If you ’ve been using Time Machine for backups , there may come a prison term when you outgrow your backup disk . It ’s easy enough to plug in a larger disk or buy a Time Capsule ( or alargerTime Capsule ) and prefer that as your new Time Machine destination , but doing that think of begin over . If you require to move to a larger platter while maintaining the persistence of your backup man , you could . It just means taking quite a few step .
Move your backups to a new Time Capsule
To move your musical accompaniment from a local phonograph recording to a Time Capsule , do the following .
Set up your new Time Capsule ( according toApple ’s instructions ) , but pass on your current stand-in disk mounted in the Finder . If potential , tie your Mac to your Time Capsule using an Ethernet cable , which will step on it up the transfer of training summons considerably .
start the Time Machine pane of System Preferences , get across on Select Disk ( or Change Disk , in Leopard ) , and select your Time Capsule saucer as the address . snap on Use For Backup .
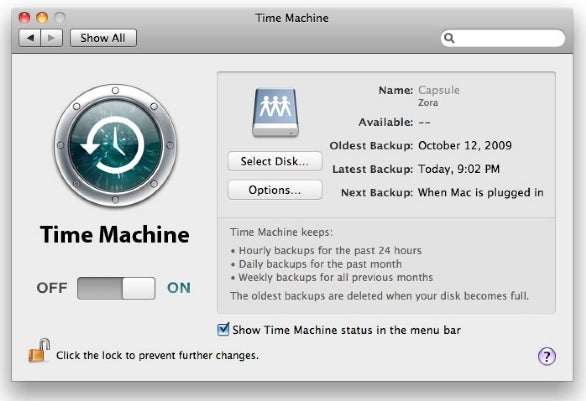
To switch from one Time Machine destination, or turn Time Machine on or off, use the Time Machine pane of System Preferences.
prefer Back Up Now from the Time Machine menu in your Mac ’s master card bar and tolerate Time Machine to begin back up your Mac to the Time Capsule . Once the Time Machine preference pane show that the program has finished gear up and is actively copying data , turn Time Machine off by doing clicking the On / Off button in the Time Machine acid of System Preferences .
Select your Time Capsule in the sidebar of any Finder window and duple - tap the folder inside it ( which may be named “ Data ” or “ Backups ” ) take your Time Machine backups . If the disk does n’t mount automatically , come home on Connect As , and supply your user name and watchword if prompted to do so . This folder should contain a single disk image , which holds your recently aborted Time Machine backup . Double - dog on this disc image to mount it in the Finder .
Open Disk Utility ( in /Applications / Utilities ) . In the list on the remaining , select your local Time Machine computer backup volume and penetrate on the Restore yellow journalism .
Drag your local support volume ( the indented volume name , not the phonograph record name ) from the list on the left into Disk Utility ’s Source field .
Drag the go up disk range of a function ( named “ Time Machine Backups ” ) from the listing on the left into Disk Utility ’s Destination subject area . Make indisputable the Erase Destination checkbox is select , as it should be by default .
press Restore , and cluck on Restore again to confirm . Now be inclined to wait while Disk Utility replicate the data file — this process could take 60 minutes or even day .
When the restoration is finished , cease Disk Utility and eject the disk image from your Time Capsule . you may then turn Time Machine back on , and your backups should keep normally .
If you ’re propel from a smaller Time Capsule to a turgid one , you ’ll follow basically the same steps , except that you should connect both Time Capsules at the same time , using the honest-to-god one as the germ and the new one as the destination .
To swop from one Time Machine destination , or call on Time Machine on or off , use the Time Machine window glass of System Preferences .
Move your backups to a larger local backup disk
If you want to relocate your Time Machine accompaniment to a larger ( but still local ) backup drive , do the pursual :
open up the Time Machine pane of System Preferences and reverse off Time Machine .
Make certain both your current backup saucer and your new disk are connected and bestride in the Finder .
Open Disk Utility ( in /Applications / Utilities ) . In the list on the left over , select your unexampled disk ( the uppermost icon , not any indented intensity names ) and press the Partition yellow journalism . From the Volume Scheme pop - up menu , choose 1 Partition . tap Options and choose either GUID Partition Table ( if you ’re using an Intel - base Mac ) or Apple Partition Map ( for a PowerPC - free-base Mac ) . dawn on OK . inscribe a name for your fresh backup bulk ( your choice ) , verify the Format kill - up bill of fare is fructify to Mac OS Extended ( Journaled ) , and tap Apply . monition : this erase the total disc !
press the Restore tab . Drag your current local musical accompaniment bulk ( the indented intensity name , not the disc name ) from the list on the left hand into Disk Utility ’s Source field .
Drag your new attached and partitioned disk from the lean on the leftfield into the Destination field . ensure the Erase Destination checkbox is selected , as it should be by default .
penetrate on Restore , and click Restore again to reassert . Now be prepared to expect while Disk Utility copies the files — this process could take hours or even days .
When the restoration is finished , quit Disk Utility . refund to the Time Machine preference superman , get through on Select Disk ( or Change Disk , in Leopard ) , and select your new disk as the terminus . Time Machine support should then proceed normally .
Joe Kissell is the senior editor of TidBits and author of the Es - bookTake Control of Mac OS X Backups .
