With macOS Sonoma , you may create a Personal Voice , which is a voice that your Mac use that voice like you . The Mac ’s textbook - to - speech capability can be used to recite in a spokesperson exchangeable to yours anything typed using the springy Speech feature film .
consort to Apple , the voice that is create uses the Mac ’s car learning , and since everything is kept on the Mac , the user ’s vocalization selective information is kept secret and dependable . So you do n’t have to worry about your transcription being used for villainous reasons by Apple or anyone else .
The Personal Voice is n’t stark . It sounds robotic , lacking modulation and emotion , but it ’s more personal than the artificial vocalization that come in with the Mac . To hear what it sounds like , I create sample . The first transcription is me speak , and the second is My Personal Voice created in macOS Sonoma . Give it a listen .

The appendage of creating a Personal Voice involves a foresighted transcription session . If you are using a MacBook , you may get aside with using its built - in microphone . For best results , however , you should utilise an international USB mic .
Here ’s how to produce a Personal Voice in macOS Sonoma . For more entropy about Apple ’s new Mac operating organization , see out ourmacOS Sonoma superguide .
How to create a Personal Voice in macOS Sonoma
Accessibility settings
metalworks
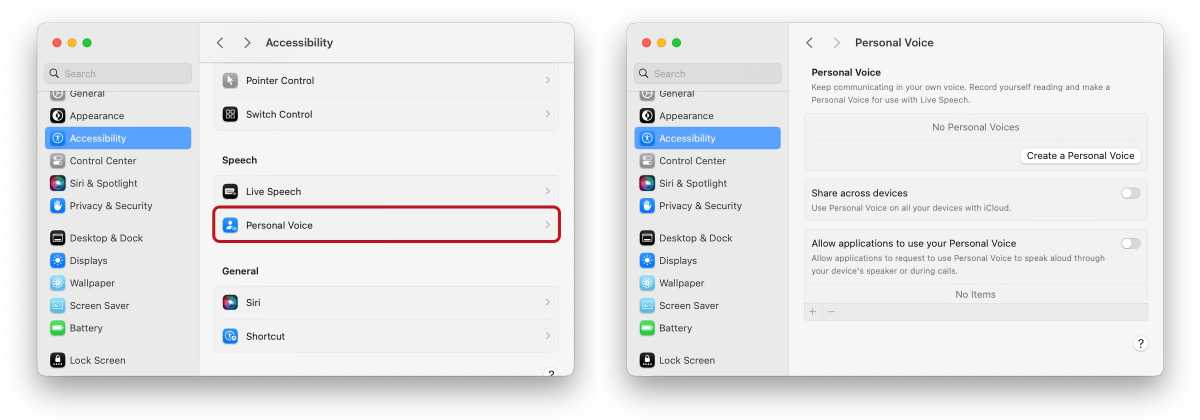
In System preferences , click onAccessibilityin the left over column . In the main surgical incision of the windowpane , scroll down to theSpeechsection and clickPersonal Voice .
This will give thePersonal Voicesection . ClickCreate a Personal Voice .
Get ready to record
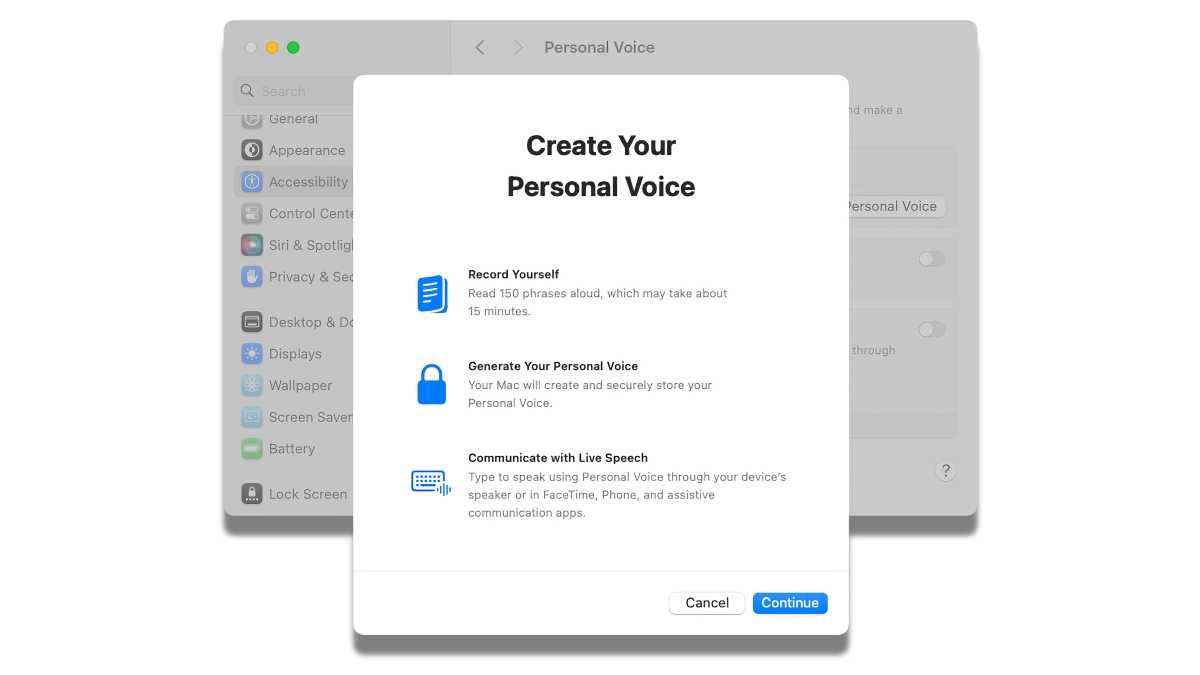
After entering the user password , an introduction appears . It tells you that you ’ll need to recite 150 phrases that will be used to create the Personal Voice . This voice can then be used in FaceTime , Phone , and other apps . The physical process choose 15 to 20 minutes . ClickContinue .
Another intro blind seem , advising you on how to get the best results . You should execute the recordings in a quiet place that creates very little echo , and you should mouth naturally . If you need to , you’re able to stop the academic term , save the answer , and finish it afterward . ClickContinueagain to start .
Recording check
Before you get recording , you require to bring home the bacon a name for the voice . participate it and clickContinue .
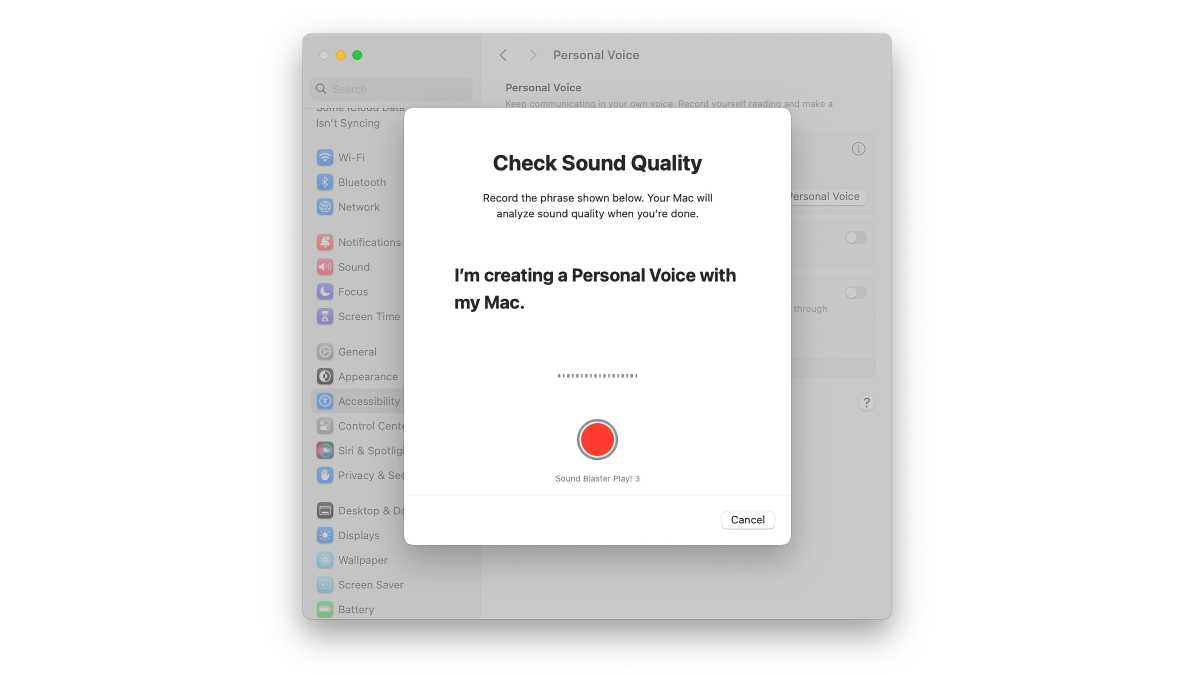
Now the Mac will checker the sound tone . At the bottom of the windowpane is a red record clitoris and a recording label that indicates which mic it is commemorate from . If it is not the mic you want , you ’ll need to cancel the session and then go into the Sound System configurations and take the mic you want to utilize . Then you require to go back to the first step and start over .
If the red button shows the right mic , you may proceed . Click the red rope and read the bold phrase . Remember , talk as you unremarkably would in a conversation . When you are done , the outgrowth will automatically smell out that you are finish talking and go forward to the next footmark .
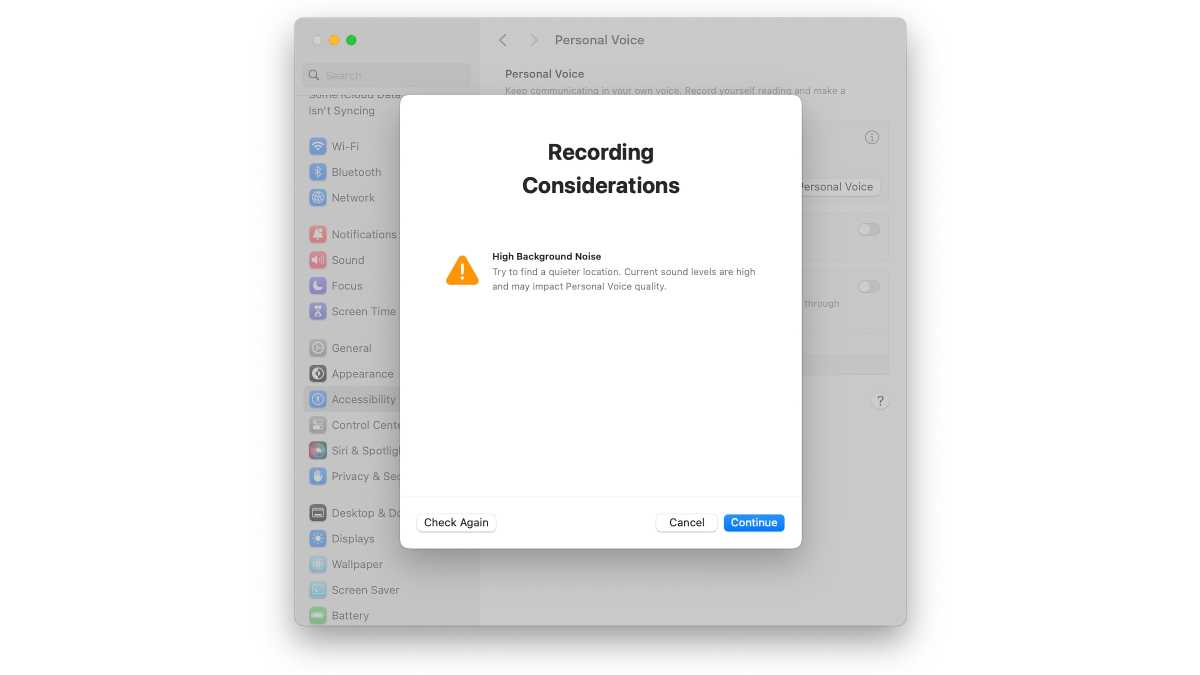
Recording Considerations
When you finish the initial recording , the Mac analyzes it and will permit you have a go at it if there are any issues . For example , the analytic thinking show here says that there is too much background noise . you may take this opportunity to address any issues you may have and then clickCheck Againto do another test .
you’re able to also ignore these suggestions and plow in the lead . Or perhaps you set about the all - clear-cut in the first place . In any caseful , clickContinueto start the operation .
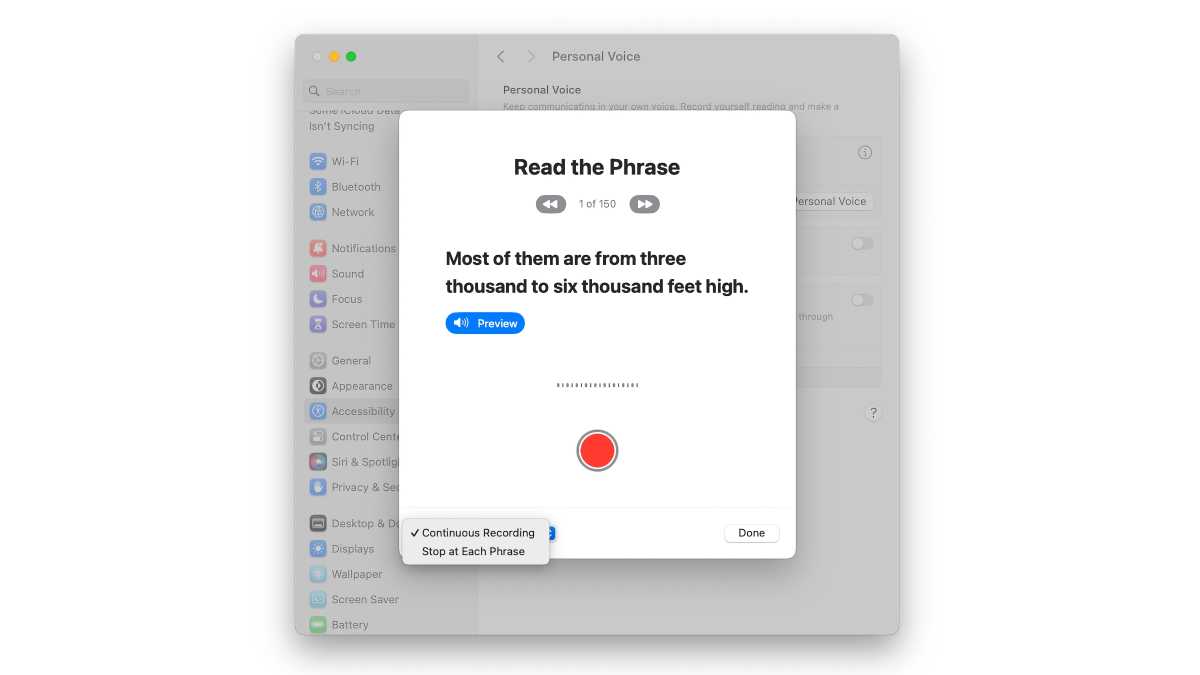
Do this before recording the first phrase
The firstRead the Phrasescreen look , but do n’t come home the flushed track record button just yet . There are a few thing you should know :
Now that you know what ’s going on with the UI , make any adjustments you require .
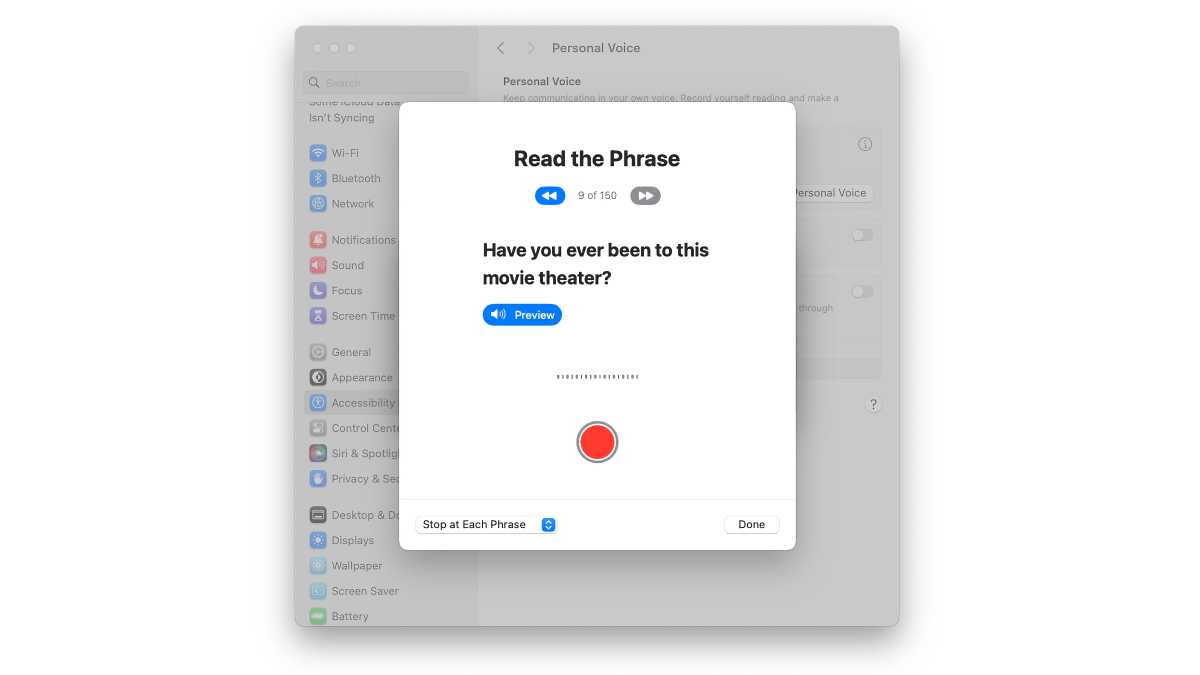
Start recording the phrases
clack the book button to start the outgrowth . This will take 15 to 20 moment .
Tip : If you are understand a phrase , tidy sum up , and want to start over , snap the record button to block off . When you ’re quick , click the record clitoris and continue recording .
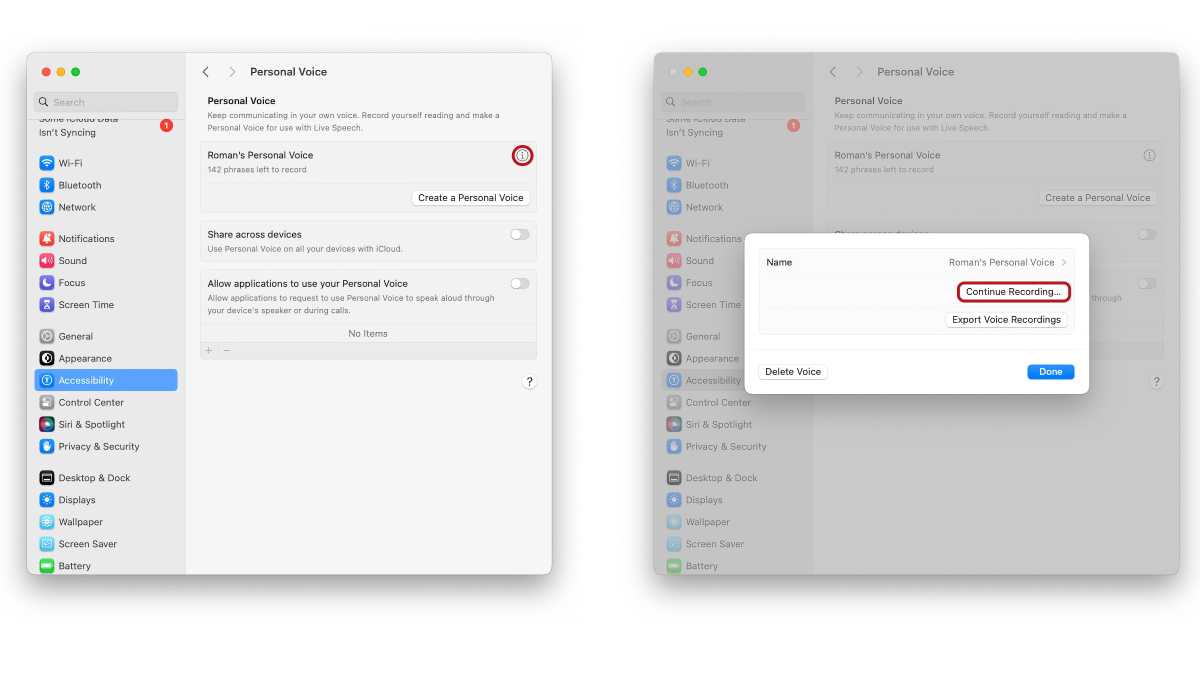
How to pause and then restart later
perchance you demand a fault or have to go do something else . To stop the academic session , clickDoneto passing . To re-start the session , come after these steps :
You ’ll take to do the sound caliber check again , but after that , the set phrase recording will keep and you could continue the process .
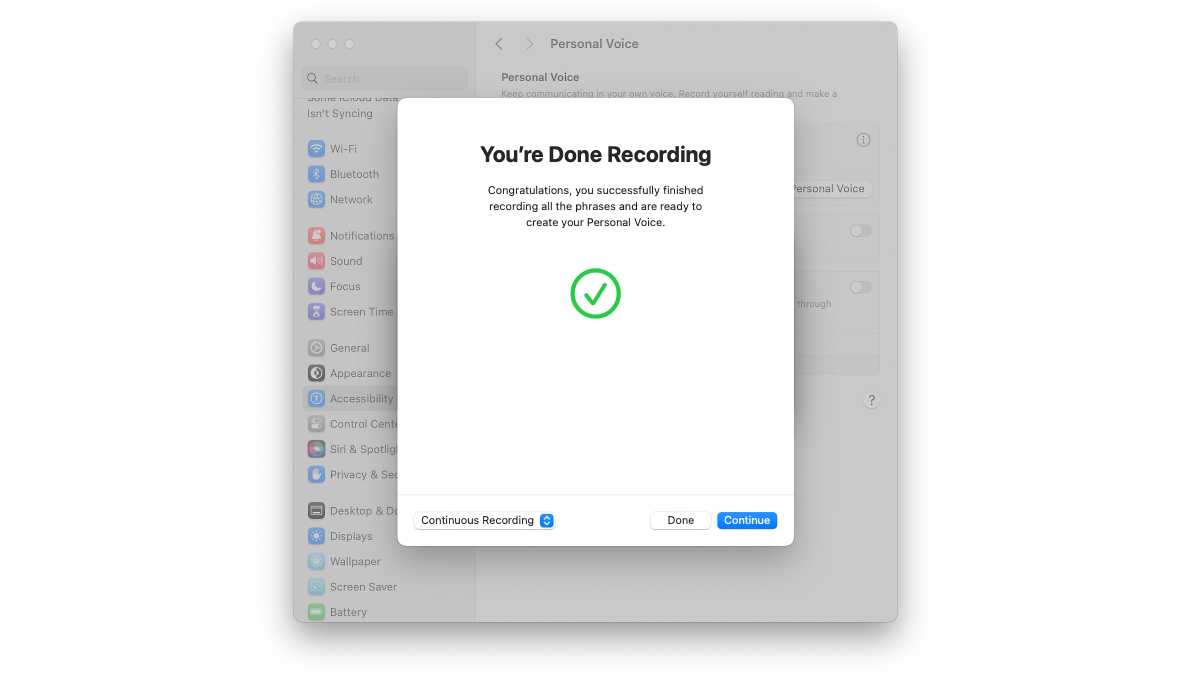
You’re Done Recording
After you say the 150th phrase , you ’ll hand the end of the session . AYou’re Done Recordingwindow appear and after you ’re done patting yourself on the back , clickContinue .
Prepare Your Personal Voice
Now your Mac needs to get to work – and it ’s going to take a while , so if you ’re using a MacBook , punch it in . You ’ll get a notification when the Personal Voice is done and ready to practice . On a M1 Pro MacBook Pro , this took about 90 second .
ClickDoneto start the physical process . The Personal Voice division in the Accessibility System Setting will display the forward motion made on making your voice . you may practice your Mac for other work while this is going on , but you should n’t shut it down . When the process is done , the progress notification will be replaced by the creation date .
The Personal Voice System Setting has a couple of other preference to lay :
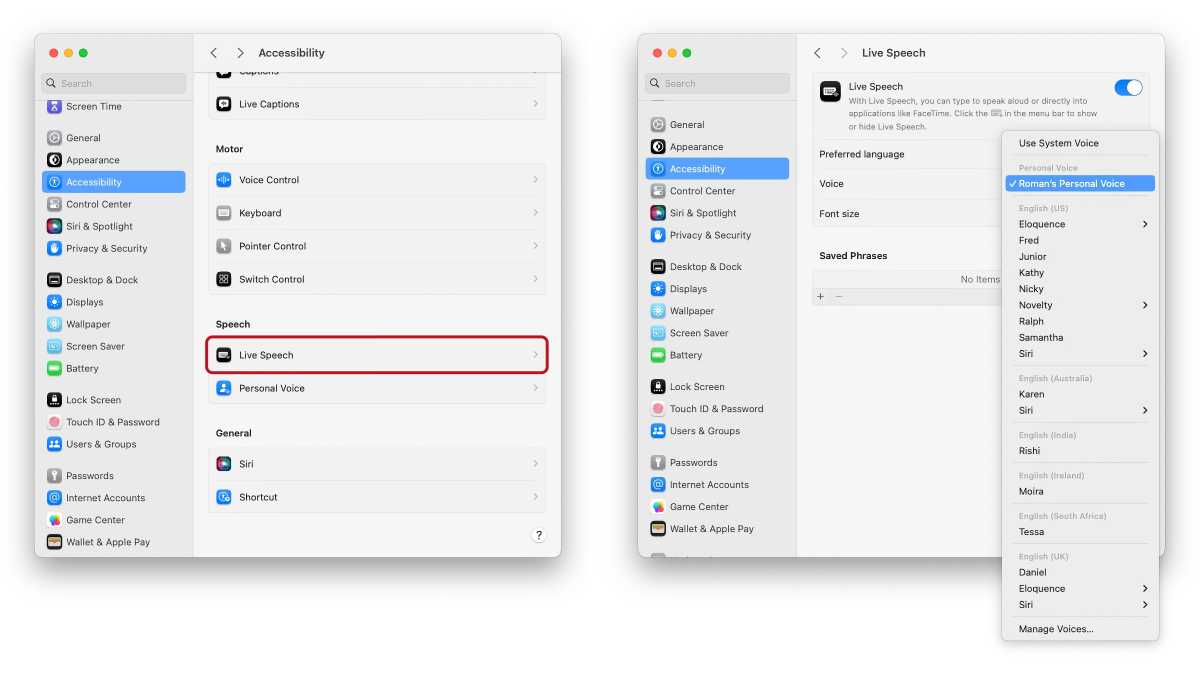
Adjust the Live Speech System Setting
Now that your Personal Voice has been create , you postulate to adapt the Mac ’s preferences so you may use it in apps . This is done in theLive Speechsetting ,
A Type to Speak boxful will come along , and you may enroll some schoolbook and hit Return to sample your Personal Voice . If you want to obscure the box , come home the bill of fare legal community icon that see like the Live Speech icon ( a keyboard with a microphone in the grim correct quoin ) .
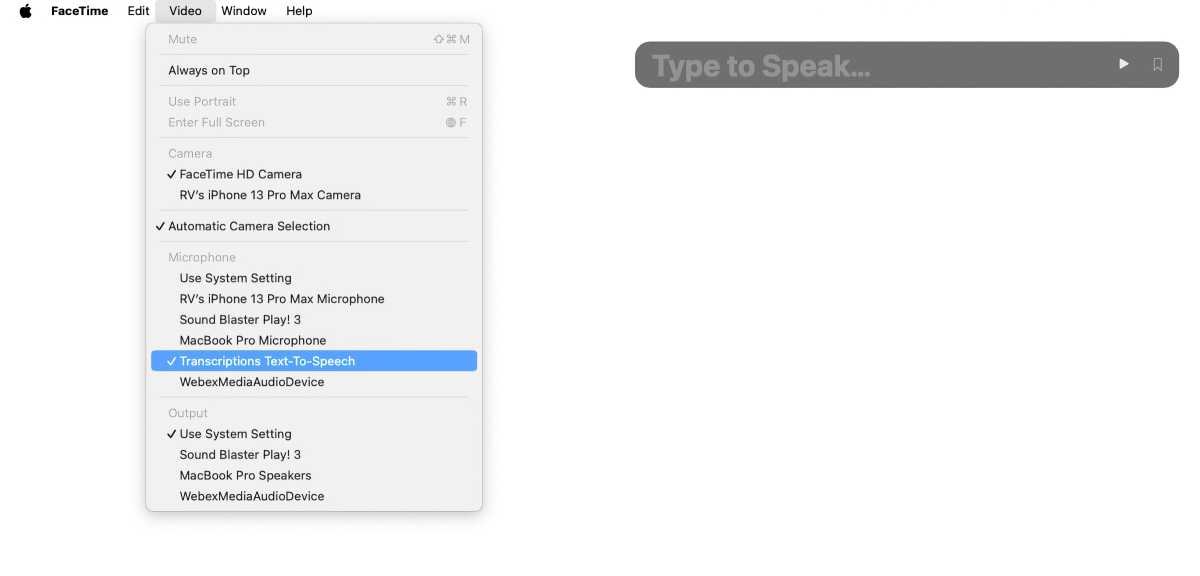
How to use Text to Speech in FaceTime, macOS
If you want to use text - to - speech communication stimulant in FaceTime , go to theVideomenu in the FaceTime app , and selectTranscriptions Text - To - Speechunder theMicrophonesection .
If you need to set macOS to use Text to Speech for the Mac , go toSystem options > Sound , then scroll down to theOutput & Inputsection and clack onInput . Click onTranscriptions textual matter - To - Speech .
That ’s it ! You should be able to use your Personal Voice in text - to - spoken communication situations . If you do n’t care how the Personal Voice sounds , you may delete it and do the operation again . You even append another Personal Voice by doing the procedure again .