When using a Mac , often multiple apps and window are loose at once . This can make it tricky to find the app or windowpane you need – when you ’re humming along working , sieve through windows and apps is a jarring singultus .
With macOS Sequoia , Apple provides a Modern window tiling use to help you retrieve an app or window . The feature take its cue from third - party public-service corporation that tot the functionality to macOS – Sequoia ’s windowpane tiling is n’t as robust as those apps , but it ’s still very useful . ( If you ’re already using such an app , you may want to adhere with it . )
Learn more about the next Mac operating organization in ourmacOS Sequoia superguide . Here ’s how windowpane tiling in macOS Sequoia works .

The screen here is set to 1440-by-932 on a 15-inch MacBook Air. As you can see, this four-window layout has a lot of overlapping windows.
Check macOS Sequoia’s Desktop & Dock settings
Foundry
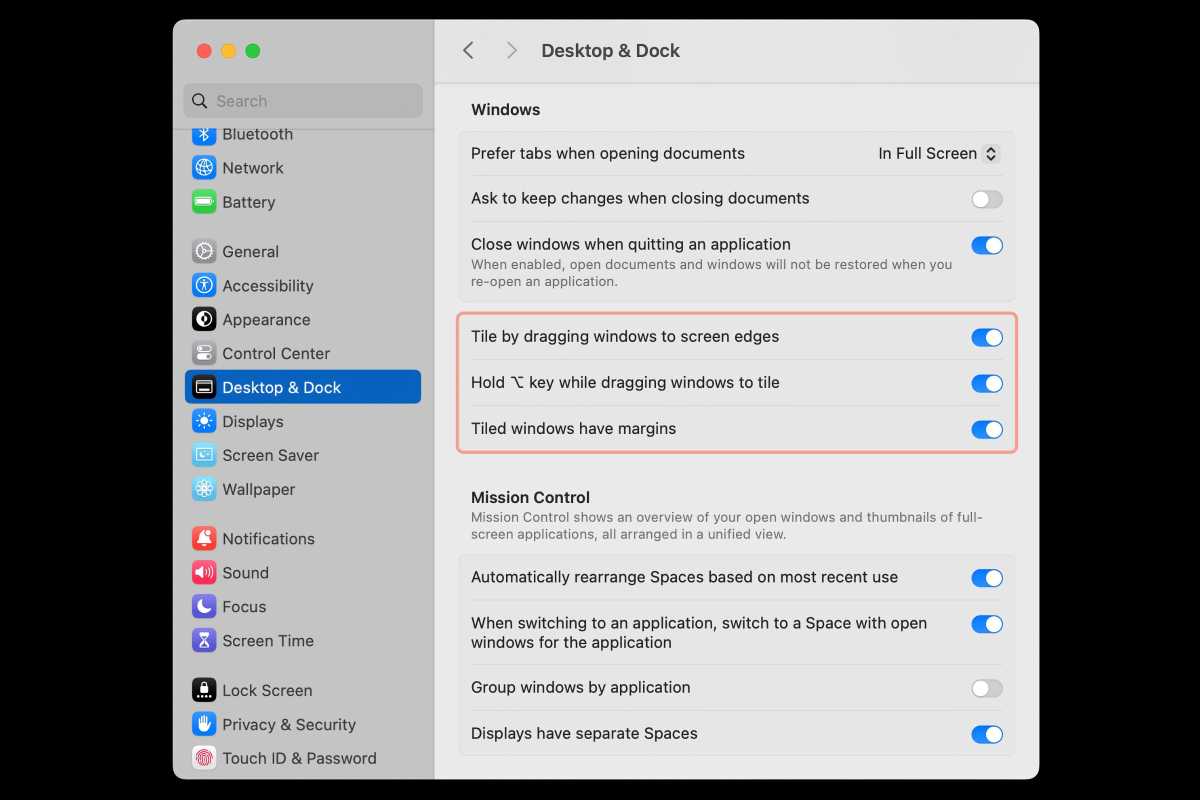
While the new windowpane tiling feature is on by nonpayment , you could check to make certain the scene is on . Go toSystem configurations > Desktop & Dockand then scroll down to theWindowssection .
Apple has three unexampled preferences for windowpane tiling :
The screen here is set to 1440-by-932 on a 15-inch MacBook Air. As you can see, this four-window layout has a lot of overlapping windows.
Once you ’ve aline the preferences , near System preferences .
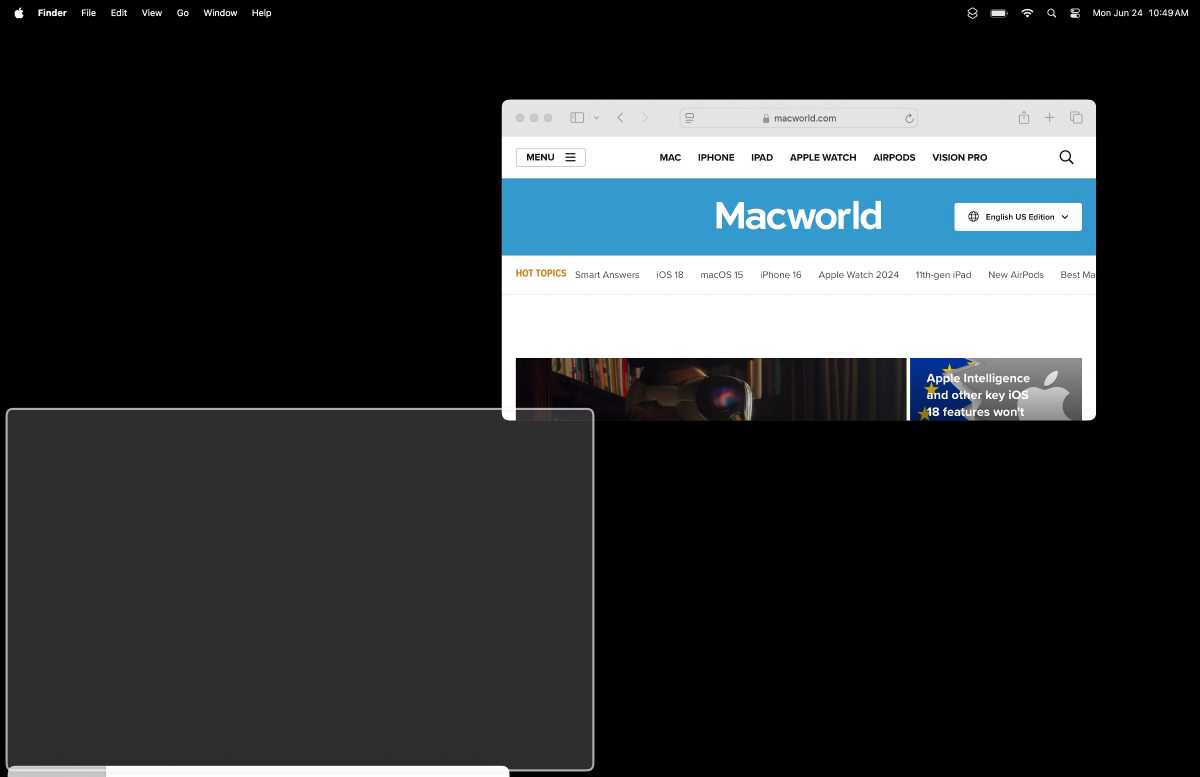
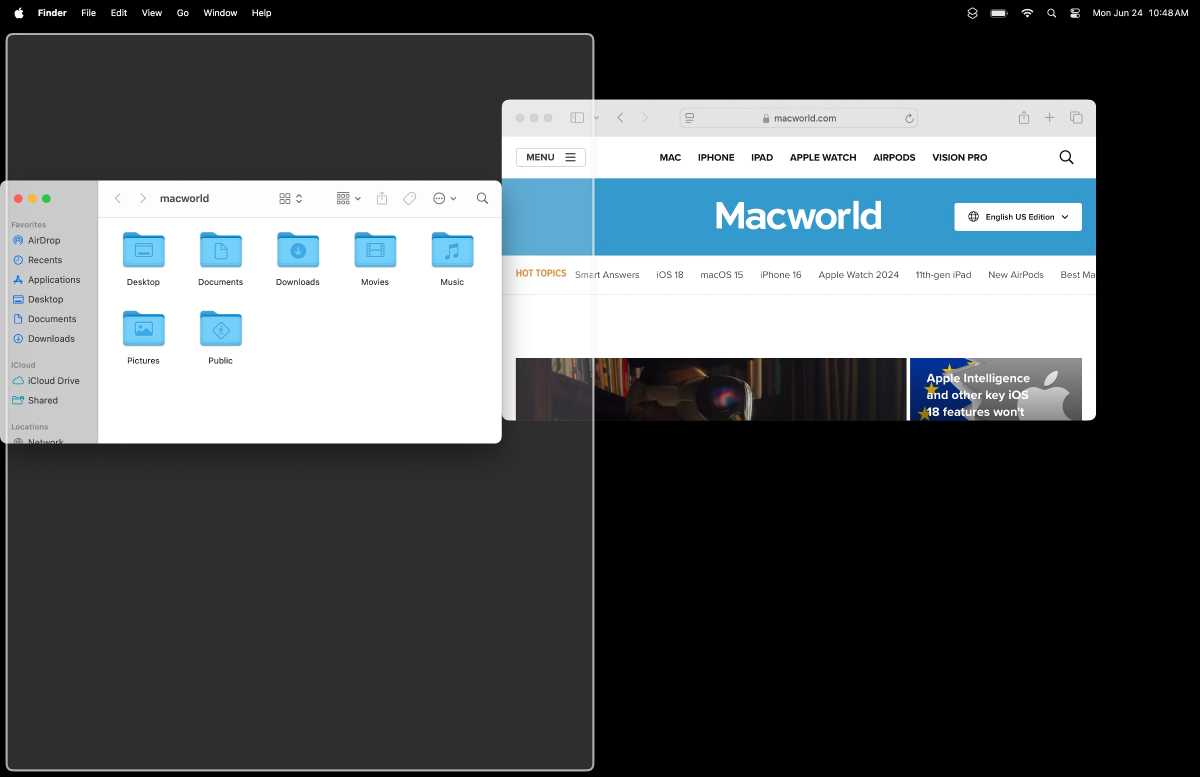
First way to organize windows: Drag and place
One way to place a window is to clack and drag it to a spot on the screen . If you drag a window to a spot , an scheme appears to indicate where the windowpane will be placed . Let go of the windowpane to place it .
Here are the spots on the screen where to drag window :
While drag a window , thecursorneeds to attain the daub on the screen to trigger off the arrangement . Make it easier on yourself by clicking and oblige the window in a location closely to the smear where you desire to scuff to .
If you decide to change by reversal this off ( see footfall 1 ) , there are other mode another to tile windows . Go to step 3 .
Second way to organize windows: Hold Option and place
When you ferment this on in configurations , you’re able to click and hold in the window , then make down the Option key , and then move to the left over or right-hand to place a window in a half - screen layout – you do n’t have to drag the window all the way to the edge of the showing .
However , you still must sweep up the window all the way to the turning point if you want to do a four - windowpane layout or hale to the top for a center - sieve arrangement .
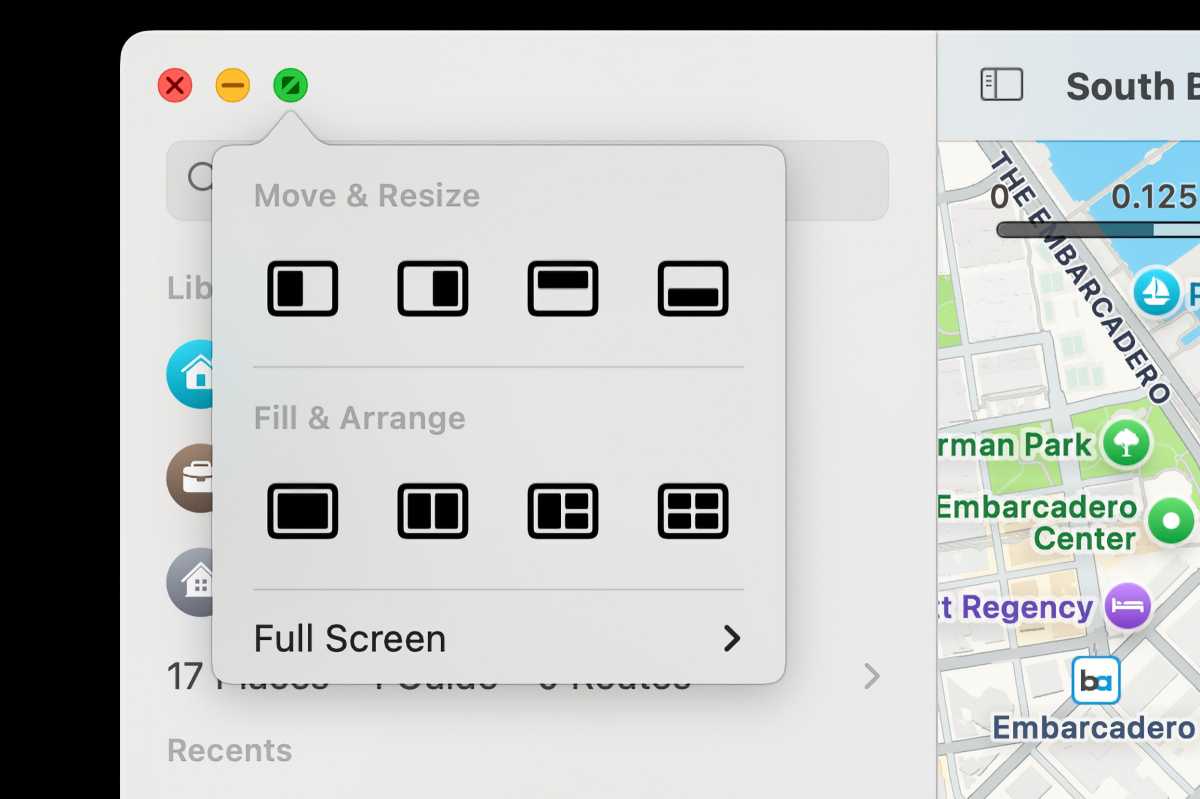
Third way to organize windows: The green button
The quick and promiscuous way to put a lot of window is to use the light-green button at the upper left of every windowpane . Hover over it ( do n’t click it ) with the cursor and windowpane tiling option pop music - up . pick out a layout and your window are automatically place .
Using macOS Sequoia windows tiling
The filmdom here is set to 1440 - by-932 on a 15 - inch MacBook Air . As you could see , this four - window layout has a lot of overlap window .
Here are a few thing you should roll in the hay about using Sequoia ’s windows tiling :
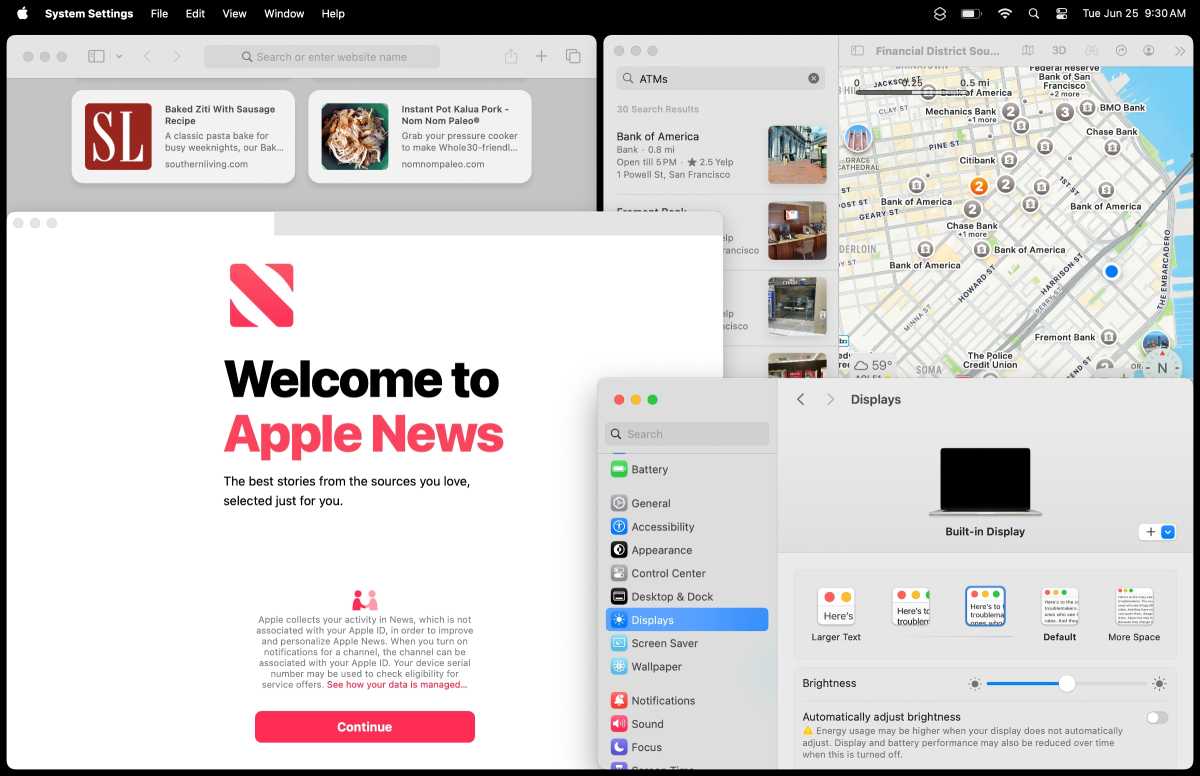
The screen here is set to 1440-by-932 on a 15-inch MacBook Air. As you can see, this four-window layout has a lot of overlapping windows.
