Consider yourself a Mac power - user ? Or do you aim to take your piazza amongst such inside ranks ? Here ’s a selection of classic yet round-eyed magic trick take fromMac Kung Fu : Second Editionto help you on your path .
Mac Kung Fu : Second Editionis a account book previously sell for $ 25 + but now reduce to the steal price of £ 1.49/$1.99 ( grease one’s palms it here ) . That ’s 400 + tips , 120,000 + speech , and over 700 eBook Sir Frederick Handley Page for less than a cappuccino coffee – and it ’s written by regular Macworld contributor and Apple expertKeir Thomas , to boot . What more could you want ?
Just for you we have a aggregation of tips from the book ! Read on …

You might discover ourBest Mac pourboire , illusion and timesavers interesting too . Plus , if you need to stop your Mac making a get-go up sound when you rick it on ? Read : How to stop Mac startup sound .
Instantly Add Movies and Music to iTunes
If you use third - political party software to download or rip music and motion-picture show to your computer , you ’ll be familiar with the rather lengthy process needed to tally them to youriTuneslibrary – you have to lead off iTunes , then ensure the correct euphony or picture show list is visible , and finally drag and drop the Indian file onto the program window … .
However , there ’s a obscure pamphlet you’re able to use to import music and film straight into iTunes . All you call for to do is configure any app you use to download files directly into this folder , and they will be instantly imported – even if iTunes is n’t running at the time .
To find the pamphlet , open Finder , strike Shift+Command+G , and then type~/Music / iTunes / iTunes Media/. One of the folders you should see will be Automatically Add to iTunes . As its name suggests , any file copy into this folder will be add up to iTunes automatically . Assuming you have keep the nonpayment preferences setting of iTunes devise your media folder , any files placed there will be moved out of the folder and automatically filed within the Music brochure whenever iTunes is running , so it should seem empty most of the prison term .
you’re able to make a background false name of the folder by clicking and haul it to the desktop , before pressingAlt ( Option)+Command and releasing the mouse push button . you could then simply drag and devolve file onto the alias instead .
Add Magical Links to Start iMessage conversations, and More
You might be used to inserting web hyperlink into documents or when composing email ( get across Edit > Add Link and typewrite the computer address ) . Whenever anybody snap the link , they ’ll visit the website you specified , just like in a web page .
In addition to links to site , MacOS allow you create app - specific links . For example , you could let in a inter-group communication in a ring armor subject matter that , when click , will start within the Messages app an instant messaging conversation with somebody . You could create a connection in a document that , when snap , looked up a particular discussion in the Dictionary app .
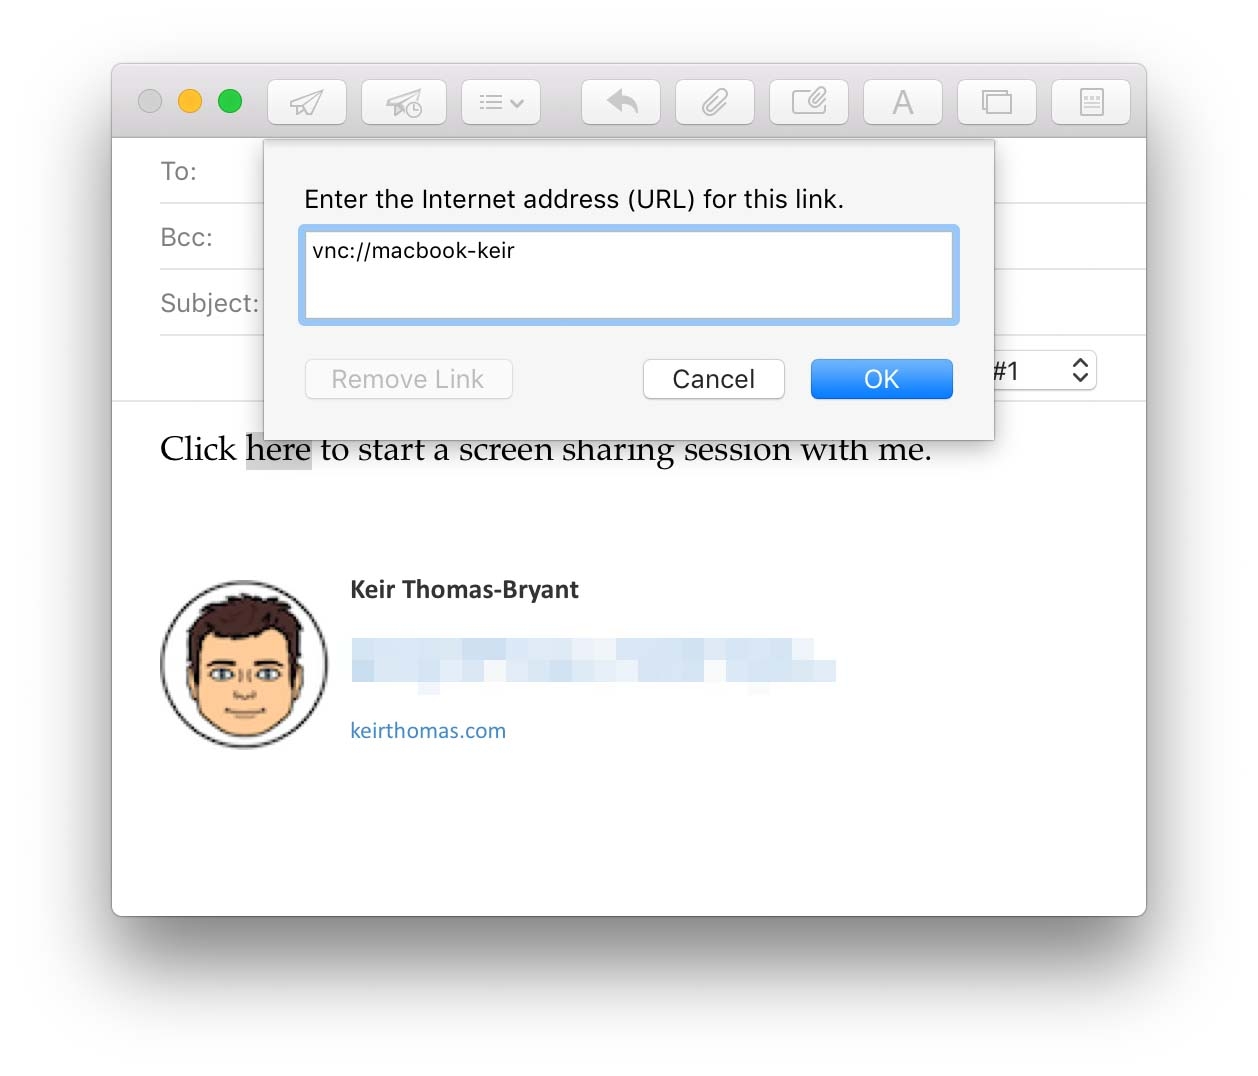
To create a nexus in a TextEdit papers or young mail windowpane , highlight the textbook you desire to turn into the link , and click Edit > Add Link , or slay Command+K.

Then look to the following list for what to type into the Create Link dialog corner .
http://—you may sneak in nexus to web pages by simply typing the address , let in the http:// constituent . For deterrent example , typinghttp://keirthomas.comwill make a contact to that website .
imessage://—This will start a Messages conversation within the Messages app . For example , typingimessage://07912345678will loose Messages and endeavor to start an iMessage conversation with that phone identification number – or send an SMS if you have Handoff enable . you could also specialise IM handles : if you have a Yahoo brother whose handle is johnsmith , you could make the following link : imessage://johnsmith . This assumes you ’ve configure Messages to lumber onto your Yahoo account , of course of study .
facetime://—This will start a FaceTime conversation within the FaceTime app . For example,facetime://keir@example.comwill attempt to start a FaceTime conversation with the individual whose FaceTime account is registered to that address . Malus pumila I.D. and phone numeral can also be specified , although as with iMessage , the phone numeral should be typecast without any spaces or symbols in it .
dict://—This will cause the Dictionary app to start and look up a particular word . For example , dict://epicureanwill open Dictionary with the Logos definition for Epicurean displayed , as if it had been type into the search field .
vnc://—This will give a screen - sharing session with whatever destination is specified , although the user will still have to click the Connect release in a dialog box that appear when the Screen Sharing software starts.vnc://macbookwill attempt to start up a screen - sharing academic term with the computer whose mesh name ismacbook .
x - valet de chambre - page://—This will launch the gentleman’s gentleman page for the pin down term within a Terminal window . For representative , x - gentleman - page://sharingwill open up the human beings page for the sharing program line .
When used without any specified address ( that is , if you simply typeimessage://orfacetime://in the link dialogue box ) , the apps will be activated when the link is click , as if the user has clicked their app icon in the Dock .
It ’s also possible to slip in other , typical uniform resource locator that are used in WWW page , such asmailto://,ssh:// , andtelnet://.
Keep your Mac wide awake
If you need to leave your Mac unattended for a while but desire to temporarily kibosh it going into sleep mode , open a Terminal window ( this app is in the Utilities folder the Applications list in Finder ) , and typewrite the following :
caffeinate -di
For as long as the Terminal window is open and the control is still running , the computer wo n’t go to catch some Z’s through inactivity , and nor will the show . Technically you ’re turn off jobless sleep modal value , which appears when OS X detects the drug user has n’t done anything for a while .

To end the wakefulness , swop back to the Terminal windowpane and hit Control+C or simply fold the Terminal windowpane .
Rather than run caffeinate indefinitely , you’re able to set a clip bound , although this must be specified in second . If you want your computer not to sleep for two hour , for exercise , then you ’d first involve to work out the number of mo ( 2 60 minutes x 60 minutes x 60 second = 7200 seconds ) and then specify it after the -t dictation - personal line of credit selection , as stick with :
caffeinate -dt 7200

Again , you’re able to fetch this to a previous end by tapping Control+C or closing theTerminalwindow .
Save Text Snippets for Quick Reuse
Here ’s a orderly trick for those who work with Word of God on their mack .
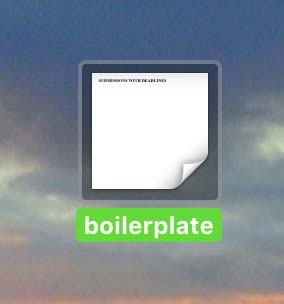
If you play up text in an lotion and get across and dredge that to a folder or to the desktop , the text is turn over into a file . These are calledtext cutting , and they will take their file name from the first few Word of God of the selection . If there ’s any data format apply to the text edition , it will be saved too . This is an fantabulous way of file away aside anything you ’ve had to redact out of a document but want to keep for other purposes .
To catch the contents of the clipping , just double - click it or select it and hit Space to make for up Quick Look . remark that you wo n’t be able to delete the file . However , to reinsert the text into a written document , just click and drag the clipping file on top of the programme window after positioning the cursor where you ’d like it to be inserted .
Once reinserted in this agency , the text clipping filewon’tbe edit , so you’re able to utilise the clipping again in other documents as many meter as you care .
How to hide files
There are two ways of making file cabinet invisible on your Mac . Neither is bulletproof from a surety standpoint , and anybody with know - how would be able to uncover them in seconds . But for quietly hide a file or two for a myopic period , they ’re deserving considering .
Hiding Files via Unix : Your Mac ’s operating scheme , MacOS , is really a reading of Unix at its heart . In Unix , you’re able to make a single file invisible by adding a full plosive ( . ) in front of its computer filename , and this turn on Macs too . This mean the single file wo n’t show up in Finder windows , in file open dialogue boxes , or on the desktop . Those browsing at the command communication channel wo n’t be capable to see it unless they specifically request to see hidden files ( that is , ls -a ) .
For instance , typing a filename of.document.docxwhen you ’re saving a data file will depict it unseeable . You ’ll in all likelihood be warned that putting a full stop in front of a filename is reserve for system file cabinet , the type of single file this proficiency is typically used to obliterate , but you may still choose to save the file .

Hiding Files So Mac Apps Ca n’t See Them : Thechflagscommand can be used to veil files so they do n’t show up in graphical exploiter interface ( GUI ) applications . However , they ’ll still be seeable if anybody crop files using a Terminal window .
To obscure files in this manner , open a Terminal window ( open Finder , select the Applications tilt , and then in the leaning of applications double - dawn Terminal within the Utilities brochure ) , and use thechflags hiddencommand , specifying the file or folder name straight off later . For example , to enshroud secret.doc , type the following : chflags obliterate secret.doc
To unhide the single file so it ’s seeable via GUI package again , use thechflags nohiddencommand :

chflags nohidden secret.doc
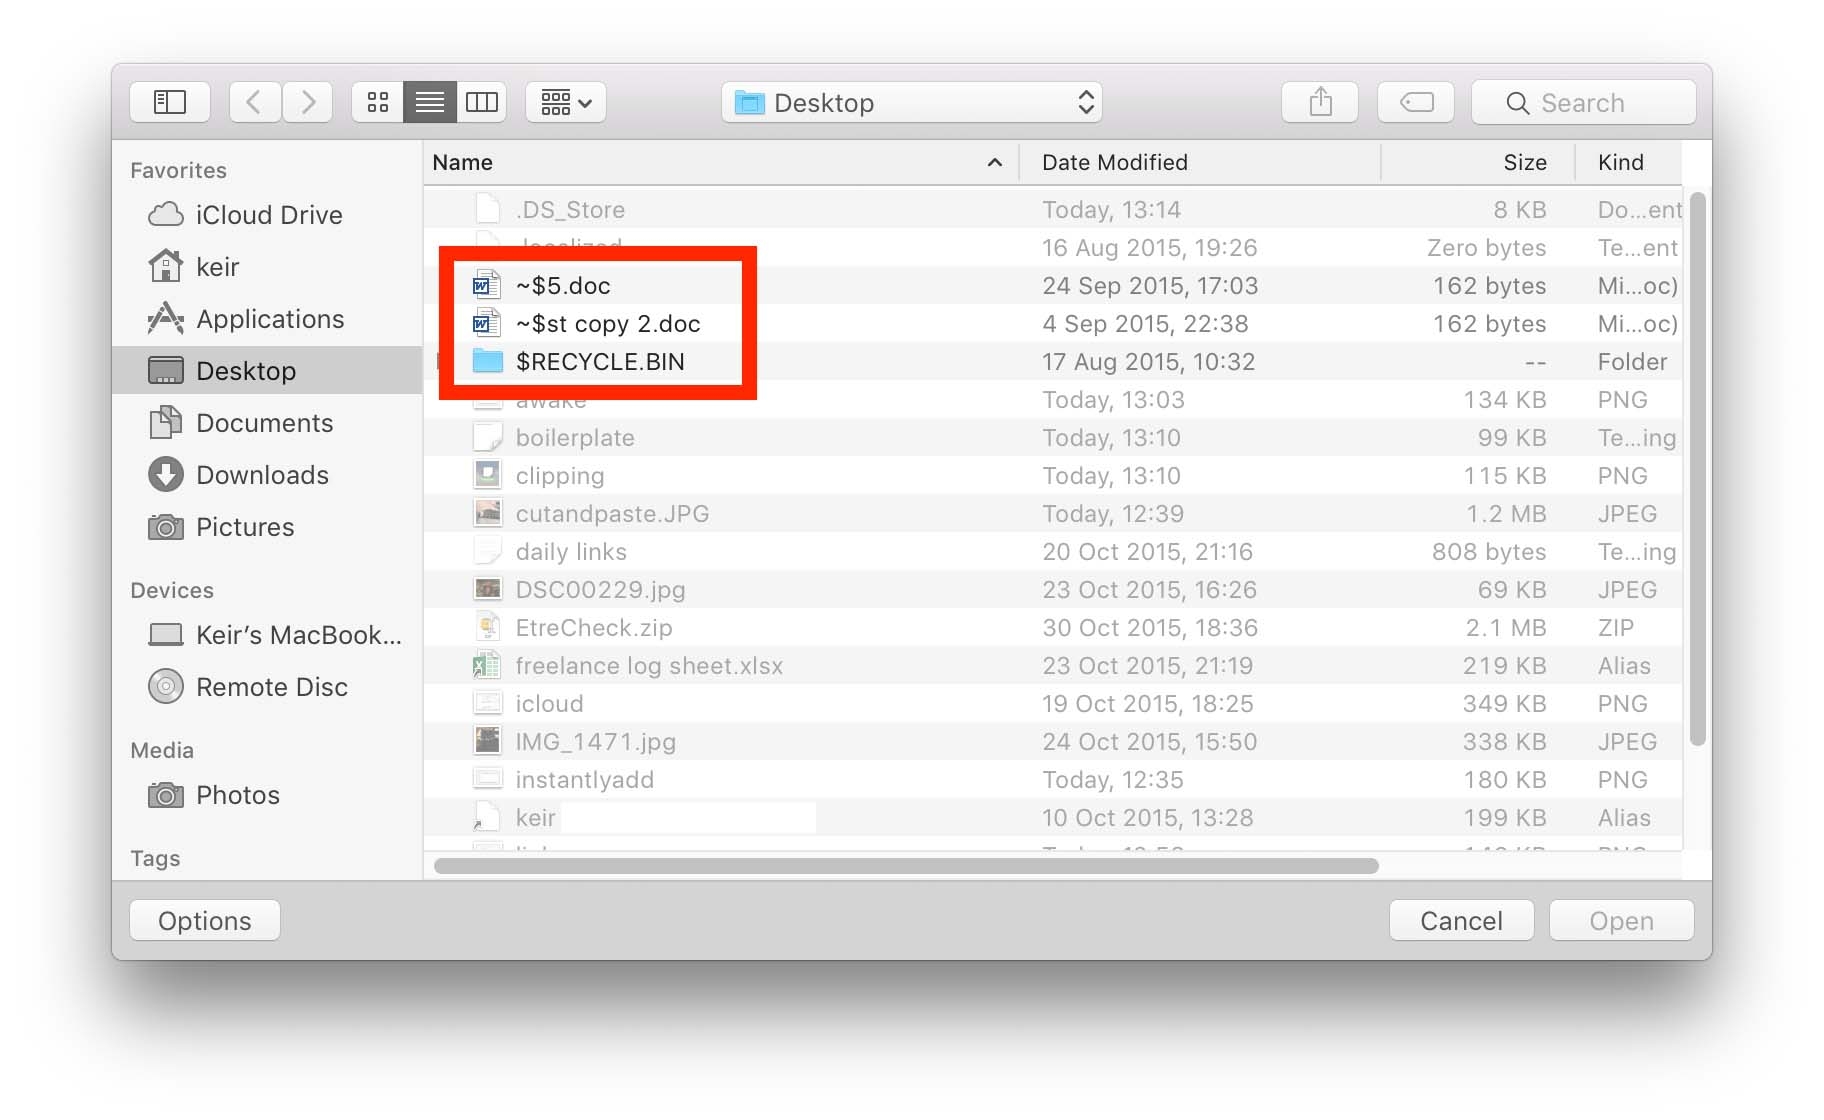
look at Hidden Files : So , if a file is hidden , how can you see it for open it again ? In expanded file candid / save dialogue box within apps , hitting Shift+Command+ . ( full stop ) will expose hidden items in the file itemisation . Hitting the key jazz band again will hide them . However , be aware that you ’ll suddenly see lots of system files that are veil in this way of life . ( point clear of these — don’t delete or open them . )
The only path to see hidden files in Finder windows is to activate a secret setting that shows them alongside other files . This will cause them to always be visible within Finder window and on the desktop , although concealed file cabinet will have a washed - out appearance to show their condition . Open a Terminal window , and type the pursuit :
defaults drop a line com.apple.finder AppleShowAllFiles -bool TRUE;killall Finder
Even after make this change , you ’ll still have to hit Shift+Command+ . within file open / save dialogue boxful to see secret files .
To revert to obscure file cabinet being hidden within Finder , type the following :
defaults delete com.apple.finder AppleShowAllFiles;killall Finder
Print in Every Which Way
Did you know you may print just about any file straight from Finder – without hassle ? This crown is blindly obvious but little known : choose one or more files in Finder and then click File > Print on the carte . This will mechanically get to the file(s ) in the nonremittal editor ( that is , a photo will open in Preview and so on ) and automatically print it / them .
But would n’t it be useful to be able to print a single file instantly , without even having to click File > Print ?
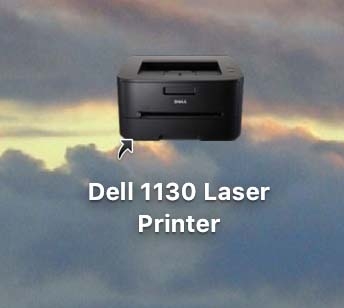
As you might expect , your Mac allow you do just that . Open System Preferences ( Apple carte > System Preferences ) and then get across the Printers & Scanners entranceway . In the lean of printers that appears on the left-hand , merely pick out a printer and drag and drop it to the screen background . This will make a shortcut to the printer , which will plausibly be an icon - sized photograph of your real printer .
To instantly publish any file , simply drag and drop it on top of this new cutoff . two-fold - click the new ikon to view the print queue .
you’re able to also add to the Finder toolbar a shortcut to your printer(s ) , which will let you drag and cut down file to instantly publish them or allow you to click the icon to see the print waiting line . set out by powerful - sink in the toolbar in Finder , and selecting Customise Toolbar . Then open up System Preferences ( Apple menu > System Preferences ) , clack Print & Scan , and then drag and fell any of the printer(s ) from the leaning to the toolbar of any open Finder window . Then click Done to exit the customise toolbar dialog box .
See EVERYTHING Your Mac Knows About Somebody
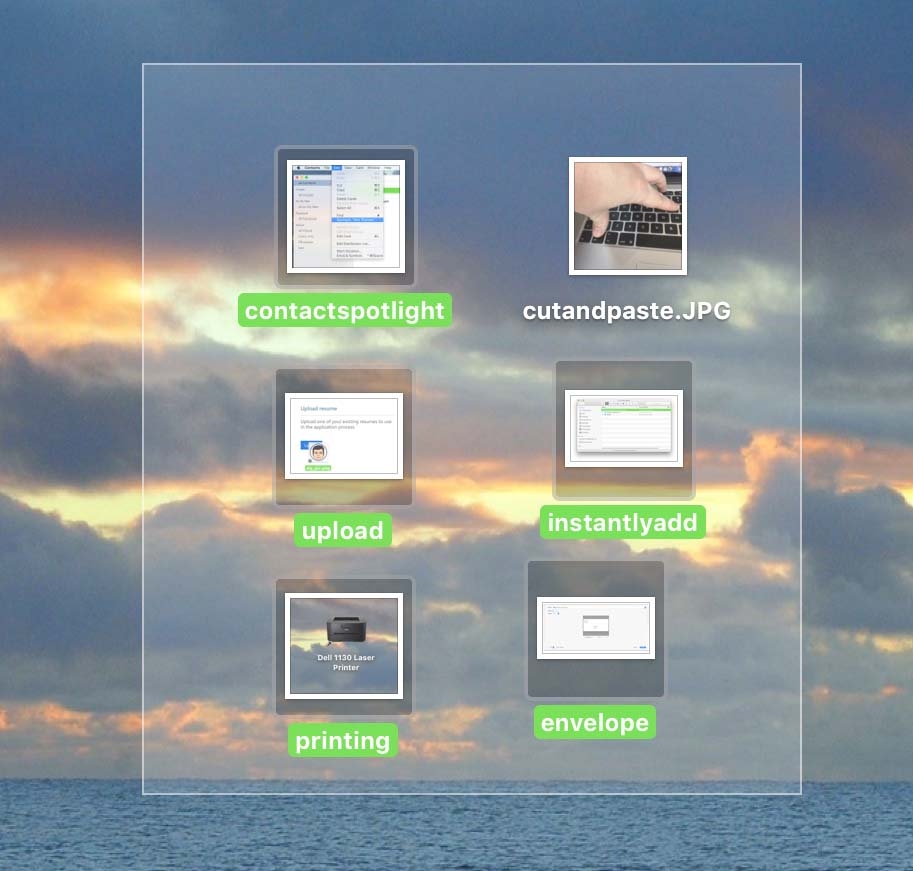
By pick out an individual ’s debut within the Contacts app and then clicking Edit > Spotlight , you may instantly find every e-mail you have from them ( and to them ) , every instant substance conversation you ’ve had with them , every text file they ’ve make , every entanglement pageboy you ’ve visit that observe them , every data file you ’ve tag with their name , and so on ( put up relevant details are contained within their card within the Contacts app . You wo n’t be able to find their instantaneous subject matter conversations if their IM address is n’t on the contact card , for representative ) .
Calm a bouncing dock icon
Some apps bounce their Dock icons when they want to enjoin you something , such as when a project has completed . Some apps bounce their icon for a short while , while others will keep bouncing the icon until you do something about it . This can be galling if you ’re busy doing something else .
While clicking the Dock icon to trigger off the app is one solution , another is simply to move your black eye cursor over the icon . It will instantly stop bouncing , and you may then return to the undertaking at deal .
Force-Open a File
you could drag and leave out files onto any Dock icon to open up them , but only if that coating believes it can understand that finicky character of single file ( for representative , doc data file are understood by Microsoft Word ) . alas , some applications do n’t realise they can study certain types of files when they in reality can .
To force an program program in the Dock to at least attack to give a file it does n’t trust it can , withstand down Alt ( Option)+Command before clicking and drag the filing cabinet to the Dock . If the diligence authentically ca n’t understand the file , either nothing will fall out or you ’ll see an error substance .
For a higher probability of success when dragging to the Dock icon as identify earlier , you might also try dispatch the file extension from the data file before open it as described ( that is , the part after the dot in a computer filename , such as .jpg ) . To do so , select the filing cabinet and shoot Command+I. In the Name & Extension field of the dialog corner that appears , take out the telephone extension .

Note that bump off the extension by simply renaming the file by any other method in all likelihood wo n’t work , look on your system ’s preferences — the file will hold the annexe but give the show of not doing so .
Do n’t forget to restore the filing cabinet annexe after attempting to open it !
Lock Files for Safety
you’re able to manually lock any file on your Mac , which will prevent edits or excision until the data file is specifically unlocked . This can be utile if you have a passe-partout version of a file , for good example , that you want to check remain sacrosanct . Folders can also be locked , which will prevent the folder or its substance from being edit out or deleted .
If you examine to delete a locked file , you ’ll be warned and will have to specifically prefer to unlock the data file .
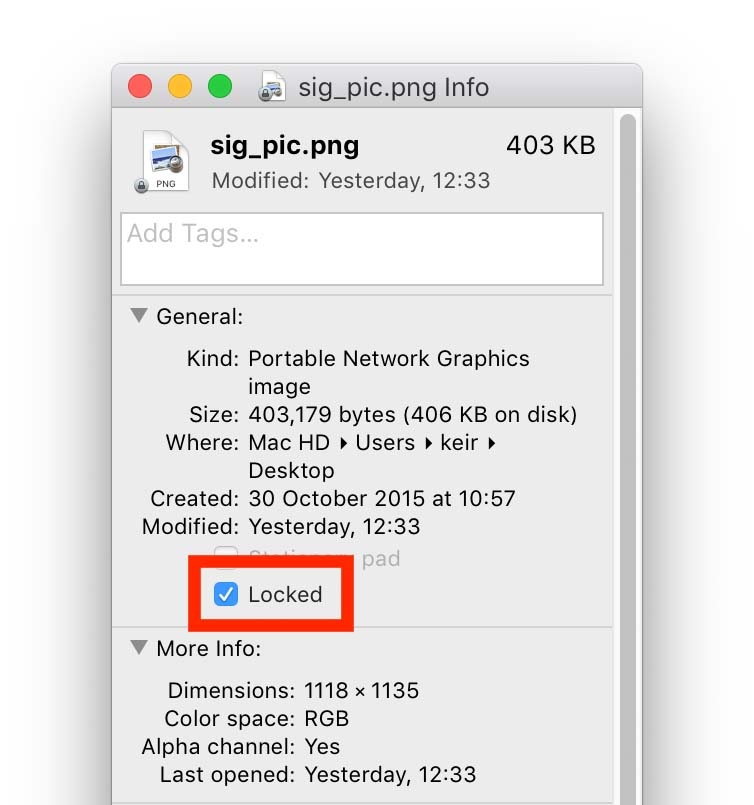
Locking Files via File Info : There are several ways to lock a Indian file or folder . The easy is simply to take the file or folder in Finder or on the desktop and hit Command+I to launch the File Info dialogue box . Then put a check in the Locked box under the General head .

To unlock a file or booklet later , plainly repeat the footstep and transfer the halt .
Locking Files via Applications : sure applications programme , including those built into macOS such as TextEdit , support data file lock from within the software . clack the filename in the window ’s deed of conveyance bar , and select Locked from the pop - up menu that appear .
Where does this file live?
Sometimes I spread out a single file for editing , perhaps one attached to an email , and I have no idea where it ’s put in on my computing machine . One option is to fall into place File > Save to see this information in the Save As dialog box , but a much easier solution is to flop - click the filename in the claim prevention of the program windowpane .
This will show a hierarchic display of folders . The top one nearest the filing cabinet ’s icon will be where the file is store . The 2d one from the top will be where the parent of that folder is , and so on , going right back to the name of the hard disk and then the name of your computer , which should be the last in the list .
pick out any entry in the list will open that folder ( or disk ) in Finder for browsing .
Print Envelopes
If yourprinteris compatible with envelopes , you could use the Contacts app to print addresses on them . Just select a contact , and then click File > Print . Selecting multiple contact will let you publish more than one envelope at a time . This lead function well if you produce groups of contact .
Quickly Upload Files within Safari
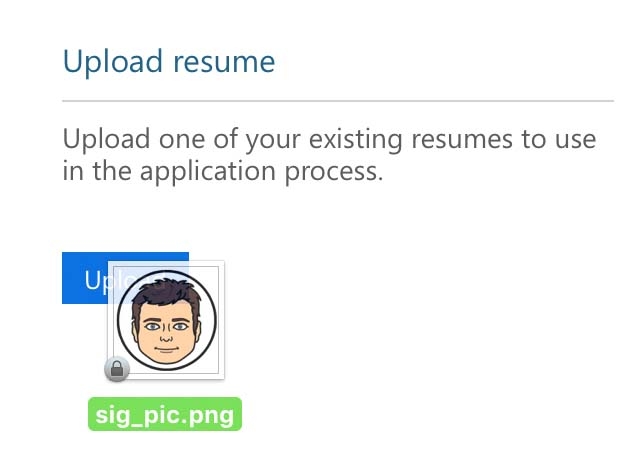
If you ’re upload a file to a site inSafari , you might see a button on the web page that — when clicked — opens a file - browse dialog box seat in which you could pick out the file .
To save a small time , you may usually just drag out and drop the Indian file from the desktop or a Finder window onto the release , keep enter the need to utilise the file internet browser . Click it to set about the upload procedure .
Switch Apps while editing a file
Let ’s say you ’re tweaking a photo inPreviewand decide you need the full power ofAdobe Photoshop .
face at Preview ’s title bar . You ’ll see the name of the file currently being work upon . To the left of this will be a small image representing the file . This is known as the proxy icon . Click and bear it for a few minute , and then drag and drop the image to the Photoshop icon on your Dock or to the Photoshop image in Applications . The most recent edition of the file will afford in Photoshop .
It ’s a good idea to close Preview be this , although it should update each time the single file is saved in the other app .
rather of dropping the proxy icon onto the Dock image , while still in the process of drag the ikon you may tap Command+Tab to bring up the program switcher and drop the proxy image on top of the program ’s picture in the switcher showing .
Note that this same technique of dragging and dropping the proxy ikon also sour if you want to insert an image you ’re working on into a tidings processing document ( although this example could be any file type and any sort of document ) . In the image editor in chief , make unnecessary the file if you have n’t already , and then drag the proxy icon on top of the word CPU or layout programme ’s window where you ’d like to infix it . It will be inserted instantly .
Select Text like a pro
In some built - in Mac apps like TextEdit , as well as in Microsoft Office and Mozilla Firefox , it ’s possible to select text in a variety of utile ways above and beyond just clicking and dragging . ( It does n’t work in Pages ) .
Selecting Noncontiguous Regions : Holding down Command while click and dragging lets you select disparate division of text . You could highlight one sentence at the showtime of a paragraph , for lesson , and while view as down Command , select another sentence at the end of a paragraph . tally Command+C will re-create both to the clipboard . If you pip Command+V to glue , the two sentence components will be pasted on two separate argumentation .
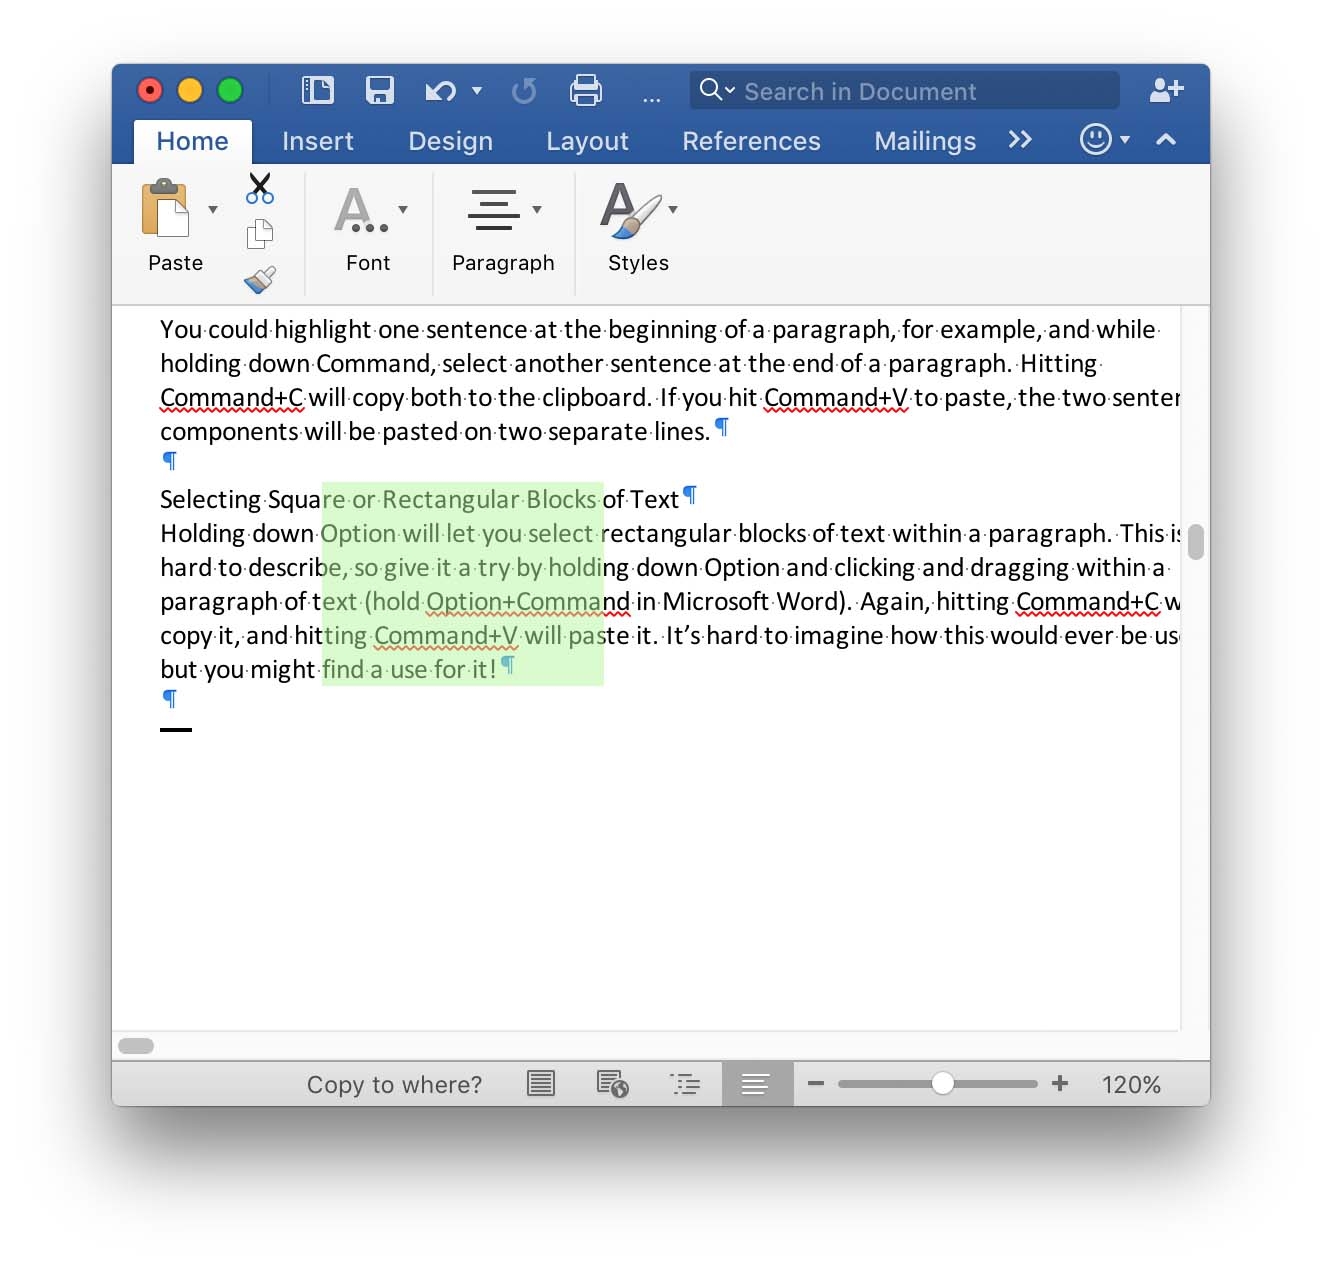
Selecting Square or Rectangular Blocks of Text : Holding down Alt ( Option ) will countenance you select rectangular blocks of textual matter within a paragraph . This is backbreaking to describe , so give it a attempt by hold down Alt ( Option ) and click and dragging within a paragraph of text ( confine Alt ( Option)+Command in older versions of Microsoft Word ) . This is another lead that may or may not work in your app .
Again , hitting Command+C will copy it , and hit Command+V will glue it . It ’s hard to suppose how this would ever be useful , but you might retrieve a use for it !
Selecting Without Dragging : By clicking at the showtime of the region of text you require to select and then holding break and clicking at the oddment of the region , you ’ll take everything in between . This works well when editing a document , and not on web Thomas Nelson Page .
If you ’ve already made a text selection , you’re able to hold down sack and click either side of it to add text to the survival of the fittest . Clicking within the choice while hold down transmutation will let you subtract letters and words from the selection .
See Numbers in Huge Type for Easy Jotting
Have you ever need to jot down a phone number from the screenland but found it unmanageable because you had to keep looking back and forward from screen to page , constantly fall behind your place on the screen ?
In TextEdit and the Contacts app you could simply play up the phone number , in good order - penetrate it , and select Large Type . This works inMailmessages too , although you might also be able to hover the mouse over the phone number until an pointer icon appear and dawn it , selecting Large Type from the card that appears . Note that this works only for subject matter you ’ve received in Mail and not for ones you ’re pen .
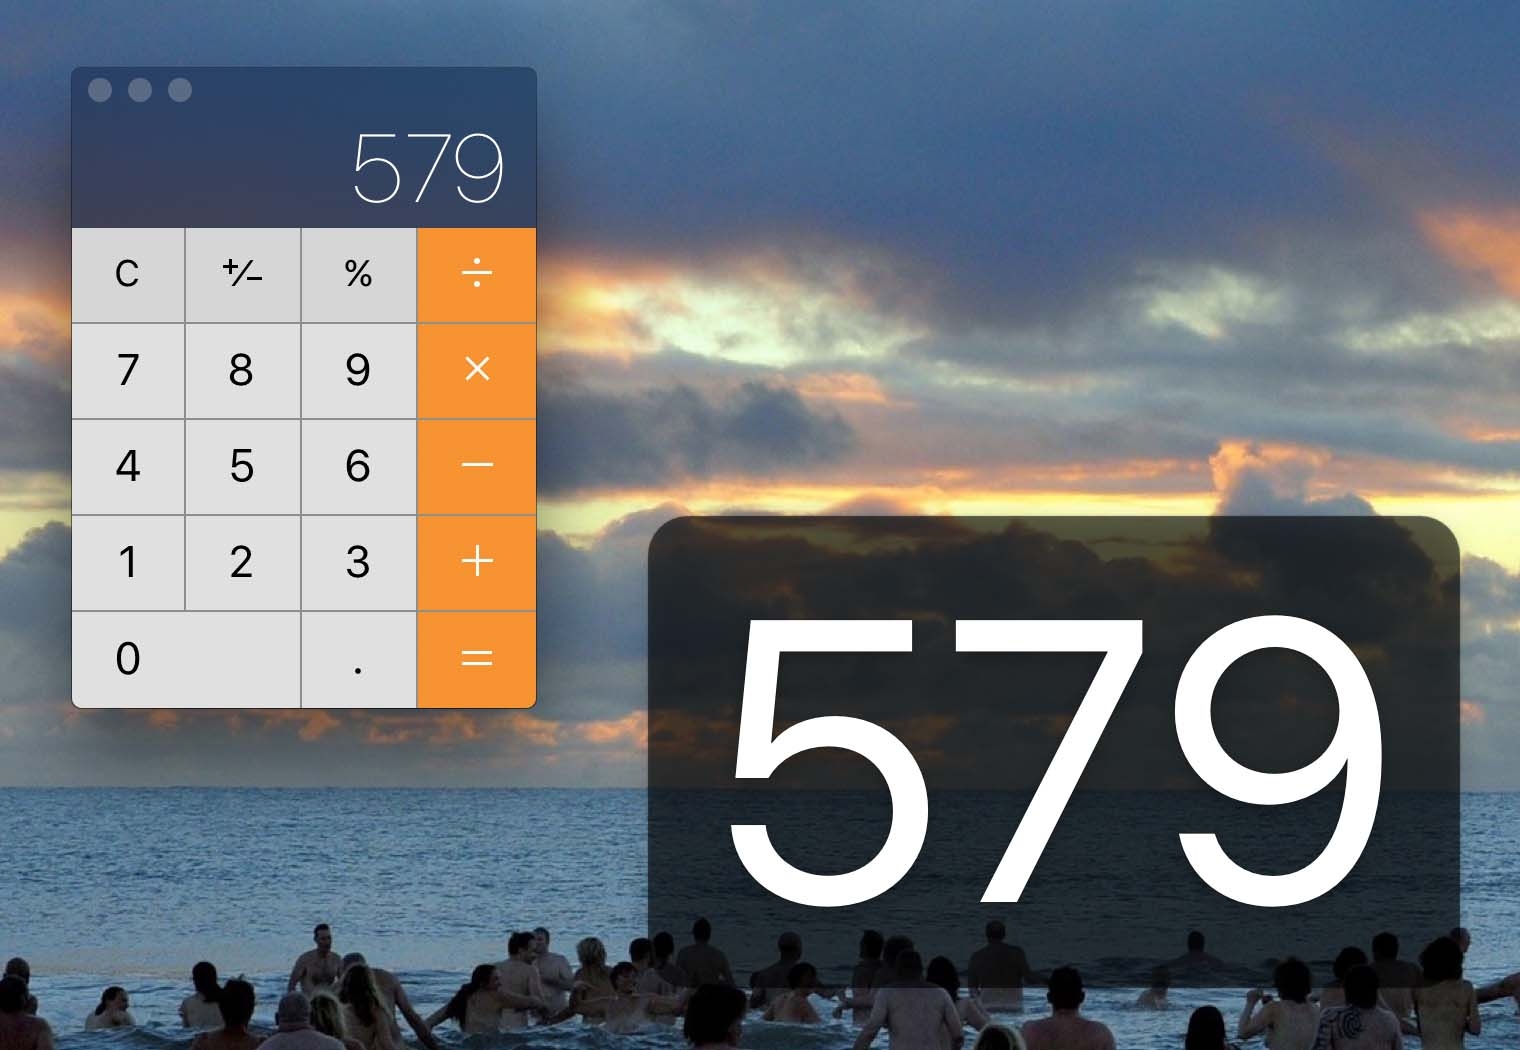
This also play when using Calculator , let you view the result of computation — right - click the identification number on the LCD projection screen and then choose Large Type .
In each causa , the text will then be displayed in bombastic float schoolbook that meet the width of the screen . To get disembarrass of it , just click anywhere
Cancel Dialog Boxes Instantly
One of the oldestMac keyboard shortcutsis Command+ . ( full stop ) , which on very old Macs was used to strike down the current task .
In macOS it was deprecate but still lingers when it get along to dialog boxwood — hitting Command+ . will click the Cancel button for you , save you the bother of reaching for your mouse .
Use Safari while booted to the recovery system
Hold down Command+R before the Apple logotype appears during bring up , and you ’ll bring up to the recovery organisation . Here you’re able to do disk curb , restore the system viaTime Machine , and even reinstall OS X.
you could also unofficially launch apps that are installed within the principal type O X installing , allow for it ’s still approachable ( that is , your system is n’t damaged beyond repair ) . It is n’t intuitive to do this , but you might require to plunge Safari to be able to research a job you ’re having .
While boot to the retrieval system , click Utilities > Terminal , and then typewrite the following :
/Applications / Safari.app / Contents / MacOS / Safari
Once you ’ve finish , remove Command+Q double to quit Safari as well as the Terminal windowpane that launched it . This will return you to the main retrieval options dialog box . To re-start the computer , click the Apple menu , and then select the Restart option .
Invert a selection of files
Let ’s say you ’ve just download 100 mental image from your digital television camera . You need to copy all but three of them to another folder . How would you select just the 97 you want to copy ?
Finder features a great little trick to let you do just that quickly and well . However , it works best on the desktop or in Icon view within Finder .
pop by select the data file youdon’twant to include in your selection . In my previous exercise , that would be the three file that we do n’t want to copy . This can be done by holding down Command and selecting each .
Then fight and concur the Command tonality and employ the mouse to rubber - band select all the single file — including the three you ’ve already selected . You should find magic pass off — the selection inverts so that file that were n’t pick out now are and those that were are automatically unselected . In my example , 97 files would now be selected .
If you like that clause , you will plausibly wish :
