When you deal or donate a Mac or give it to a family phallus , it ’s good to make a clean breakout : pass over the puppy clean , reinstall the late version of OS X , and turn over off a system that you ’re not worried has remnants of yourself on it .
But how can you be certain ? Readers have written in with several related to questions , so let ’s talk this week about wipe out a drive , how FileVault 2 encryption can play into it , and out - of - date Recovery Drive divider .
Erase and leave no trace
Reader Jim Kay , who asked about migrate from one Mac to another a couple of weeks ago , had a second question as well that opens a delightful can of worms :
Since I ’m see to resell my current Mac , how do I reinstall OS X , so as to wipe my hard drive and resell roll in the hay the raw purchaser has a strip - up reckoner , and my file cabinet are nowhere to be find on it ?
Wiping or erase a movement has a surprising number of definition . In the olden days , in the long ago , we ran utility software system that often came from third party , which would simply delete the catalogue and related to records . Such an erase was , in practice , the best mode to make a clean installation . But it does n’t make all the file on the magnetic disk unrecoverable — it just make them strong to recollect .
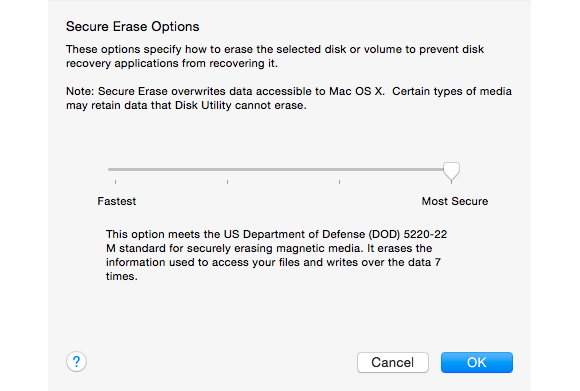
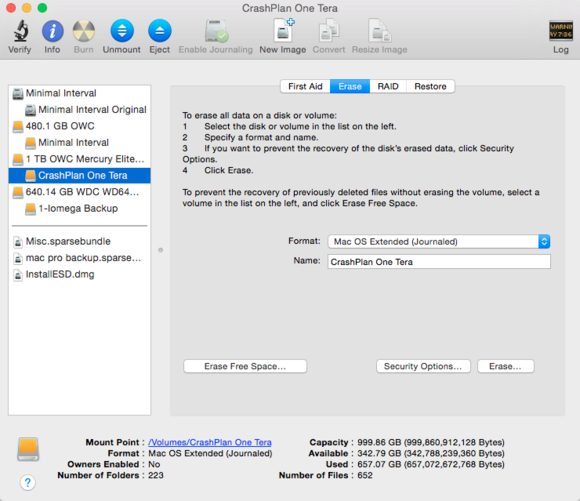
To get rid of old data in a thoroughgoing fashion , you need use a multi - passing approaching , in which every mo of storage in the magnetic disc is overwrite with new data point ( often zeroes ) . That ’s been build into Apple ’s Disk Utility for age . When you select a bulk in Disk Utility and then the Erase tab , you may click Security Options to pick how many times the drive is overwritten : once , three multiplication , or seven clip . Once is deliberate enough for unconstipated role , while three and seven correspond to different U.S. government security guidelines .
firmly erase your concentrated drive with Disk Utility .
Before Lion , you had to boot from a CD or videodisc arrangement saucer or a third - party utility , like Disk Warrior , or from an outside driving force with OS X install . Then you ’d scarper Disk Utility to erase your startup driving . But this has become easier sinceOS X Recoverywas added in Lion . Restart a Mac and hold down Command - R after the startup bell sound , and the figurer boots into the recovery manner . Select Disk Utility from the startup menu , and you’re able to erase your startup drive firmly .
You ’ll save a piffling time if you do an erase without overwrite , then reinstall OS X , then Erase Free Space with an overwriting option .
There ’s a slightly different way to fulfill the same goal . First , erase a driving without the overwriting part , and reinstall O X. After you boot , found Disk Utility , select the startup book , and flick the Erase tab . Now use the Erase Free Space alternative , which also offers 1 , 3 , and 7 mountain pass of erase , and only empties out unused parts of the disc . The advantage is that your computer stay usable ( though often slow ) while this mathematical process is underway .
Along with both Secure Erase and the Erase Free Space options , which can take a very , very long sentence even for a unmarried passport , you ’ve got two other options , one of which you do n’t need to enable .
Even better with SSD and FileVault 2
If your Mac has an Apple - establish or third - political party SSD , you ca n’t utilize Secure Erase , nor do you needs necessitate it , as Appleexplains in a funding document(see the note at the end ) . SSD data ca n’t be trivially recovered because of how SSDs optimize computer memory to reduce clothing and tear .
This is by no means foolproof , and one should assume that there are forensic tools available that can reconstruct erased SSDs — some are for sales event , but I have n’t tested their claims . Apple does n’t provide in - depth details on why it made its instruction about SSDs as it does for some security claims , and thus it ’s impossible to confirm .
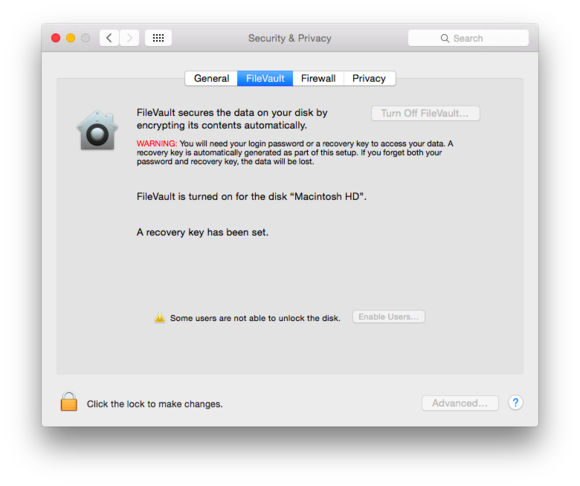
However , there ’s a simple way with both SSD and even hard drives to do a fantastically fast and reliable expunging : using FileVault 2.FileVault 2 , the full - record encryption ( FDE ) option that first appear in OS X 10.7 , maintain your startup drive encipher at all time . Whenever you boot your Mac and lumber in to one of the accounts that ’s authorized to bring up with FileVault 2 , OS X encrypts everything pen to disk and decipher everything register on the tent-fly .
If you use FileVault , any datum “ left behind ” on your erased hard driveway will be totally indecipherable by your Mac ’s next possessor .
With a FileVault - encrypted startup phonograph recording , you’re able to re-start into OS X Recovery and launch Disk Utility to erase the volume . However , before erase , you need to select the platter and then opt File > Unlock “ bulk name ” . introduce the word for any FileVault - enable drug user invoice , and the disk is unlocked and can be erase .
Erasing a FileVault - encipher volume cast aside the key that ’s colligate with it , turn a phonograph record into a nearly perfect blare of irrecoverable randomness . Without the key , which is uncrackable in any realistic geological period of clock time by any current technology , the delete data point is as dependable as gone as if it had been written over millions of times .
you’re able to then install OS decade on that sectionalization , either from the convalescence scheme orvia an outside drive .
A few other recovery and FileVault issues
Reader Peter wondered how FileVault figures in to cloning a disk . Because FileVault code an integral drive and only decrypts file when you ’re logged in , it has no effect on how or whether you make a knockoff , use Migration Assistant , or copy files .
However , if you ’re planning on using FileVault on the new computer , I would intemperately paint a picture enabling FileVault on the new motorcar before moving any file to it . This will belt along up the operation by encrypting the new computer ’s fewer files first . When FileVault has finished and your new Mac has boot and you ’ve lumber in , then start the migration cognitive operation , and all fresh file cabinet are encrypted on the fly .
Andrew Robertson writes that when he upgraded to Yosemite , his convalescence ride remain out of date with 10.9 Mavericks . Then , when judge to set up FileVault and enable iCloud - based retrieval of his key fruit , he does n’t see an option to do so when booting into OS X Recovery .
Fortunately , there are answers for both :
you could reinstall 10.10 on the startup disk without damaging the rest of your apparatus , though make a backup first . This should raise the recovery division . ( Carbon Copy Clonercan clone a retrieval partition from one drive to another , but it ca n’t create one from an installer or from scratch . )
The reset password option is n’t useable with FileVault 2 , but you could hive away a copy of your retrieval key with Apple . To recuperate a key , first start up OS X usually , and move into the wrong parole three time . ( This is also how to use iCloud password recovery on non - FileVault systems . ) You ’re then presented with the option to meet Apple , which requires speaking to a representative , and answering multiple questions exactly as you entered them when go under up the convalescence option . If right , Apple ’s client service clear access to the stored keystone , which they furnish to you .
Ask Mac 911
We ’re always count for problem to work out ! e-mail us atmac911@macworld.com , tweet them at me ( if brief)@glennf , or call 206 - 337 - 5833 and depart a voicemail subject matter . ( We ’ll be experiment with some audio in the future , and may put your question “ on the atmosphere . ” )
mackintosh 911 ca n’t provide lineal email response or answers for every question . For that , turn to AppleCare , an Apple Store Genius Bar , or theApple Support Communities .
