Applefinallyreleased a newiPhone SE , an iPhone that does n’t cost more than your monthly rent , and it has prompted you to lastly upgrade . You in all probability need to plunge right into the phone the moment you get the box in your hands , but permit me implore you to take a beat and do a little prep first .
We have apparatus advice you ’re going to need to devote attention to . Sure , it seems like an unnecessary waste of fourth dimension and you need to get die with your stain new phonenow , but this clobber is go away to really keep open you a lot of time and defeat afterwards .
1. Back up and restore
That ’s right , you ’re going to want to back up your old iPhoneafteryou have your new iPhone SE in hand , so the backup is as up - to - day of the month as it can possibly be . you could back up via iCloud , in iTunes , or in the Finder .
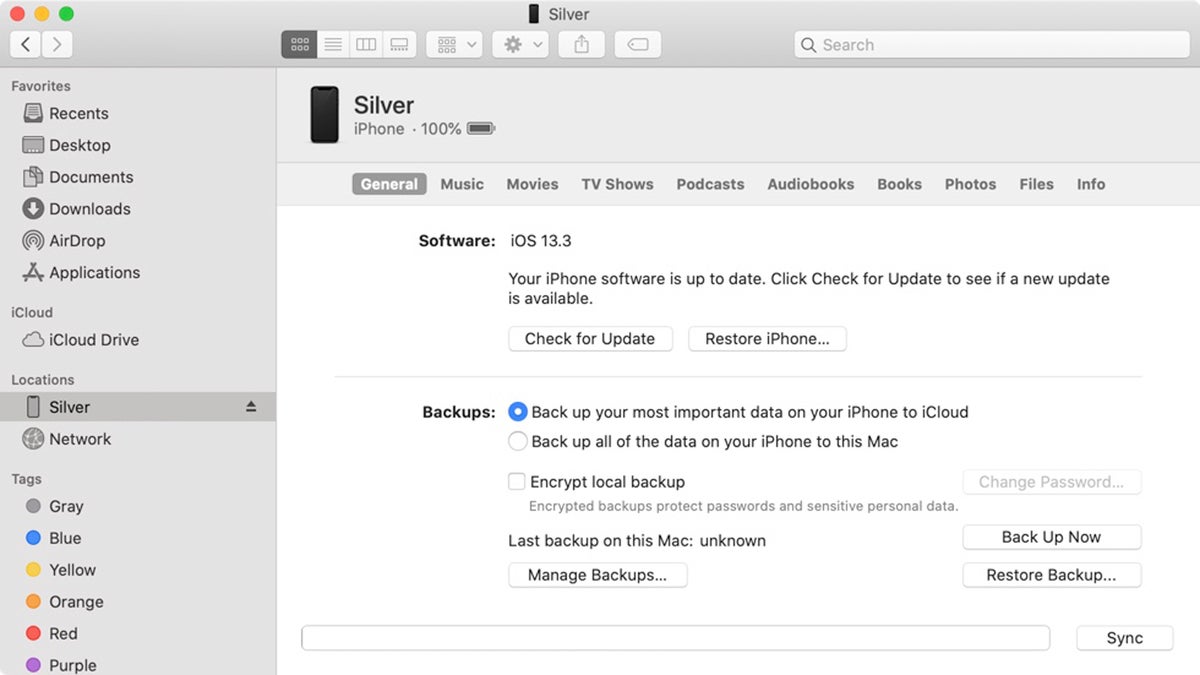
For a Mac backup ( macOS Catalina):Connect your older iPhone to your Mac , open up a new Finder windowpane , and select your iPhone in the left editorial in the Locations part . You ’ll see a windowpane that look like the iPhone management window that used to be in iTunes . In the Backups section , take , Back up all of the data on your iPhone to this Mac . CheckingEncrypt local backupis a good idea , so your history passwords and Health data gets backed up too — just pick out a password you wo n’t draw a blank . clack the button toBack up now .
In macOS Catalina , you may get at your iPhone through the Finder .

In macOS Catalina, you can access your iPhone through the Finder.
When the stand-in is done , plug in your new iPhone SE , then tell your Mac you want to restore from the backup you just made . afterwards , you could switch back to iCloud support if you prefer , inSettings > iCloud > Backup . But it never offend to run a backup on your own Mac every now and then .
For a Mac backup ( macOS Mojave or older):The backup process is alike to that described above for Catalina , but rather , you apply the iTunes app . After you back up your quondam iPhone , connect your fresh one . iTunes will take you through the dance step for set up .
utilize iTunes if you ’re using a Mac with an operating system old than macOS Catalina .
In macOS Catalina, you can access your iPhone through the Finder.
For an iCloud backup : No need to connect your old iPhone to your Mac . Just launchSettingsand tap on your Apple ID visibility at the top , then go toiCloud > iCloud Backupand selectBack up now .
When set up your new iPhone SE , you may restore your iPhone from this backup once you ’ve logged into your new twist with your Apple ID .
If you happen to be coming from an Android phone ( hey , welcome to the garden ! ) , there ’s an AndroidMove to iOS appthat can help you with getting all of your your Google account data in Mail , Calendars , and Contacts , moving your camera roll over , even transferring your Chrome bookmarks to Safari .
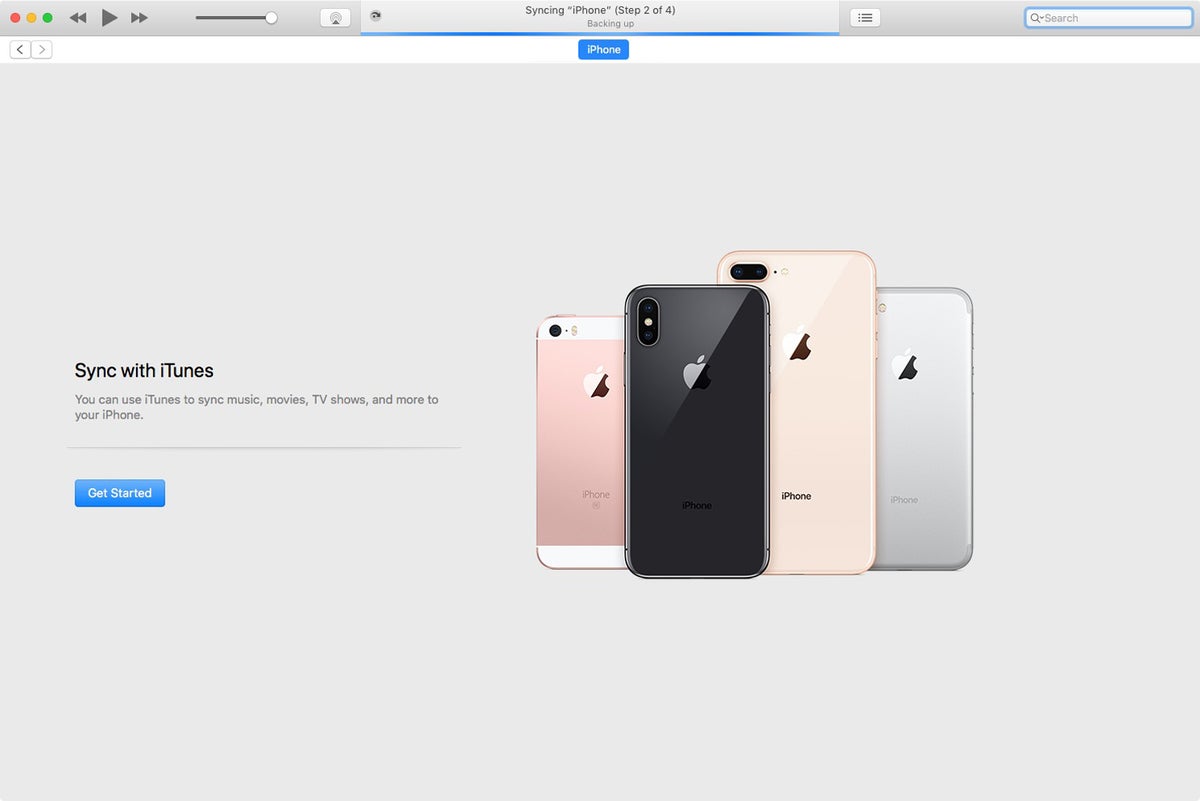
Use iTunes if you’re using a Mac with an operating system older than macOS Catalina.
2. Update your old iPhone, then use Quick Start
Io has a feature of speech called Quick Start . It ’s practically wizard . You just bear your new telephone next to your old telephone , and a little card pops up asking if you need to transfer all your stuff to the newfangled gadget . You ’ll then point your old phone ’s camera at your new phone ( which displays a swarm of small dots ) and put down your older phone ’s 6 - digit passcode .
Quick Start
You ’ll go through the residue of the setup process , like enabling Touch ID , and then your phone will be quick to go , set up just like your honest-to-goodness iPhone . It ’ll even motivate you to revise your old iPhone ’s computer backup if it has n’t been backed up in awhile .
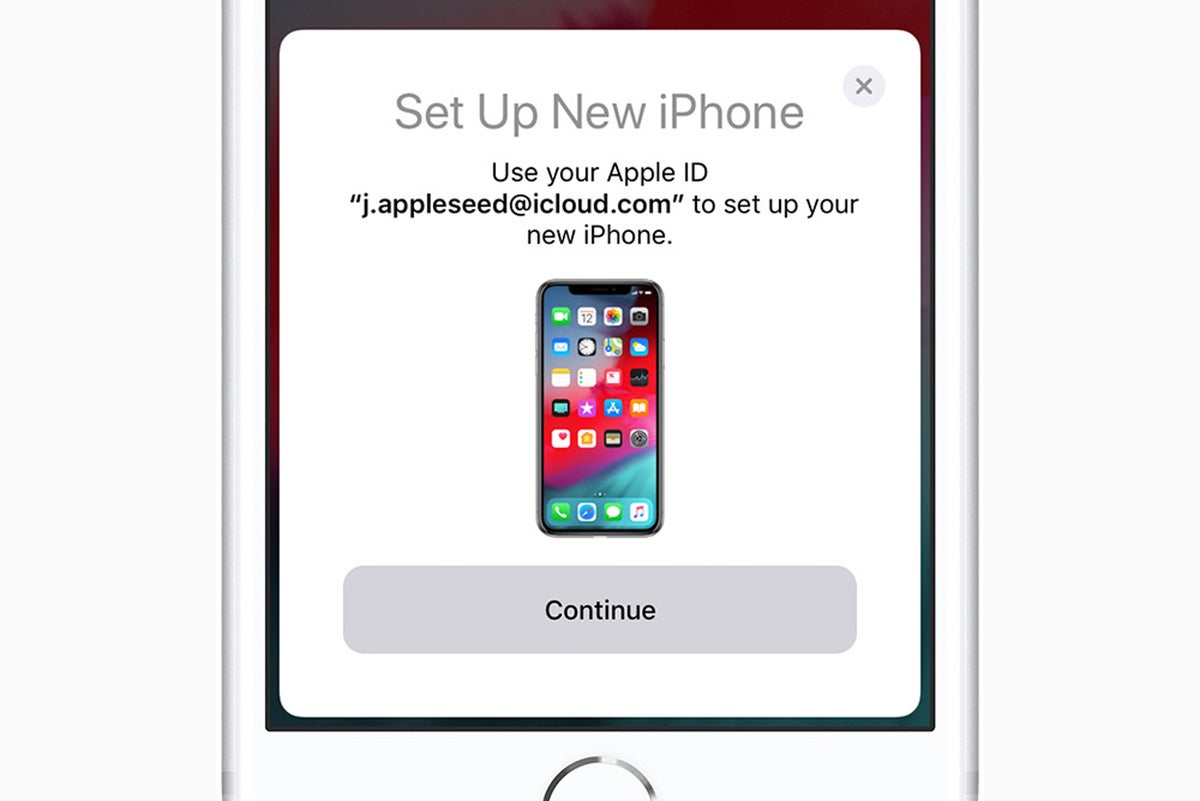
Quick Start
Setting up your phone this elbow room transfers over most of your scope , the organization of your home screen , and more . It ’s ahugetime saver . But it postulate iOS 11 or raw , so if you have n’t updated your old phone for some reason , you might want to update right away . You do n’t want to have to wait through a big update process once you have your iPhone SE in hand .
After setting up your speech sound this way , you ’ll want to give it a little while to re - download all your apps . Initially , your phone will show procurator icons for your apps , all arrange and placed into folders incisively as on your old iPhone . But your new headphone has to really re - download apps , because every time you download an app from the App Store , your phone really grabs a unique edition specifically optimized for your iPhone role model . But your user data and configurations get remove over , and that ’s the important part .
As tight and easy as this is , we still recommend backing up your telephone set as described in routine 1 above . If anything go really faulty during your setup process , you ’ll be glad you did !
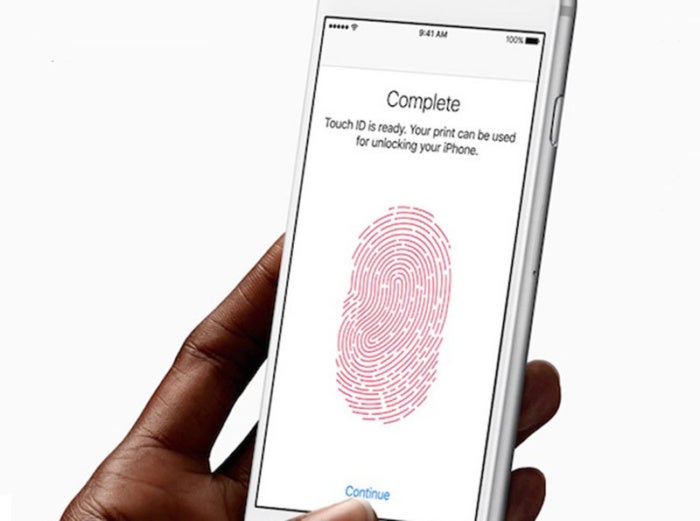
Touch ID setup can be a little slow, but it’s more secure and faster than typing in your passcode all the time.
3. Set up Touch ID and Apple Pay
Yes , you should apply Touch ID for maximal security — it ’s the fast fashion to unlock your iPhone SE , and will make it less pestiferous to practice a complicated passcode since you do n’t have to typecast it in every metre .
You ’ll be remind to set up Touch ID on your iPhone SE during setup . But you should take a moment afterwards to add another finger’s breadth or two . peradventure you used your right thumb during setup — add your left thumb in case you ’re holding your phone in your other deal , and your right indicator finger in case it ’s plane on a desk or table .
Head toSettings > Touch ID & Passcodeto impart fingerprints . You might even desire toadd one for your partnerif you want them to easily access your phone . Remember than you may change the name of the fingerprints in this menu , too !
Touch ID apparatus can be a small slow , but it ’s more strong and quicker than typing in your passcode all the clock time .
Worried about your privacy with Touch ID ? Do n’t be . No fingermark data ever leaves your earpiece — Apple wo n’t have access code to it . And it is n’t accessible by other apps , too .
Since you ask to have Touch ID enabled in parliamentary procedure to useApple Pay , this would be a good meter to jump into Apple ’s Wallet app to set that up . If you ’re new to Apple Pay , just keep abreast the teaching within Wallet to bestow a credit calling card or two . If you already had Apple Pay on your erstwhile iPhone , you ’ll notice that your cite cards have disappeared on your new iPhone . Why ? For your security , of course . Your Wallet story will still be there , but you ’ll have to re - enter any payment cards you ’d wish to use with Apple Pay .
4. Update your apps
corking , now you should be on your home plate screen door on your new iPhone , at last . polish off up the App Store first — you’ll want the latest versions of all of your apps . For the most part , you will have grabbed the previous ones when you set up your headphone , but there always seem to be a few updates there .
To check for app updates , launch the App Store app , then tap your account ikon in the upper right . You ’ll find an update section , as you scroll down . If you used Quick Setup , most of your apps should be up to date already , so this will be , er , quick .
Do n’t forget you may have your apps automobile - update by flip making sure the App Updates switch inSettings > your Apple ID > iTunes & AppStores is enabled . Or , you’re able to manually revise your apps and just go over out the “ What ’s fresh ” release notes to see what changed .
Apple just release iOS 13.4.1 for the iPhone SE a day before the phone became wide usable . You may have already been prompted to update during the setup process , but if not , now is a great time to verify you have the latest dismissal . Head toSettings > General > Software Updateto snap ( or whatever the later iOS release is at the time ) .
5. Pair your Apple Watch
If you expend an Apple Watch ( or maybe you just purchase a stigma novel Apple Watch to go with your iPhone SE ) you ’ll need to pair it to your new iPhone to keep the Activity information run to your Health app , and make your new headphone ’s notifications show up on your ticker .
First , you have to unpair your scout from your old iPhone , either in the Apple Watch app on your old iPhone ( tap your watch , then the “ i ” ikon , thenUnpair Apple Watch , then participate your iCloud password when incite ) , or on the picket itself ( configurations > General > Reset ) .
Then , launch the Watch app on your raw iPhone SE , which will take the air you through the pairing outgrowth including setting a passcode , unlocking behavior , and Apple Pay .
If your Apple Watch is n’t already running watchOS 6 , you ’ll want to update it . To upgrade , your Apple Watch needs to be connected to its charger , in range of your iPhone , and at least 50 percent turn on . Then look for the Software Update selection in the iPhone Watch app . upgrade your Apple Watch can be a slow process , so it ’s a good idea to get started early .
