Thebest camerais the one you ’ve got with you , they say . And for a great many of us , that ’s the television camera in our iPhones . fortuitously , any iPhone released in the preceding couple of old age will have an passing solid built - in photographic camera , with plenty to offer everyone from everyday snappers to serious iPhoneography enthusiasts .
In this article we provide detailed advice on puddle the most of the most utilitarian photographic camera features , configurations and mastery usable to today ’s iPhone photographers .
For even more advice on the features in Apple ’s latest and upcoming operating systems , readBest iOS bakshish .

This article incorporates the work of several additional writers : Rob Mead - Green , Chris Phin , Lauren Crabbe , and the Northern Ireland photographerGerry Coe , the first someone to be awarded a fellowship for iPhone nontextual matter photography by the British Institute of Professional Photography .
The basics
Before we start using the iPhone ’s tv camera features , we demand to in reality launch the Camera app .
you could do this in a few dissimilar way . you may wiretap the Camera app icon on the Home screen , or slide up from the bottom of the screen to reach the Control Panel and choose the Camera app icon there . But the well-off is to plainly swipe inwards from the righthand edge of the curl CRT screen . ( That ’s in iOS 10 and later on . In iOS 9 it was slightly fiddlier : you had to come in your digit on the photographic camera ikon on the lock screen and swipe up . )
Once the Camera app is opened you ’ll see a range of controls under the primary pic frame : Time - Lapse , Slow - Mo , Video , Photo , Square , and Pano . There are also controls at the top to toggle the flash and HDR mode , lay a timekeeper and flip the camera for a selfie . ( And if you ’re on an iPhone 6s or later there ’s a button to activate or deactivate theLive Photosfeature – do n’t worry , we ’ll get to that . )

Finally , there ’s a warm - jump to the Photos app on the left ( show up your most late photo as a thumbnail ) , although if you have n’t unlock your iPhone only the photos you ’ve take this meter will show up , protecting your privacy should someone else use your iPhone to take a shaft . And there ’s a filter choice control condition at the bottom - right hand : memory access these by tapping the greyed - out circle beside the white shutter button .
We ’ll go through all these camera lineament in more particular in this article .
Quickly jump to a specific shooting mode with 3D Touch
If you ’ve got an iPhone 6s , 6s Plus , 7 or 8 , iron firmly on the ikon for the Camera app on your household projection screen and you ’ll get the option of jumping straight to slo - mo , TV , selfie , or regular photograph musical mode . If you ’ve got a 7 Plus , 8 Plus or X , Portrait Mode will be tot to this list .
( It ’s worth restore the Camera app back to your first silver screen of apps if you ’d antecedently banished it because of the Control Centre button for launching it , partly for this lineal - mode - launch feature but also because Touch ID is so fast on the 6s and by and by that you never get the chance to see Control Centre from the Lock screen ! )
An interesting redundant fact : if there ’s room for the3D Touchpopup menu to appear above the Camera icon , you get ‘ Take Photo ’ at the top , then slo - mo , video and selfie . But if your ikon is high up , as is the case in our screenshot , the menu drops down instead and is reversed , with selfie at the top .

We ’ve got a separate article with more advice onHow to use 3D Touch .
Using the Timer button
The Timer release can be see at the top of the screen ( or left in landscape ) . Tap it and you may set a self - timer of 3 or 10 seconds . You ’ll see the numbers come up on the projection screen as it look down . On our iPhone 5s the phone mechanically took a burst of 10 pic .
You are most likely to employ this feature if you have the adeptness to set up your iPhone on a platform and maltreat away from it to take a photo without it falling over . We imagine we will see a destiny of people propping their phones up on walls and then abuse into shot so take selfies – no more extend your branch out to take pic of yourself . carry to see lots of third - political party manufacturers coming out with tripod for the iPhone .
To take a selfie on a timer , tap the dial , prefer the routine of bit and tap the shutter button – then make certain the dig is describe up the way you want before the time run out !

Selfie sticks
While we ’re on the subject of selfies , have you considered buying aselfie stick ?
They might seem a second odd , and we ca n’t warrant you wo n’t get some funny look from Passer by . But they really are useful : the spare aloofness you could get between your face and the photographic camera lens will make for a far more flattering portrait .
We ’ve got another article with advice onHow to use a selfie pin .

Using Time-lapse mode
Apple introduce a slow - mo option in iOS 7 capable of shoot motion-picture show and slow up parts of them down for hillarious effects . The Time - lapse mood sum in iOS 8 is even more appealing , taking photos at what Apple calls “ dynamically selected intervals ” to make videos .
To take a Time - reversion television , swipe all the way to the right hand on the Camera app ’s display , past video and slow - mo . Tap the record button and the app will mechanically take a still icon every few minute .
When you ’re finished , tap the reddened button again . The app will stitch all those film together to form a time - lapse video .

For the best results , ensure the iOS equipment is completely still – you may desire a point of view for it – and leave it record for a minute or more . You ’ll find the Time - backsliding TV in Photos > Albums > Videos .
Read our advice aboutshooting time - lapse television on the iPhoneif you ’d care to eff more .
How to reduce camera shake
Although things have improved dramatically , the iPhone can still skin in low twinkle , such as at dusk or indoors . To compensate for the low-pitched light it will often take longer exposures , and so if you ’re not arrest your iPhone completely still , the scene will get a bit smeared . ( The iPhone 6 Plus , iPhone 6s Plus and later on all have ocular image stabilization to help palliate this . )
One grounds you may tend to get blurred picture with your iPhone is that it ’s loose and thin , and hence rather awkward to obligate compare to a full - size camera .
you’re able to reduce camera shake with some old - fashioned technique that literally terminate your hands from moving as much : pushing the side of your body against a vertical control surface to stabilise it , stay your elbow on a low wall , or even simply bracing your iPhone by holding it in both custody and tucking your elbows into your eubstance . Take a deep breath and lease out a slow , steady exhale as you gently pink the shutter going push .

Or you could use the two - second ego - timer . With this , so you ’re not actually pressing a shutter when you ’re deal a shot and so shake the tv camera with the simple human activity of doing so , you start the timer , press the shutter , then in the two seconds before the camera actually takes the shot , brace yourself and hold the iPhone steadfastly .
Of of course , if you really desire to get serious about beating tv camera shake , you may need to regard buying an accessary . Which leads us on to the next section …
Tripods
Time - lapse shots are peculiarly helped by the use of a tripod , but a comely iPhone - compatible tripod can prove its Charles Frederick Worth in almost every area of photography . Camera shake is a constant worry for smartphone lensman , and tripod can be a superb manner of go down up a stable shot .
We ’ve gathered a excerption of thebest iPhone camera tripodsfor your delectation . or else , you could justsearch Amazon for iPhone tripods .
Use a hardware shutter
you may use the physical volume buttons on the side of your iPhone to take the snapshot rather than the big onscreen button – ready to hand if you ’re holding the phone at an awkward angle – but this also extend to phone ( admit the bundled ones ) that have inline volume control on the cable .
Pro photographer would habituate something like this with big fancy SLRs especially as a agency of reducing photographic camera shake ; the human action of pressing a real or onscreen push can shake the camera at the very instant you desire it to be still , so by spark off a pellet using a button which is on a cable , usually with the camera held in a tripod , you ’re murder that wag completely .
you may go one better : there are outback control that associate over Bluetooth ( whisper it : selfie sticks ) , but if you ’ve gotBluetooth headphoneswith volume controls already , they should make for too as a completely wireless shutter trigger .

Use your Apple Watch as a remote shutter
If you ’ve got anApple Watch , commemorate that you may use it to see what your iPhone ’s tv camera is seeing – useful in surprising situation , such as when checking the tops of cupboards for lost items or contorting yourself down the back of the TV trying to take a injection of its serial number – and for triggering a scene . The ready to hand Camera app preinstalled on the Apple Watch enables you to use the spotter as a remote shutter trigger for your iPhone camera .
start the Camera app on your Apple Watch and it will automatically open up the Camera app on the paired iPhone . Prop up the iPhone in a nice vantage point ( perhaps use one of these lovelyiPhone tv camera tripods ? ) while checking the shot is right on your Apple Watch .
When you ’re happy , either tap the white circle on the watch screen to take the photo , or hit the ‘ 3s ’ push to place a three - moment time lag . The latter is useful when you desire to take – and be in – a group family photo and not be search down at your scout at the moment the shutter goes off .

We discuss this method in more profoundness in a disjoined article : How to take photograph with an Apple Watch .
Take shots in HDR – but keep the original too
Even if you ’ve drive a tiny - capacity iPhone , if it ’s able of take HDR shots , turn that feature film on ( or leave alone on Auto so the iPhone decides when to use it ) but also turn on the option in configurations > Photos & Camera to economize the original shot too .
This way you could take vantage of gamy Dynamic Range photos – which mix together three dissimilar vulnerability of a scene so that you still see point in very smart and very dark areas – but also have the regular , non - HDR adaptation as well , since HDR shots can bet either a flake flat or a bit peculiar . Basically , this way you have options .
HDR melds several exposures to create a single video with an impressive amount of detail and a broad range of shade and color . render using it instead of the trice when you ’re faced with tricky lighting conditions .

Portrait Mode
Available on iPhone 7 Plus , 8 Plus and X
Portrait Mode , added in the iOS 10.1 software system update , is presently uncommitted only for theiPhone 7 Plusand8 Plus(and imminently on theiPhone hug drug ) , because it depends on those devices ’ twin - lens system rear television camera .
Portrait Mode applies an arty depth outcome to your pic , putting the subject in focus and obscure the background : a assay - after impression cognise in photographic rope asbokeh .

To access Portrait Mode , swipe across the rotating computer menu at the bottom of the tv camera user interface – it ’s just to the right of Photo . attempt to verify the study is within 2.5 metres and the ground is importantly further back ; and good ignition is of import too .
A quartet of professional photographers canvassed for their thoughts on Portrait Mode by Apple came up with a serial of peak , including “ cut back out the distractions from your subject ” , “ pulling the photograph down just a tomentum really make simulacrum face more cinematic ” , “ soft , diffused kindling will help with keeping the exposure flattering ” , and “ a space of about eight feet away is recommended ” .
We look at this feature film in far more depth in a separate article : How to use Portrait Mode .

Portrait Lighting
usable on iPhone 8 Plus and ex
Portrait Lighting is a set of smart kindling effects that can be apply during or after have a shot in Portrait Mode on the iPhone 8 Plus or X. It ’s still officially in beta , and can be a scrap inconsistent , but if you know what you ’re doing you may get some decent , professional - looking result with very lilliputian endeavor .
When you ’re shooting in Portrait Mode , you ’ll see a little hexagon at the bottom of the viewfinder display , mark Natural Light ; this is the nonremittal , stock effect . But if you tap or lift this you ’ll see that there are four more option .

Studio Light is the most honest , and subtly and realistically lighten up the subject ’s cheek and other high spot . Contour Light , on the other hand , add more shade and may improve the sense of a definition in a shot ( or , as pictured , make a soul take care less white-haired - barbate ) but more commonly make them count grubby or unshaven .
The concluding two options curve out the subject ( in colour or mono respectively ) and put them against a black background . Very occasionally these work well – we ’ve base shot from boozy bar gatherings sometimes benefit – but they are easy the least honest . The cutout process has great difficulty get by with curly hair , for case .
Burst Mode
One of the intellect pro are able to get such great portrait shots for magazine screen is because some take many heaps or one C of shots and just pick the one that captures a momentary expression or a moment of delight or seriousness . you’re able to do the same with your iPhone using Burst Mode , and it ’s great for getting the consummate guesswork of your kid grinning or your dog ’s guilty expression when you discover him tearing up a shock absorber .
All you do is hold the shutter down ( whichever shutter you utilise ) and get the tv camera just keep shooting . Of course this employ up loads of distance on your equipment , but once you get a quiet moment go to that burst of shots in your Camera Roll and tap Select . Now scrub through all the shot , tap the ones you care then wiretap Done ; you ’ll be make the pick of economize everything or just the ones you selected , and in the latter vitrine all the other , rubbish barb get delete .
Panorama
Panorama , which was introduced to the iPhone in iOS 6 ( but did n’t get along to the iPad until iOS 8 , interestingly ) , is a wondrous way for creating vainglorious , artistic shots of noble-minded landscape vistas , or clever trick shots of your agency where somebody runs around your back so they seem twice .
Swipe across to the right , retiring Photo and Square , until you reach Pano . Tap the shutter button and then move your iPhone from provide to right across the image you wish well to capture while trying to keep the gimmick as steady as potential . ( If you opt you could go from mightily to left instead . Tap anywhere on the saloon in the middle of the screen and it will toggle between left - to - right and right - to - left-hand . )
For formal panorama – those in an elongated landscape format – you need to hold the iPhone in portrayal orientation . It ’s possible to take a panorama while have got the gadget in landscape style , but you ’ll have to move it from top to bottom or from bottom to top , and you ’ll wind up with an elongated portraiture stroke .

The panorama mode itself offer some advice on how to take a upright scene : you require to move the machine endlessly ( do n’t suspension or stutter in your movement ) and slowly . experimentation until you get the knack of it .
Focus & exposure
You probably know you may tap somewhere on the projection screen when you ’re in the Camera app to recount your iPhone specifically where to focalize ( even if it has recognised face in the scene and decided to prioritize them ) but this also sets the exposure : that is , how bright or dark the image is .
So for instance , if you ’re photographing someone inside a room with their back to a windowpane , by default option the iPhone ’s automatic photograph will probably turn them into a silhouette ( as it try on to equilibrize the bright backlight and the dark subject ) ; but if you tap on them , it know what you need to prioritize , so it makes the scene brighter . The view out of the window will get ‘ blown out ’ – that is , made too bright and so detail will be lose – but at least your topic wo n’t look like they ’re in a looker tribute programme .
Traditional ( and now of course of instruction digital ) picture taking has a concept forebode photograph compensation , the idea that you let the camera decide how unspoilt to expose the scene , but then you give it a nudge – expressed usually in thirds of a ‘ hitch ’ – brighter or darker , to better ponder the shot you want to take .

you could do this on an iPhone too , but it ’s much less expert ; tap on your field , then sweep the slight brightness ( sunburst ) symbol next to the focussing straight up to make the picture lustrous , or down to make it dark .
Lock focus & exposure
commonly the iPhone will focus and bring out a guessing fresh each time , since that is indeed what you usually require , but there are metre , usually for creative reasons , that you require to lock the focus and vulnerability .
To do this , tap and hold on the screen door ; you ’ll see a serial of contracting rectangles around your finger . This is your cue that the exposure and focal point are now locked even if you move the photographic camera a little or to a completely different part of the view . tapdance anywhere on the image to unlock them again .
Live Photos
Live Photos is a neat if slightly gimmicky photo feature that was sum to the iPhone ’s repertory with the launching of the iPhone VI and iPhone 6s Plus .
If it ’s trigger , Live Photos seize a few indorsement of low - Re video just before and just after you snarl the shutter for a still photo , so you end up with a cute candid video to go with the paradigm – and most people still do n’t know much about the lineament , which means you often terminate up capturing them off - sentry go with an unstaged ( or too arrange ) performance . It ’s just fun , really .
Live Photos is turned on and off in the Camera app itself . It ’s the ‘ bullseye ’ type icon in the midsection of the top row : three homocentric circles . If this ikon is lily-livered , bouncy Photos is alive ; if it ’s white , it ’s not . Tap the picture to toggle between the two .

To ‘ aerate ’ the picture conceal within a Live Photo from the Photos app , do a force - insistence if you ’ve got an iPhone with 3D Touch , or do a prospicient insistence if you have n’t . You ’ll see a few moment of hopefully entertaining low - res telecasting .
Read more : hold out Photos tips
The Rule of Thirds grid
Although stab can front great with their subject dead centre , you’re able to usually make your shots look in effect , more dynamic and flat - out more professional if instead you cover the “ Rule of Thirds ” – and you’re able to easily do this if you switch on the grid in preferences > Photos & Camera .
Now , expend those parentage as a guide , positioning a horizon along the bottom horizontal descent , lining up a stand up subject with one of the upright , or the eyes of a close - up portrait at one of the upper points where the guide lines cross , say .
Composition
Capturing a expert picture is n’t just a subject of knowing the right preferences . Compose your exposure as the pros do . expend the iPhone ’s Grid feature ( we showed how to turn this on in the premature pace ) to divide the frame into horizontal third , and put your subject on one of those lines , rather than in the middle of the screen .
Be careful to keep the camera level , too ; nothing ruins a photo like a tilted horizon . Also , keep an eye on the background signal to check that you do n’t see anything “ grow ” out of the top of someone ’s headway .
The professional photographer Gerry Coe says that when a photographer habituate an iPhone they acquire a “ totally different outlook ” compared to using a DSLR . The iPhone offers a simple-minded lens and sensor and this forces you to intend about composition in a dissimilar way .

“ Unless you attachsupplementary lenses , ” Coe total , “ you have to form with a semi - wide of the mark lens and the only rapid growth or supernumerary blanket angle you have is your leg . ”
With this in mind , the iPhone does n’t sound like a natural prick for a lensman . However , for Coe , despite these limitations when it come to taking the initial shot , it ’s the flexibility of iPhone photography that is the real benefit .
He explains : “ Really it is the ability to almost instantly transmute an image to a imagination I may have had on the day and not have to go back and play around with Photoshop . Quite honestly I could not do what I do on the iPhone in Photoshop . ”

Zoom
Your iPhone – with the elision of theiPhone 7 Plus , with its twin - lens rear - facing camera – can not magnify the trope by using an optical soar , the way many compact or professional cameras can . alternatively , it use a digital zoom , which but make the pixels self-aggrandising and blockish , obliterate fine detail . Zooming in digitally also hold it even unvoiced to take a steady photo .
Want to fill the form ? Then move nigher to your subject . If you really need to zoom along in , you’re able to get the same digital outcome with an image editor in chief later .
Lighting
Your phone can handle a lot of situations with aplomb , but it ca n’t shoot every scene you receive . Your teeny image sensor craves light and does best outdoors in daylight . For the best exposure , keep in intellect the advice that photographers have followed for many 10 : essay to position yourself ( the lensman – not the issue ) so that the Lord’s Day is behind you or over one of your shoulders . The sun should be shining into your subject ’s cheek , ideally .
Avoid shooting direct into the Lord’s Day , or you ’ll radically underexpose your content . If you ’re shooting indoors , position your back to the windowpane and plough on the twinkle .
Flash
It may sound counterintuitive , but when you ’re shoot in daylight , a filling flash can be your secret weapon . It produces a prompt burst of light to reduce the shadows that bright sun can causes . A fill flashing provides pleasant , even lighting on your subject ’s fount to fill most of the shadows .
Of of course , the tiny LED flash works only at very close range , so do n’t look it to assist unless you ’re within a few feet of your subject .
Flash on the iPhone 8 Plus
If you ’ve have an iPhone 8 Plus , you’re able to take advantage of the raw Slow Sync Flash . While it sound like something only skilled photographer could take advantage of , it ’s easy to use and it could amend the quality of photos take with the flash .
Why ? fundamentally , the iPhone takes a picture at a slower shutter speed while firing the jiffy quickly . The longer the shutter is clear , the more the background is scupper , which reach the picture brighter . And the best part is that the flash is goes off for a shorter amount of time equate to old iPhones , meaning it ’s not as distracting to those around you .
The result ? It provides illumination to the field of the pic without becoming too harsh . The background of the paradigm is much bright too , furnish an all - pear-shaped improved image . The full part ? The lineament is automatic , just turn the jiffy on !

Shutter delay
Since your iPhone ’s shutter controls are digital , you ’ll run into software - base shutter lag – the time between when you take the pic and when the sensor actually enter the image . Also note that the onscreen shutter button trips after you lift your finger , not when you weigh it .
To compensate for this slowdown , have the camera steady and look how long your shutter takes . And if you use the touchscreen button , tap it lightly to avoid blurring your exposure .
How to scan QR codes
We wish Apple would build QR - scan capabilities into the iOS Camera app . But it ’s also easy to rake QR codes if you utilize the Google Chrome iPhone web browser app app .
Swipe properly on the Home filmdom to open up the notification heart , then in the search stripe at the top of the screen door character QR code . You ’ll see an option for Scan QR Code next to the Chrome logotype . Tap this and the electronic scanner will plunge . Now you may take the QR codification .
Alternatively , if you ’re using an iPhone equip with 3D Touch – an iPhone 6s , iPhone 6s Plus , iPhone 7 or iPhone 7 Plus , in other Word of God – you just have to beg and bear the Chrome app image . A 3D Touch shortcut menu will appear , admit an alternative to Scan QR Code .

If you do n’t habituate Google Chrome on your iPhone , it ’s possible to scan QR codes using Apple Wallet . open up the app , wiretap the + symbolic representation , and prize Scan Code to Add a Pass .
Read more : How to scan QR codes on iPhone
Creating large canvases
Gerry Coe says that traditionally , “ if you wanted high - caliber , bounteous files then you needed a magnanimous camera with mass of megapixels , but I have produce 6ft - spacious canvas Panorama images from my iPhone .
“ The file sizes are a lot large [ than with early iPhone models ] , and therefore less enlargement is want to get full-grown four - foot canvas . ”
That Coe is able-bodied to get four - foot canvas from 8 - megapixel images show the fact that while Apple offers fewer megapixels on the iPhone than many smartphone manufacturing business tender , it ’s quite sufficient – and more megapixels only serve to make even bigger single file . Read more about themegapixel mythhere .

Experiment with filters & effects
After you snap your photo , you may use the Photos app , iPhoto , and third - party apps to make tweak . you may wield most of these control as if you were adding spices to a soup : experimentation and apply them “ to taste ” . The intensity controls , for instance , line up the intensity of colours . It ’s commonly good to stand by with down or medium point , since high grade incline to make everyone look like an overcooked Meleagris gallopavo . Effects such as negative , sepia , and black - and - white can also help you take charming pic .
One of the biggest benefits of carrying an iPhone is that you could set up dozens of apps . Check out the iTunes App Store to encounter programs that better the way the photographic camera works , as well as image - editing apps that let you raise your photos after the fact .
Best photo apps for pros
The photographer Gerry Coe says that if you want to try out , there are stack of very estimable camera apps that can be downloaded from the App Store . Here are his recommendations :
Snapseed : “ My favourite go - to app for introductory adjustment and colour balance . ”
Hipstamatic , Oggl , 645 PRO , SlowShutter , ProCamera : “ For take pictures . ”

ScratchCam , Pic Grunger , DistressedFX : “ For textures . ”
Coe also advocate : notion , Big Lens , iResize , Superimpose , Laminar Pro , Photosync , Repix , Leonardo , Aquarella .
say next : right photography apps for iPhone & iPad

Managing photos (part I)
iOS ’s Photos app contain three main options : Photos , Shared ( if you have Shared Photo Streams turned on ) and Albums . All three options are available from the bottom of the screen . We explicate each option below .
Albumsis the digital eq of the old - fashioned photo album . Your Camera Roll record album is join by My Photo Stream – your photo stream ( if you have it turn on ) . you’re able to also see all the Panoramas you have take away . Videos you have shoot with your iPad or iPhone . And any album you have created yourself ( we ’ll explain how to do this below ) .
Photosis simply where every single flick on your iPhone is hive away . These can admit pictures from your Camera Roll and those you ’ve spell from elsewhere ( from your Mac for example ) , and any that are in your Photo Stream .

Managing photos (part II)
If you tip photo you will see that to make it easier to navigate your photos , the Photos app organises your snaps by Years , Collections and Moments .
MomentsIt ’s likely that when you first exploit on Photos you will see your late jibe , grouped in what Apple referrs to as Moments . moment present you the exposure you take at a specific prison term . For example , on a tripper to the seaside for a day out with the class . Any photos you take at that location , at that time will mechanically be grouped into a Moment so you could find them and share them easily later on . ( If this is n’t the first view you see , just beg anywhere on the silver screen to ‘ zoom in ’ to that Collection . )
CollectionsIf you need to reckon back further then tap on < Collections ( top right ) , and you could see Collections of photos you have taken , usually group by location and date . For instance , our iPhone is clever enough to keep picture taken in Switzerland separte from those taken in London and Surrey .

YearsSimilarly , dab < twelvemonth to catch your photograph by year . This is plausibly the firm direction to discover your exposure from Christmas 2011 . Just tap at the oddment of 2011 to be taken to the photos from that prison term .
The great matter about the Photos app is it show all your photos , not just those taken with the iPhone or iPad camera . So if you have shared images from your Mac to your iPhone , or from your iPad to your iPhone you could see them all in these dissimilar scene .
How to find your photos on the iPad or iPhone
Where ’s the Camera Roll ? It’svanished .
Since the launching of Io 8 photos are hive away slimly otherwise . Previously , every pic taken with your iPhone or iPad could be found in the Camera Roll folder . Not any more . This caused some new user to believe that all their photos had been deleted during the initiation , but they are still there : you could find them in collection .
Tap pic and catch accumulation by Months and Years , and by Moments , which sorts your photo by location and event . This actually make finding sure-enough shots a lot easier than scrolling through years deserving of exposure . It will mean that all your photos , taken on all of your devices , are commix up together .

One rationality for the confusedness is probably that when you strain to share a picture to Facebook or similar the record album that the phone shows by default used to be Camera Roll and now is lately Added ( although Facebook still labels it as Camera Roll ) . This shows you the photos you have take with the iPhone camera over the past 30 day . It ’s no wonderment people thought their photograph had been cancel . If you want to deal a photo on Facebook that is more than 30 day old you need to add that photo to an album , and the tap on Camera Roll and select the image from that album . More on this below …
The removal of Camera Roll also make it difficult to tell which of your images are store in the cloud . Basically everything is stored in one bountiful folder – which in the light of the iCloud celebrity photo escape is n’t idealistic . record next : How to keep your iPhone photos safe .
The fresh search feature is helpful when looking for photos . wiretap on the magnifying glass icon and the hunt field will prompt you categories of images taken Nearby , Favorites , Home and in a locating you have lately visited .

you could search all of your photos by date , clock time , emplacement or record album name .
you may seek for the photos you take in May by type May in the hunt field , for exercise . typecast the name of a location where you necessitate photograph and you should see the images you took at that location . These lookup standard remain in recent searches .
How to favourite photos on your iPhone
This is another means to ensure you’re able to always see the photos you like the best . Under every photo in your program library there is a sum picture . exploit that icon to fill up it in . This will tot up it to your Favourites record album .
Hide images on your iPhone or iPad
In iOS 8 and afterwards you may shroud effigy you do n’t require others to see from Moments , Collections and Years ( although they will still come along in album ) . To hide an image , water faucet and hold on its thumbnail , then tap Hide .
To retrieve the photo you call for to visit the Hidden record album and wiretap and contain the thumbnail to unhide it .
This is more or less confusing as if you pink on an figure in late Added and select obscure it does n’t disappear from that prospect . However if you ’re in Moments it will disappear from prospect when you choose Hide .

fundamentally , if you do n’t need someone to see an image make trusted you switch to Photos from Albums first .
Creating a photo album on iPhone or iPad
If you ’ve demand a sight of photos at an case you may wish to put the full ones in an album . If you care to fix up an Album come out by open your Camera Roll , then tap Select , wiretap the images you wish to put in the album , and tap Add To . At this gunpoint you’re able to either tot the photos to an existing record album or scroll to the bottom of the list to pick out New Album . Now enter a name for the album , and save .
Setting up Photo Stream on iPhone or iPad
One of the key features of Apple’siCloudis Photo Stream . This enable your iPhone to mechanically upload the last 1,000 exposure or picture you ’ve taken and mechanically share them with all your other Apple devices .
To switch Photo Stream on if you have n’t already head to preferences > iCloud > Photos and hook the My Photo Stream slider from result to right hand to activate it .
How to share your iPhone photos with others
There are wad of other easy ways to divvy up the photos you take on your iPad or iPhone with friends and fellowship . For example , you’re able to share the photos of a mean solar day out at the seaboard with the family who blend in there with you .
To share a Moment like that , start the Photos app , select photograph , and then drill down to the Moments option . Scroll up or down to the find the Moment you want then get across on the Share option to the right wing .
The partake window will now glide into view kick in you two option : ‘ Share this consequence ’ which enables you to apportion all of the photos in that Moment ; or ‘ apportion some exposure ’ , which enables to choose the photos from that Moment you would like to share .

If you choose ‘ Share this second ’ another windows glides into view giving you the option partake your Moment via AirDrop or iCloud ( as long as you do n’t have too many photos take , and as long as you have Photo Sharing change by reversal on in place setting ) .
you may also choose to replicate the Moment – ready to hand if you require to paste a selection of photos into an email , or you may choose to print the select pictures contained in that Moment via AirPrint .
If you choose ‘ portion out some photos ’ , a different windows glides into aspect , which evince all of the photos in that Moment . To choose some photos that you would care to share , plainly tap each one once so a blue circle with a check mark inside it appears .
Once you ’ve made your selection , rap Share and the communion carte du jour you saw in ‘ Share this mo ’ will appear again .
This time as well as AirDrop , iCloud , Copy and Print options , you ’ll also have the chance to share your pictures with other services admit Messages , Mail , Facebook and Flickr . only choose the option you want and share , divvy up aside .
How to create an album so you can add images to Facebook
If you wish to tot up images toFacebook , currently the good way may be to seize those photos from an album because at the instant Facebook is only showing the retiring 30 days photos and any exist albums you have dress up – it is showing the Recently add together album in place of the Camera Roll .
impart the above situation , you may wish to make albums for your trope to make it easier to find them when using apps like Facebook .
If you ’ve taken a collection of pic and like to share the best ones on Facebook – or if you just want to create an album to make them easy to find , or so you could share them with a friend using Photo Stream – find the epitome in Recently Added if they were taken in the retiring 30 mean solar day ( or in the Photos surgical incision if they were taken longer ago ) .

Tap Select and pick the photos you wish well to keep . At this point we usually find it frustrating that we only see a square thumbnail of the shot because it is arduous to see the detail and determine how full the pic is . We run to flick through , initiative figure of speech , noting which image it was as it close , and then tapping Select and ticking that image .
When an image or ikon are selected spigot add together To and select the Album you bid to append to , or scroll to the bottom and pip New Album to create a new record album . Now when you try and share the images on Facebook all you require to do is select the relevant record album .
How to import photos from your Mac to your iPhone
Most of us have photo collections that go right smart beyond what we take on our iPhones , but that does n’t mean they ’re all lost to your iPhone either .
Luckily it ’s a breeze to add any of the photos stored on your Mac to your iPhone . To do so , simply conform to the steps below .
link up your iPhone to your and Mac and open iTunes , select it from the Devices list and then pick out the Photos selection from the card bar .

check that the Select Photos from … alternative is check and then take where you require to spell your photo from . you’re able to choose either an existing Aperture or iPhoto library or choose images from your Mac ’s Pictures folder or any other folder you care .
If you prefer to you use Aperture or iPhoto , you ’ll be given the option to sync all your photograph , albums , Events and Faces or choose select albums events and Faces . You also have the option to include any video you have stored in Aperture or iPhoto , if you like .
Once you ’ve decided which picture , album and Events you ’d care to spell , choice Apply and then go and make a loving cup of tea while your pic are synced with your iPhone . That ’s it : you ’re done .

How to select all the photos on your Phone
As we have shown it ’s easy to select some of the photos on your iPhone but what if you desire to choose all the exposure on your iPhone ? Unfortunately there is no means to select them all in one go , but you may select photos by Moment .
Go to the moments view , then tap Select in the top right quoin of each moment . You will need to go through all your mo , tapping on the Select button for each one as you go . It ’s slightly frustrating that you ca n’t select whole Collections or Years this way .
Once you ’ve take the image you ’ll now be able to do one of three things :

Share photos : habituate the Action button ( the square image on the bottom left of the silver screen with the arrow coming out of it ) to share the picture you ’ve selected using AirDrop , iCloud or to Copy or impress them
Add to an album : Use the Add To button to add up the photos you ’ve choose to a newfangled or existing album .
Delete : you could delete any photos taken on your iPhone or apportion via Photo Stream by tapping the Trash icon on the bottom right field of the Photos carte . However this method wo n’t work on picture collections you ’ve synced to your iPhone from your Mac using iTunes .

The good fashion to erase them is to head back to iTunes and then deselect any Album and Event you ’ve previously synchronised and then select Apply . To delete all the picture you ’ve shared from your Mac using iTunes , uncheck the Sync Photos from … checkbox under the devices Menu .
How to delete (and undelete) photos
The bit of ‘ deleting ’ a pic no longer deletes a photo – not properly . or else , the photo move to the of late Deleted brochure where it remains for 30 days unless you go to the pamphlet and delete it from there .
To cancel a photo enter the photo and rap the waste newspaper basketful . Choose Delete Photo .
Then go to Albums > Recently Deleted to turn up the ‘ erase ’ photo . Annoyingly it ’s not the most recent photo that shows up as the picture here , but the least late . enter the record album and pat on the image to get the options to Delete or Recover . If you pick out to delete from here the image is gone . If you do n’t delete it but leave it in this folder it will disappear in 30 day time . you’re able to also erase ( or recover ) all the images or a large figure of paradigm in one go by tapping Select > Delete All or Recover All or by tapping each mental image you wish to keep or delete . There is also a Delete All option .

Since we have a 16 GB iPhone we frequently delete range of a function to make space so this is an annoying extra whole tone when we are sample to delete photos . While it might be useful to keep images uncommitted just in case you deleted them by accident , it used to be the case that those images remained in our Photo Stream even if we edit them from Camera roll .
If you blue-pencil an epitome from your equipment it ’s not instantly removed . You have 30 daylight in which to interchange your mind . If you then decide you were wrong to delete it , go to the late Deleted folder , launch the icon and prime Recover . you could also recuperate a group of exposure . dab Select , then pick out the persona you wish to go back and water faucet Recover .
If youreallywant to delete the image , find it in the latterly edit folder , open up the image and pick out Delete . you may also delete a group of pic this way . Tap Select , then select the images you wish to recover and tap Delete .

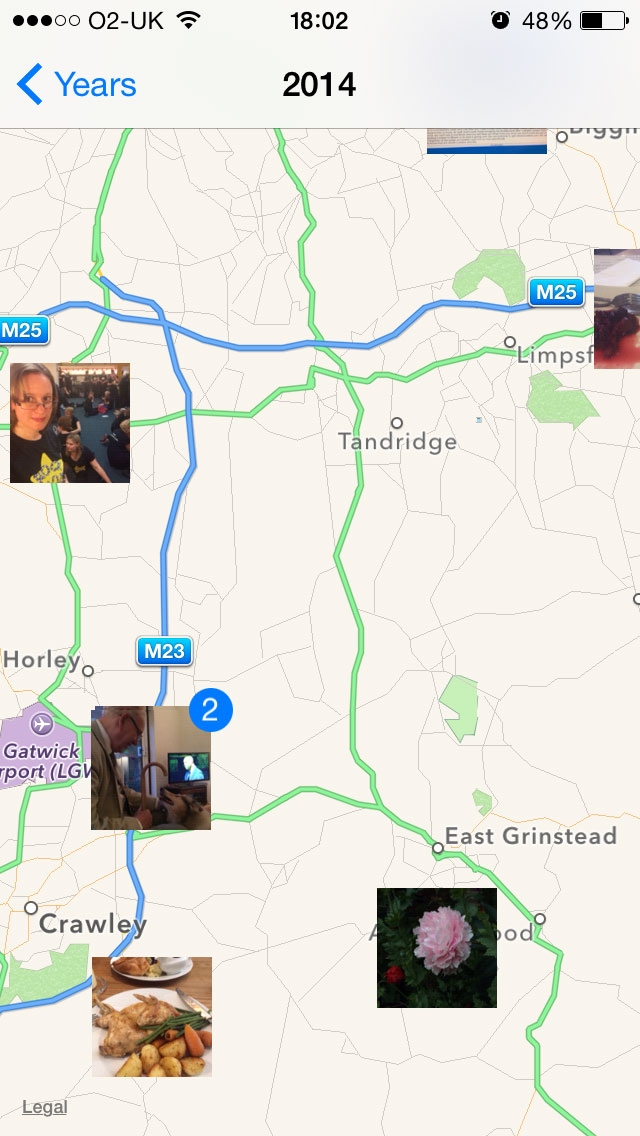
View your photos on a map
From Photos > Collections tap on the name of a location above a mathematical group of photos to see those pic on a map . If you dial back to the yr consider you’re able to tap on the location for that year , and see group of photo you have taken at the emplacement you took them in .
This is great if you wanted to remember where it was you enjoy that marvellous Sunday lunch or the beautiful gardens you visit one weekend .
How to use the editing tools in Photos
iOS ’s editing tools make it easy to be originative with your exposure . Apple also let the use of third - party filter and effects without having to unfold and near apps .
you’re able to range , straighten , remove red heart , adjust lighting and direct contrast and more . Just spread Photos and select the image you wish to edit . Now tap Edit > and pick the craw , filter , or impregnation tool .
For related advice , seeBest fashion to back up photographs .

How to crop a photo on the iPhone or iPad
take your image . dab Edit . Now exploit the square Crop icon . The interface here is a fiddling different to iOS 7 ; you involve to tap the icon on the right that calculate like different shaped boxes . Now you may pick the constraints of your craw . rap Done when you are happy .
How to straighten an image on the iPhone or iPad
Do you have a photo that needs straightening up ? This is often the pillowcase when you photograph water and then rule it look like the weewee is going to melt out of the persona because it ’s on a rake .
iOS makes this edit easygoing . Tap the Crop icon and you will see a new telephone dial appear below the mental image . Turn this telephone dial until the lines that it draws over your image look in argumentation with the horizon .
How to add more colour to a photo on the iPad or iPhone
To change the colour saturation of an image , tap the dial image and peck Color . you could drag the slide up ( or to the right depending on the orientation of your gimmick ) to summate more color to the range .
you’re able to do even more here . Tap the three lines and you could see what the Saturation , Contrast and Cast levels are . To increase dividing line , pat Contrast , then move that slide until you are happy . We were able to get a nice racy sky this elbow room .
Finally we looked at Cast and moved the slider until we were happy with the Edward White of the clouds in our image .

Adjust the brightness of a photo taken on your iPad or iPhone
you’re able to also adjust the Light levels . Options include Exposure , Highlights , Shadows , Brightness , Contrast and Black Point .
notice the range of a function you wish to edit . Tap Edit . choose the telephone dial image and plunk Light . You could hale the sliding board up for a more gossamer feel to your range . beg the three argumentation icon to get to the additional setting . Turn down Exposure to see more of the sky . haul down highlight to see more sky . Pull up shadow to see more of what ’s in the nuance . take out up Black Point to get deeper blacks .
Choosing a filter for an image on your iPhone
You do n’t have to use all these sliders to get the stark image . A number of predetermined filter are usable , and have been since iOS 7 . regain your image and select Edit . pink the three traffic circle at the bottom of the silver screen . Select the filter you like from : Mono , Tonal , Noir , Fade , Chrome , Process , Transfer , Instant .
you may also total filters to the pic when taking it . Tap on the three circles in the bottom - right corner when you give the Camera app .
Undo photo edits on the iPhone or iPad
Find the image . Tap Edit , then tap Revert to revert the persona back to the original . you’re able to do this at anytime as they are nondestructive edits . If you want to keep the before and after image you couldscreen catch the emended imagebefore reverting to original .