We show you how to utilise the new pro - unwavering photos boast that arrive with High Sierra .
How to use the new photo editing features in the Photos app
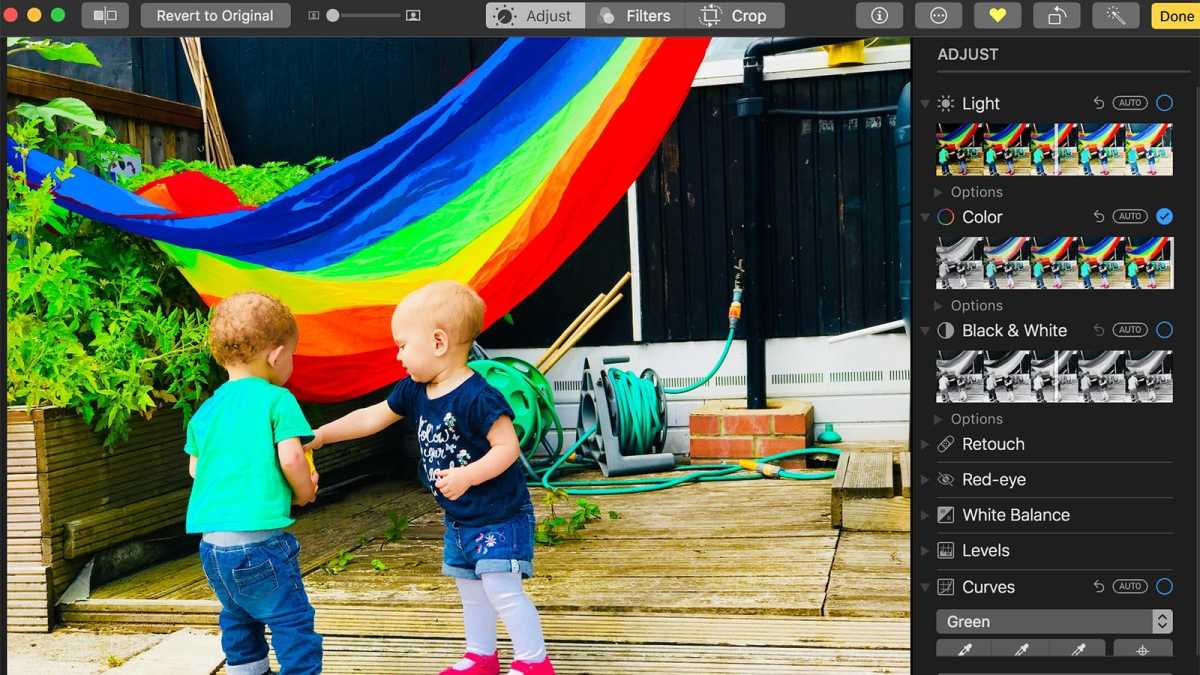
There are some welcome change to the Photos interface in High Sierra , from a new choice replication , good deal rotary motion and favouriting within the depository library perspective , to some pro - level photo redaction features suitable of Aperture . To contact them penetrate on Edit then Adjust .
Where antecedently you had options to Enhance , Rotate , Crop , Filters , Adjust , Retouch , and denotation . Now you ’ll find Levels , Curves , Definition , Sharpen , Noise Reduction , Vignette and two new editing tools : curved shape and Selective Colour .
To look at the editing alternative within each putz , press the disclosure triangles beside them .

metalworks
How to use Colour Curves in the Photos app
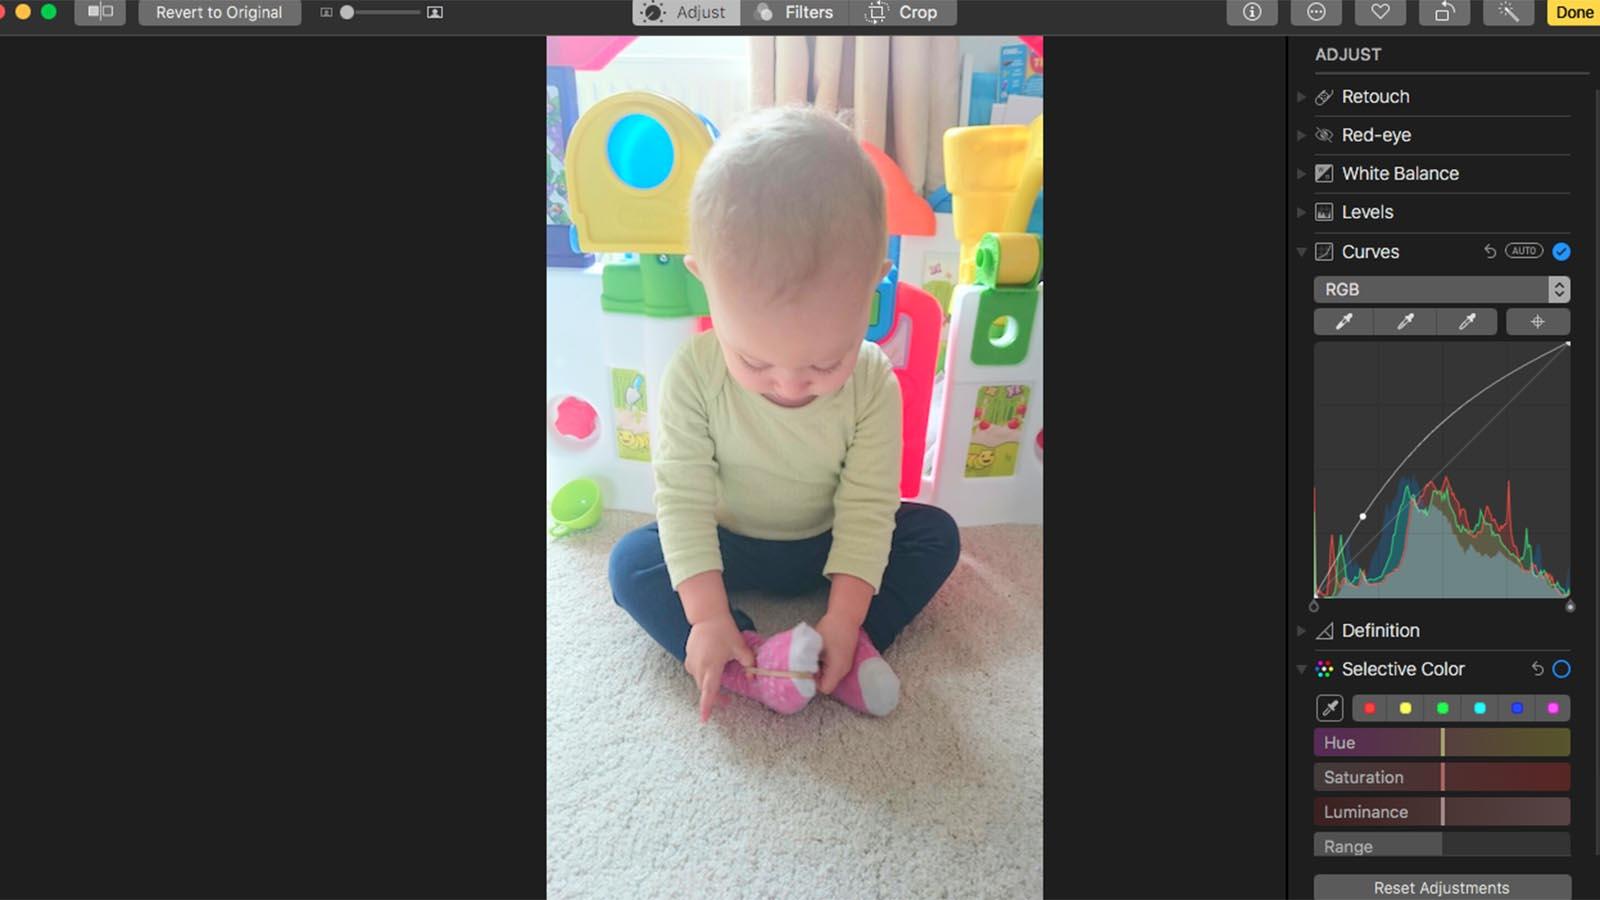
With the Colour Curves adjustment you could adjust the tonal range of your range . It ’s a small more complicated to use than some of the other tool , but you could use it to lighten up a grim scene , promote contrast and color , or make color work shift .
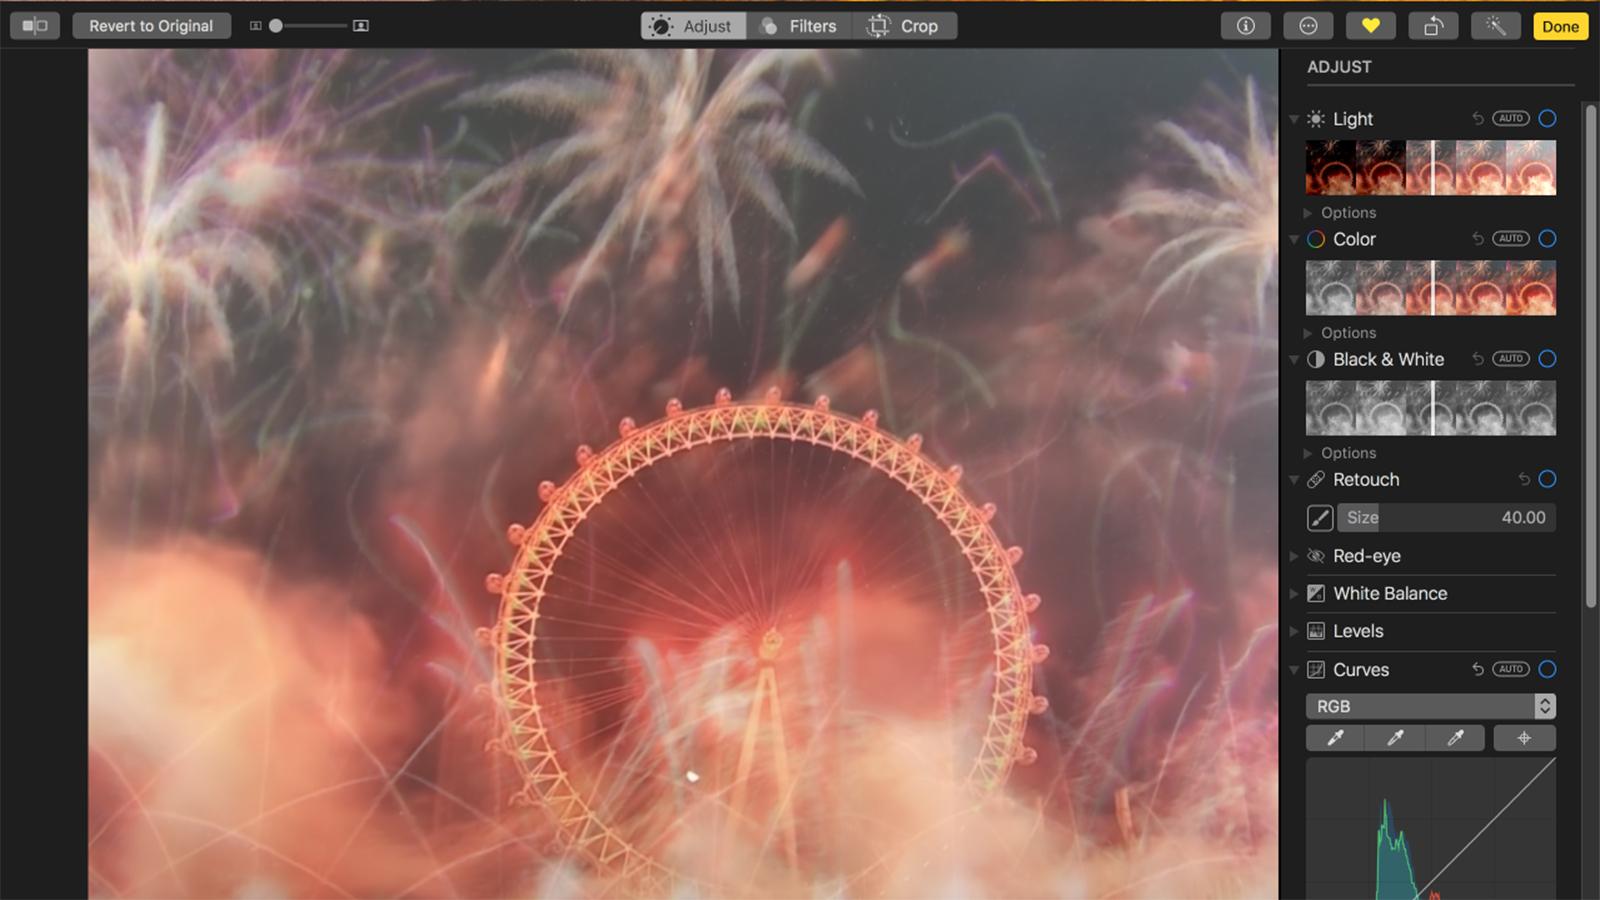
To utilize Curves , scroll down the listing and get across on its revealing trigon to let out the tools and a graphical record . The mental image tonality is represented by the line , the highlights of the prototype are found in the top right section of the graphical record , the blue lights are found in the bottom left segment .
you could choose RGB , or focalize on Red , Green and Blue separately , dragging the anchor period on the graphical record until you get the affect you are after .
For example , to brighten up the trope , select the railway line in the bottom exit and drag it upwards until you see a curve var. . The image will change in genuine sentence so you’re able to decide when you have attain the designed event .
You could also create an S - curve , dragging one anchor point up in the highlights , and another lynchpin bespeak down in the shadows . This would boost dividing line and the colour saturation .
you’re able to also use the pipette to pick a colour to rig as a black point , grey point , and white stop , just as in Photoshop . you’re able to also take a colour in the mental image to mark as a point on the curve .
How to use filters in Photos app
Photos in High Sierra also bring with it nine newfangled pre - build image filter presets .
Where previously Photos bid Instragram inspired filters , such as Fade , Chrome , Process , Transfer , and Instant , now the filters are version of three unlike styles : Vivid , Dramatic , and black and blanched , with warm and coolheaded options .
To access these filters click Edit > filter and click through the options until you find one you like .
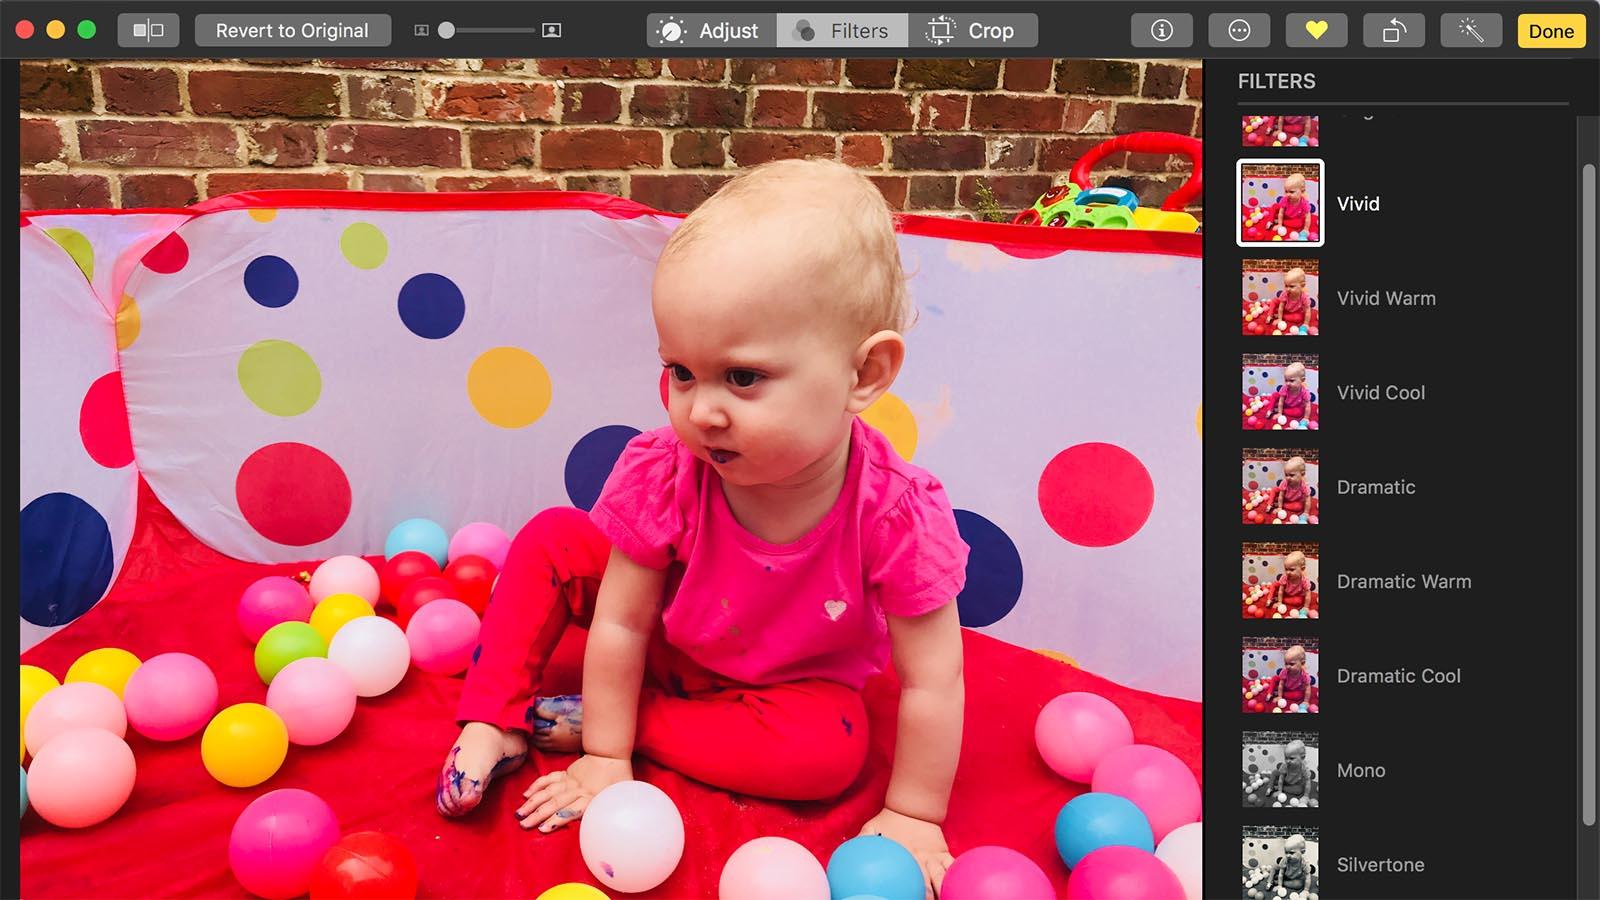
When you have select your filter you’re able to continue to edit it using the Curves and other editing tools until you have the style you are after .
Turn a live photo into a Gif
There ’s a new Media Types folder in Photos which makes it easy to line up your videos , selfies , Depth Effect images , Panoramas , Time Lapse , Slow - mo , and unrecorded Photos . A young lineament in pic in High Sierra is the power to plough those springy Photos in to a Gif like repeating loop .
you could also manually interchange the Live Photo ’s representative trope to a different segment of the television , trim down the Live Photos video , and , in addition to the new Gif - like Loop , you could set one of three other effects : a traditional live pic , a back - and - forth reverberate effect , or a Long Exposure image that mime a pic taken with the shutter leave behind subject for a prospicient time .
To turn a alive photo into a loop ‘ Gif ’ , open your Live Photo in Edit mode . Below the photo you will see a Pseudemys scripta ( this allows you to switch the still image associated with the Live Photo , as well as modify the start and terminate points of the Live Photo ) .
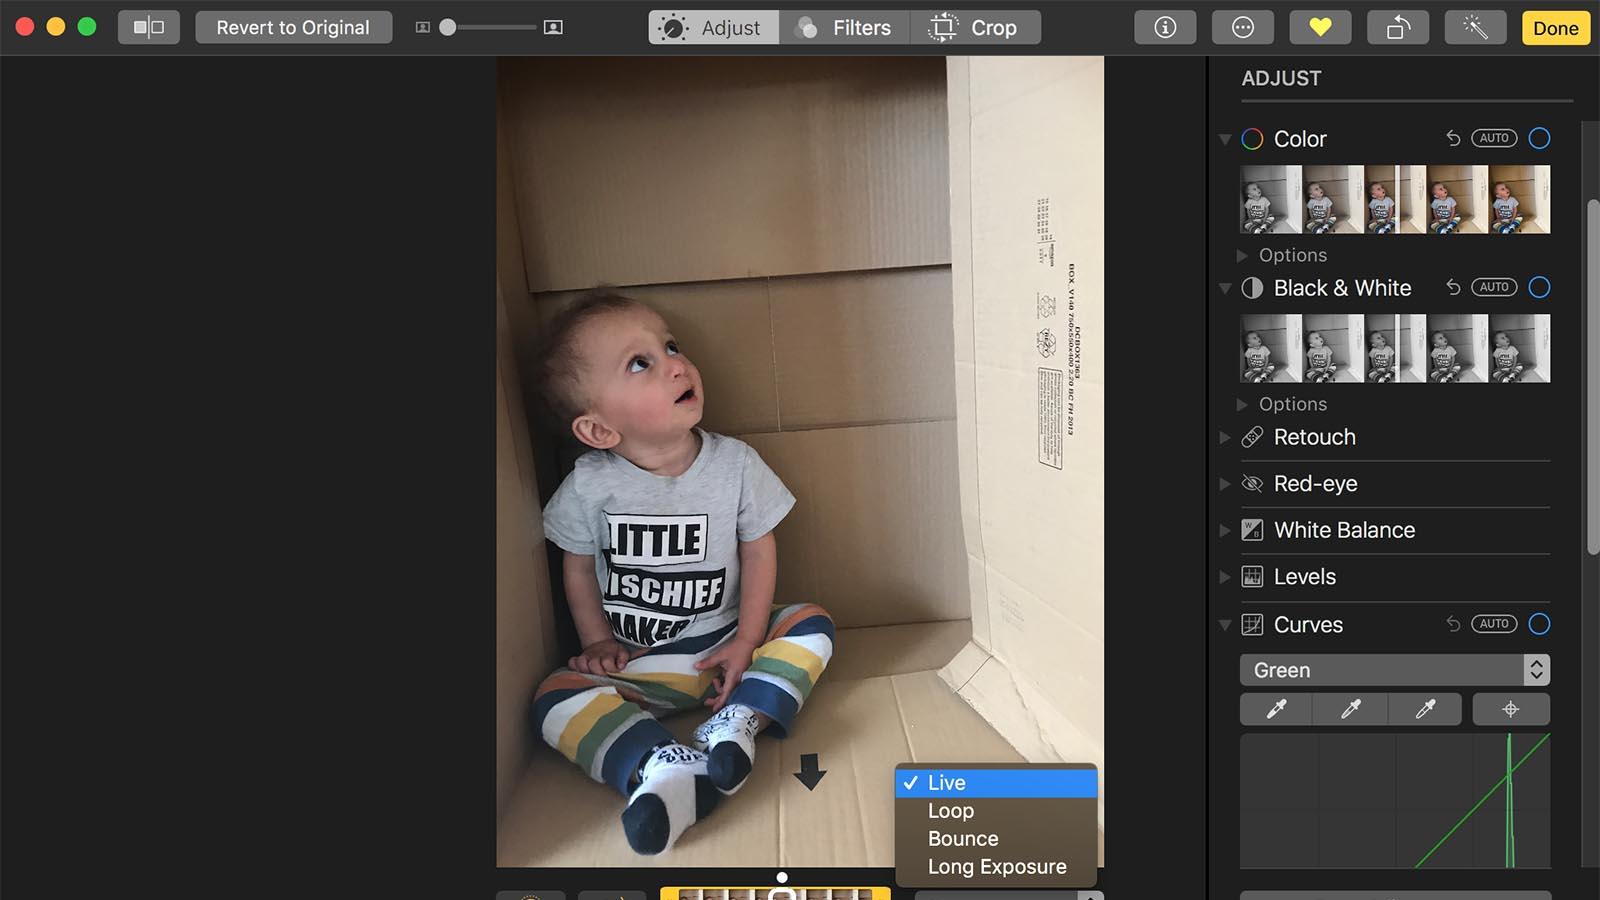
Next to that is a drop cloth down box with the option : Live , Loop , Bounce and Long Exposure . Choose Loop . like a shot the image will start to coil . If you were hop to change the first and end power point unfortunately you ca n’t , but you’re able to take to turn the audio recording back on ( it ’s change by reversal off by nonpayment in Loop mode ) .
The other exchangeable option is Bounce . Where loop sort of fills in the crack between the unlike apparent motion , in Bounce the sample is short and the one movement is repeated over and over . you could not play audio in Bounce .
We have a accomplished guide to call on hot photos into Gifs here : How to make a GIF on iPhone .
How to create a long exposure shot in Photos
If you have a resilient Photo of something like a waterfall or fireworks you could make a Long Exposure image from it .
Note : this image wo n’t be any good if you moved the tv camera . Ideally you require to keep the camera wholly still when taking the live pic ( as you would if you were taking a Long Exposure shot the traditional room .
As before , take the Live Photo , choose Edit and in the boxful beside the sliders choose Long Exposure .
We ’d like the choice to make a Long Exposure photo out of a Slow - Mo video . unrecorded pic by their nature are n’t really long enough to give a really proficient Long Exposure effect .
Open a Photo and edit in Photoshop
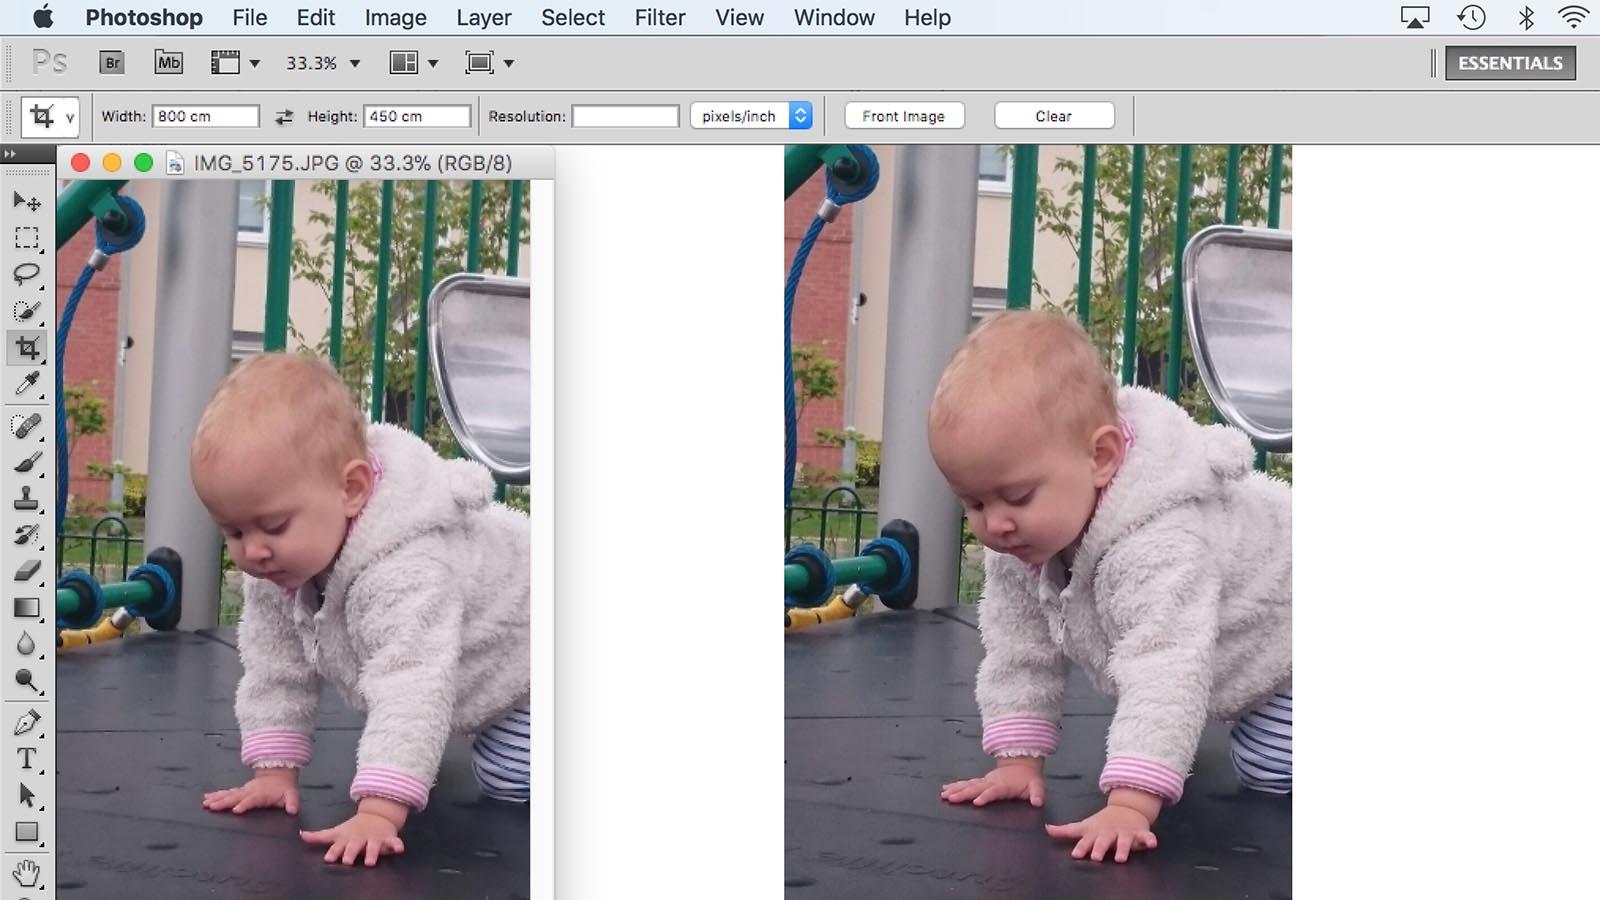
The Photos app now lets you make edits using Photoshop and other third - party editors .
From photo right tap the icon you bid to edit and choose Edit With > Other , and then select Photoshop from your applications ( or any other photo editor you might prefer ) .
The image will open up in the third - party photograph editing app and you will be able-bodied to use all the features of that app to edit it . For example , you could opt a Photoshop filter and put on that to your persona .
Any edits you make will automatically be saved to your Photos depository library .
