With the release ofEl Capitan , Apple took the chance to giveDisk Utility a facelift . you’re able to still apply the computer software to initialise a inauguration thrust — it ’s exchangeable to the steps in the previous version .
This how - to move through the steps of formatting a startup drive using Disk Utility 15 in El Capitan . If you ’re using an honest-to-god version of Disk Utility , the footmark arehere .
1. Connect your drive
To arrange an outside storage twist , connect it to one of the port on your Mac . Turn the crusade on , and ensure it seem in the Finder .
If you ’ve already installed El Capitan and you want to format you Mac ’s internal cause , you’re able to boot into Recovery Mode to format the drive . To bring up into Recovery mode , set out up your Mac and guard down Command - R. You should see a windowpane labeled OS X Utilities . ( observe : if you initialise your Mac ’s internal parkway , this will erase all of the datum on the driveway , include your apps , Indian file , and the operating system . )
2. Open Disk Utility
Disk Utility
You ’ll use OS X ’s Disk Utility app to format the parkway . Locate Disk Utility in Applications > Utilities and open up it .
If you booted into Recovery modality , select Disk Utility at the bottom of the window ( see below ) .

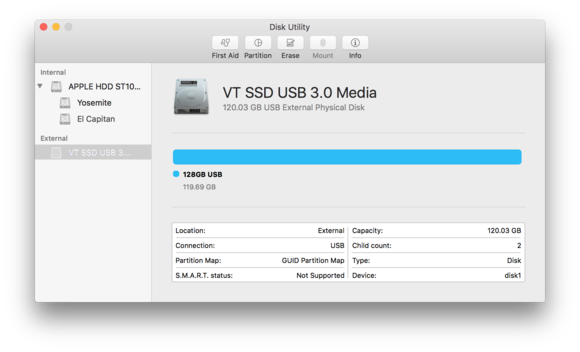
3. Select the storage device in Disk Utility
Disk Utility ’s left pane establish the storage twist connected to your Mac . Underneath each gadget are the drive ’s divider . Select the gimmick you desire to format . Then come home the Erase button at the top .
If the Erase clit is dimmed , it means the movement you desire to initialise is in use and you need to bring up off another drive or into Recovery mode , which was describe in step 1 .
4. Name and Format
A dialog corner will appear . You need to enter a name for your repositing gadget .
penetrate the crop up - up computer menu for Format , and you could choose one of the formats . The nonpayment selection is OS ex Extended ( Journaled ) ; if you require a bed of surety , you may go with OS X Extended ( Journaled , Encrypted ) , which will encrypt your storage gimmick . ( If you do n’t see the Encrypted options , that ’s probably because the drive you are arrange is currently not using a GUID Partition Map . Select OS X Extended ( Journaled ) , go to step 5 , and then come in back to footstep 4 , repeat the step but with an Encrypted option take . )
The “ Case - sensitive ” formats countenance for single file name with Das Kapital missive to be different from lower-case letter letters . So , for lesson , three files named FILE , File , and file can subsist in the same folder . You in all probability do n’t need to utilize a fount - tender format .

MS - DOS and ExFat are microcomputer formats . Since we ’re formatting a Mac startup driving force , you’re able to disregard these two .
5. Scheme
There ’s a third pick you involve to make called Scheme . For an Intel - based Mac run El Capitan , select GUID Partition Map . There are two other options you could brush aside : Master Boot Record is for Windows , and Apple Partition Map is for PowerPC - based Macs ( remember those ? ) .
When you click Erase , Disk Utility will erase the data , reformat the storage equipment , and mount the private road on your desktop . Click Erase when you ’re ready to proceed . After a few minutes , your store gimmick will be ready for you to set up El Capitan .
How to establish OS X El Capitan
How to make a bootable oculus sinister X 10.11 El Capitan installer drive


