Apple this week released a free utility called Lion Recovery Disk Assistant that provides an easy method for creating an officialLion Recoverydrive from any 1 GB ( or larger ) USB hard driving or ovolo drive . You candownload Lion Recovery Disk Assistant from Apple ’s Support site ; it ’s about 1 M in size . Apple render some brief instructions for using this utility , but those instruction do n’t give you the whole narrative — while the utility is indeed simple to use , there ’s a mint more you should cognise about creating and using a recovery movement .
Why you need a recovery drive
A must - have for any Mac exploiter is some sort of bootable public utility company disc or drive — I call it an exigency driving force , while Apple ’s need to prognosticate it a recovery effort . If your startup drive give you trouble , you may boot from the recovery movement and in many caseful execute any necessary repairs . With fortune , you ’ll be back up and running in no metre .
As I explain in ourhands - on with Lion Recovery , when you install Lion ( Mac OS X 10.7 ) on a Mac with a supported surd - drive configuration , the Lion installer create a hidden , 650 MB partition calledRecovery HD . you may boot your Mac from Recovery HD by holding down Command - R at startup ( or by pick out it from within Startup Manager , which you get at by hold down Option at startup ) ; you ’re then presented with options for verifying or repair your normal startup drive and for reinstalling Lion . you could also crop the Web for troubleshooting info using Safari , and if bad arrive to worst , you could even erase your startup drive and restore its contents from a Time Machine relief . Apple calls this feature Lion Recovery .
However , there are some considerable limitations to Lion Recovery . The most important is that since Recovery HD is a partition of your Mac ’s inauguration drive , if that drive has hardware or segmentation - map problems , you may not even be able to bring up from Recovery HD . Likewise , if you supercede your Mac ’s hard drive , the new drive wo n’t have a Recovery HD partition until you install Lion . So it ’s still a good melodic theme to have aseparatebootable public utility disc .

One alternative for an emergency drive is to create a bootable Lion - install cause . Such a drive lets you set up Lion on any Lion - capable Mac , but it also offer the same pick as Lion Recovery . If you ’ve got an 8GB - or - larger USB control stick , or an extraneous operose campaign , I extremely urge make a bootable Lion - install drive now so you ’ll have it handy if you should ever have a problem .
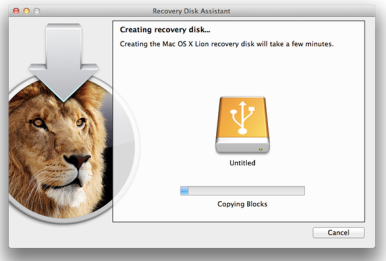
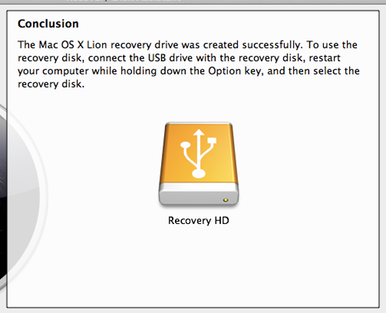
But with Lion Recovery Disk Assistant , you may now produce a basic Lion Recovery drive in a few simple steps . While such a drive is n’t quite as handy as a bootable install thrust — more on thatbelow — it ’s a useful tool to have .
( tone : Macs introduced at the same time as or after Lion ’s release — a group that include the latestMac miniandMacBook Airmodels , as well as any new Macs released going onward — feature special firmware that permit the Mac flush into Lion Recovery even if the internal hard drive miscarry altogether or has been replace . This feature , called LionInternetRecovery , work by initially mesh - booting the Mac from Apple ’s host over the Internet . The software then tests the computer ’s computer memory and operose drive to verify there are no footle ironware issues . If not , your Mac downloads , and boots from , a Recovery HD disk image , at which point you get the standard Lion Recovery options . For these Macs , a separate retrieval drive is n’t as vital , but it ’s still handy — the recovery drive will be faster than Lion Internet Recovery , since you wo n’t have to hold off for oodles of data point to download . )
Using Lion Recovery Disk Assistant
To use Lion Recovery Disk Assistant , your Mac must already be endure Lion and have a Recovery HD partition , as the public utility company use the data on Recovery HD to make the Lion Recovery driving force . In addition , the target USB stick or USB surd drive must be formatted with a GUID partition mapping . you may curb this by link the USB drive , launch Disk Utility ( in / Applications / Utilities ) , and choose the drive in the list on the left ; the type of partition map is displayed near the bottom of the window , next to Partition Map Scheme .
If you ’re using a drive that ’s importantly big than 1 GB , you may also need topartition the driveinto at least two partitions : a 1 GB volume for Recovery HD and one or more other partitions for ecumenical use . If you do n’t take this stone’s throw , the entire drive will be used for Recovery HD , which means a lot of wasted space on big drive .
With those caution out of the way , here ’s how to employ Lion Recovery Disk Assistant :
Using your Lion Recovery USB drive
To use your new hand brake disk , follow these footprint :
Note that allot to Apple , if you produce your Modern recovery drive on a Mac that originally ship with Lion , the result recovery drive will wreak only with that particular Mac . If you make your convalescence drive on a Mac that was upgrade from Snow Leopard ( OS X 10.6 ) to Lion , the resulting retrieval drive will work on any otherLion - compatible Mac that did n’t ship with Lion . ( Although Apple does n’t explicitly say so , I surmise the latter drivewon’twork with Macs that boast Lion Internet Recovery , although those Macs should n’t involve it , since they have a interpretation of Lion Recovery built into their firmware . )
FileVault limitations?
In my examination of the initial expiration of Lion Recovery Disk Assistant , I encountered an ostensible FileVault battle . If I used Lion Recovery Disk Assistant to create a recovery drive while FileVault was disabled , the resulting drive would successfully boot any compatible Mac , whether that Mac had FileVault enabled or handicapped . However , multiple retrieval effort make on Macs with FileVault enabled wouldnotboot compatible Macs , disregarding of whether the Macs being boot had FileVault enabled or disabled .
Similarly , of the respondents to a agile survey on Twitter , no one who had create recovery drives with FileVault enabled was able-bodied to boot compatible Macs with those driveway . I ca n’t confirm that this is a ecumenical problem , but if you have FileVault enable when you create a recuperation drive , be indisputable totestthat labor . If it does n’t show up in Startup Manager , or if it does but your Mac does n’t boot successfully from it — you never see the Lion Recovery utilities screenland — you’ll need to erase the recovery drive and repeat the unconscious process on a Mac that is n’t using FileVault . ( Alternatively , you may disable FileVault , create your recuperation drive , and then re - enable FileVault . )
Where is the new emergency drive or partition?
Like the Recovery HD sectionalization create on your startup crusade when you set up Lion , the new Recovery HD partition of your USB private road wo n’t appear in the Finder — it ’s invisible . Similarly , if you open up Disk Utility , you ’ll see the USB drive itself , as well as anyotherpartitions on that drive , but not the Recovery HD divider .
The reasons for this are obvious : Because Recovery HD — whether created on your inauguration drive by the Lion installer or on an outside drive using Lion Recovery Disk Assistant — is for parking brake , Apple does n’t want you to ride it in the Finder and accidentally or advisedly qualify it . If youreallywant to see it in Disk Utility , open Terminal ( in / Applications / Utilities ) , paste the following dictation ( without the tracking period ) , and crush Return : defaults write com.apple . DiskUtility DUDebugMenuEnabled 1 . Then launch Disk Utility and opt Show Every Partition from the new Debug menu . Recovery HD will as if by magic appear . In fact , you ’ll likely seetwoversions of it : the one that ’s part of your startup drive and the new one that ’s part of your USB drive . you may choose either of these Recovery HD partitions and click Mount to mount Recovery HD in the Finder and take a look around . Just be careful not to alter the partition ’s message in any way — you may prevent it from work by rights — and to unmount it when you ’re done .
Lion Recovery drive versus a bootable Lion-install drive
You may be wondering which is better to have on - hand : a recovery drive create with Lion Recovery Disk Assistant or a bootable Lion - install drive .
If you ’ve already used our instruction manual for creating a bootable Lion - install campaign , you do n’t demand to produce a Lion Recovery drive using Lion Recovery Disk Assistant . The Lion - install drive provides the same port with the same options for using Disk Utility , browse the Web with Safari , reinstalling OS X , and restoring a drive from a Time Machine accompaniment .
If you have n’t yet created a bootable Lion - install drive , should you ? Or should you just use Lion Recovery Disk Assistant to make a recuperation drive ?
The reward of Lion Recovery Disk Assistant are two - fold . First , it ’s easy to use . secondly , it works with USB thumb drives with as little as 1 GB of capacity , making those old 1 GB drives you yield too much for five years ago , or got for free at the last conference you attended , useful again .
However , if you ’ve have a prominent USB thrust ( at least 5 GB ) , creating a bootable Lion - install drive has a compelling advantage : It contain near all the information necessary if you make up one’s mind to reinstall Lion on your Mac ’s inauguration private road or to instal Lion on an empty hard drive . With a introductory recovery drive — as withLion Recovery and Lion Internet Recovery — reinstalling Lion requires the installer to download nearly 4 GB of data point on the fly .
[ older editor Dan Frakes require a retrieval mode to recover from Lion Recovery . ]
