When that new 24 - column inch iMac arrives , you do n’t require anyone or anything getting in your elbow room as you take out it and set it up . It ’s an exciting moment , so go out front , go for it ! But ( or course , there ’s a “ but ” ) after you ’re done placing it perfectly on your desk , plugging it in , turning it on , and then sit back to gaze upon it admiringly , take a footling break . Pause for bit , because now it ’s time to correct up your Mac for the workplace you want to get done .
To get the most out of your Mac experience , there are a few thing you should do first before doing anything else . Many of these tasks are the case you require to do only once , and when they are set , you will rarely want to accost them again and you could focus on working or creating on your Mac .
Figure out which adapters you need
While you set up the iMac , you may have point out the ports on the back . The iMac has only one type of connector , which is shaped like a USB - C plug . The 24 - inch iMac comes with a duad of these ports , and the technology behind those port is Thunderbolt / USB 4 , meaning that you could use those ports with Thunderbolt and USB gimmick . ( The $ 1,499 and $ 1,699 do with two additional ports that are USB - C only . Most Thunderbolt devices wo n’t work with those ports even though the cable attend the same . It ’s puzzling , we know . )
The catch is that the equipment you desire to link to your new iMac — heavy drive , pressman , photographic camera , etcetera — in all likelihood use a overseas telegram that has a different connector . So to connect your old machine to your fresh iMac , you require to buy adapters .
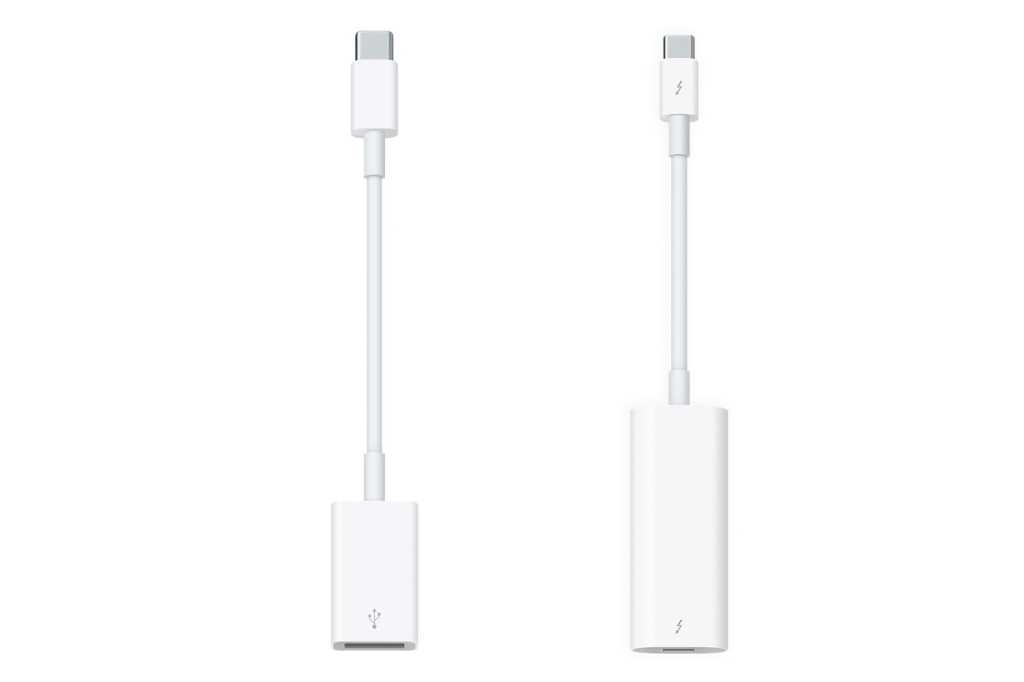
You ’ll plausibly need Apple ’s USB - C to USB transcriber ( result ) and Thunderbolt ( USB - C ) to Thunderbolt 2 Adapter ( right ) .

You’ll probably need Apple’s USB-C to USB adapter (left) and Thunderbolt (USB-C) to Thunderbolt 2 Adapter (right).
Apple
opportunity are , the equipment you want to connect uses a USB - A connecter , the most widely used version of USB . So the arranger you will postulate is a USB - C to USB adaptor . Apple has one for $ 19 ( Amazon link ) , but you could find third - political party versions for a little cheaper . If you have a machine that uses a dissimilar variant of Thunderbolt , you call for an adapter like Apple ’s $ 49 Thunderbolt 3 ( USB - C ) to Thunderbolt 2 Adapter ( Amazon link ) . We have acomplete guideto help you regain the transcriber you necessitate .
If you have a lot of devices you desire to connect , consider seat in a Thunderbolt docking facility . This is a box that provides a Seth of different connectors you’re able to plug into . There are a diverseness of loading dock available with unlike port offer . We recentlyreviewedthe OWC Thunderbolt Hub ( $ 149 ) and liked it . We alsoreviewedthe WD_Black D50 , a dock with a built - in 1 TB arduous parkway for $ 449 . That difficult private road would be ready to hand for the next stair listed below .
You’ll probably need Apple’s USB-C to USB adapter (left) and Thunderbolt (USB-C) to Thunderbolt 2 Adapter (right).
Set up a Time Machine backup
The Mac operating system ( anticipate macOS ) has a build - in feature for making substitute of your data point . It ’s called Time Machine , and it ’s really well-fixed to set up and use . Though it seldom happens , if you use your computer enough , there will add up a prison term when you a single file you ’re working on goes unsound , or you mislay it , or you need to revert to a antecedently saved interpretation . Time Machine can aid you recover that file cabinet .
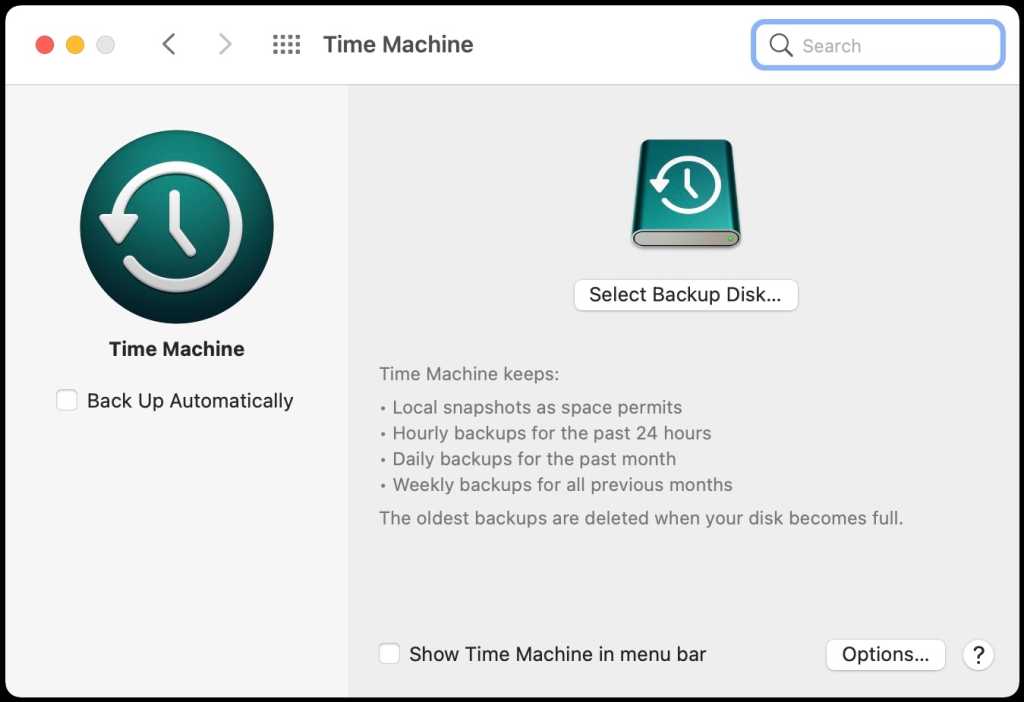
You take an extraneous hard drive to use Time Machine . plug into the movement to your iMac and then go to the Apple carte and open System Preferences . Click onTime Machineand you could set it up . you’re able to have Time Machine perform backups mechanically as long as the campaign is connected to the iMac .
It study just a few minutes to place up Time Machine — clock time well spent , specially when the time come when you need to recover a file .
It takes just a few minutes to set up Time Machine—time well spent, especially when the time comes when you need to recover a file.
Configure iCloud Drive
iCloud is Apple ’s on-line service that provides a way to synchronize your datum between your Macs , iPhones , and iPads . It also has email , notice My , and other service . When you set up a new iMac , you ’ll be ask to determine up an iCloud account or lumber into one if you already have it . But once your Mac is up and running , you should go a gradation further and configure iCloud Drive , the online reposition that iCloud ply .
In System Preferences , sink in on your Apple ID at the top to get to the iCloud configurations . Then click oniCloudin the left over pillar , and in the corner to the right labeled “ Apps on this Mac using iCloud , ” discipline the iCloud Drive if you want to use it . Then select theOptionsbutton , and a windowpane will come out up that show the apps that will store data on iCloud Drive .
Turning on Desktop & Documents will allow you to access files in those folder on any equipment .

Turning on Desktop & Documents will allow you to access files in those folders on any device.
IDG
If you stop Desktop and Documents , this will allow you to access any file saved to the Desktop or Documents folder on any other Mac , iPhone , or iPad that you utilize . If you do n’t need to have this kind of access , uncheck the Desktop and Documents box . Learn more about Desktop and Documents on iCloud Drive .
Check for macOS and app updates
While Apple does a good line of work of ship its Macs with the latest version of macOS , sometimes update get released while your iMac is shipped to you . It ’s a ripe idea to check for the latest version of macOS before you start because it fixes bugs , patches security holes , and inclose new feature . ( The latest translation of macOS is reading 12.1 , and it ’s possible your iMac has an older adaptation . )
If you need to find out , here are the measure to update macOS :
Check the Mac App Store for app updates .
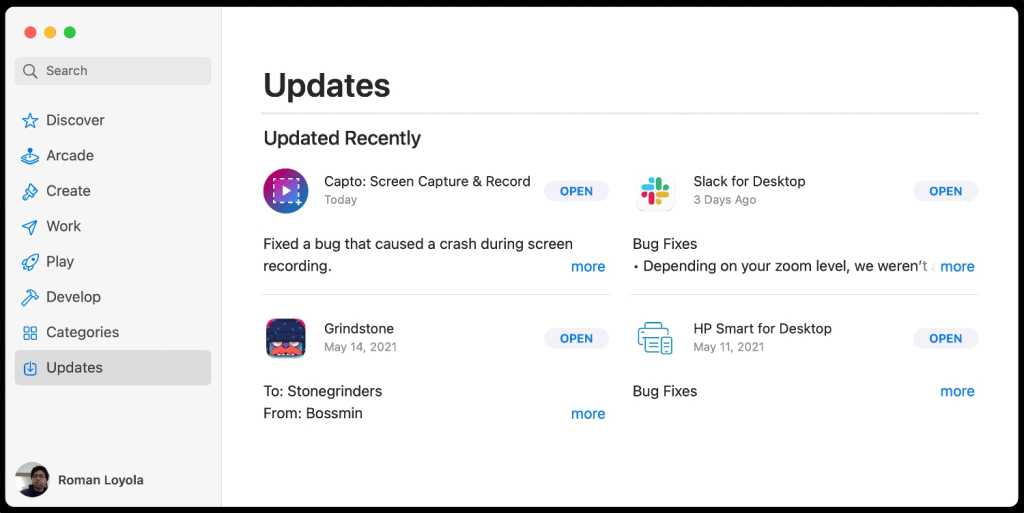
Check the Mac App Store for app updates.
you’re able to also check for update for the apps you use . If you buy apps in the Mac App Store , you’re able to launch the App Store app and clickUpdatesat the bottom of the left tower . For apps that you did n’t buy in the App Store , you ’ll have to check with the developer ’s site to see if any updates are available .
Set up Touch ID
If you corrupt a $ 1,499 or $ 1,699 24 - column inch iMac or pay extra for the $ 1,299 model , the keyboard is equipped with a Touch ID sensor , Apple ’s security feature article that uses a fingermark scanner . When you first pose up your iMac , you ’ll go through the Touch ID mark up , but you could bring a couple of other fingers to your visibility . you’re able to do that in the Touch ID organization preferences .
Touch ID comes with the $ 1,499 and $ 1,699 iMacs . The Touch ID button is located on the upper right recess of the keyboard .
That’s all done, so clean up your mess
We ’ve all done it : after localize up your new iMac , you begin using it to do things , like check e-mail , visit a few websites , ferment on a presentation in Keynote , edit out a telecasting in iMovie — the inclination drop dead on . But look around . You probably have the iMac box laying there , you moved things around to make way for the iMac , maybe you even have your old Mac sit properly next to you on the floor . Numerous studiessaythat you are more generative when your workspace is tidy , so take a respite from new iMac ( I know , it ’s firmly ) , and clean house up after yourself . Then you ’ll be able to apply your iMac without any distraction .
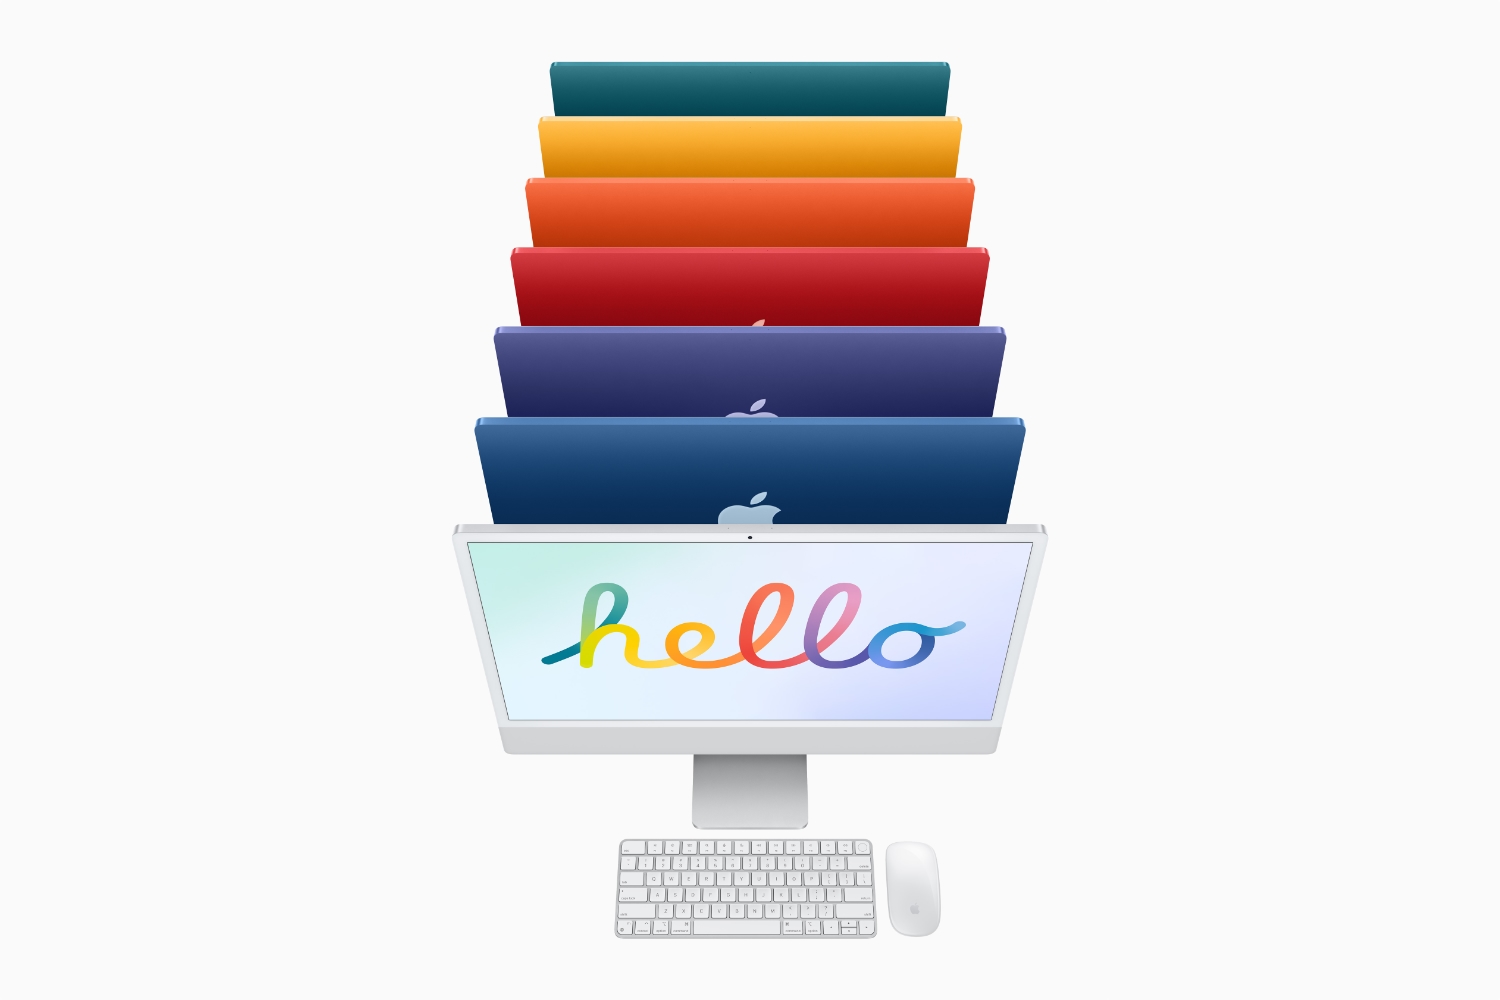
24-inch iMac (2021)
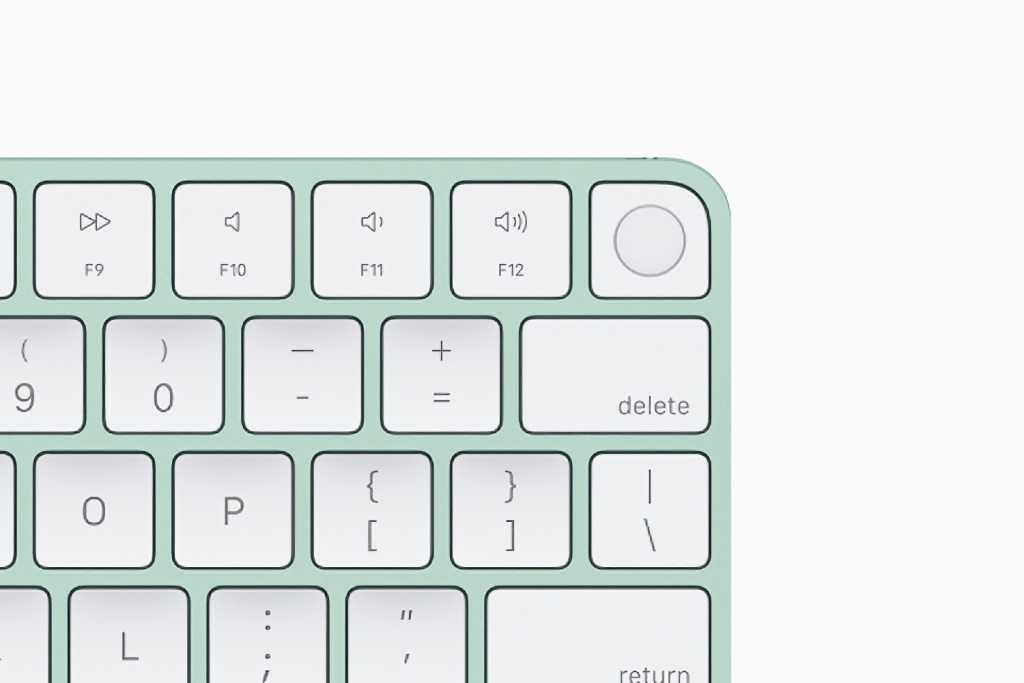
Touch ID comes with the $1,499 and $1,699 iMacs. The Touch ID button is located on the upper right corner of the keyboard.