iMovie ’ 11 offers manyoptions for style title of respect text — more than you likely pull in . But what if you need even more command over how text edition appears ? Or maybe you want a usance graphic or logotype to appear in the corner of your video . With an double editor in chief and a little amount of shenanigan , you’re able to easily do so .
Step 1: Create the image
The secret to make this technique work is to create your title or computer graphic as an image that you’re able to spell into an iMovie project . In Adobe Photoshop , Photoshop Elements , Acorn , or another epitome editor , do the following :
1 . make a new file ( File > New ) set to the dimensions of your television . If you captured 720p footage , for illustration , the firmness of purpose would be a breadth of 1280 and height of 720 ; if you shot 1080p , the resolution would be 1920 by 1080 . ( Adobe ’s software propose several video presets , which also add guides to alarm you to areas where the image may be pasture in some instrumentalist . ) If you ’re given the option to particularise a background people of colour , chooseTransparent .
2 . produce your titles and content where you need them to appear on the screen . If you did n’t particularise a transparent background earlier , delete or enshroud the background .
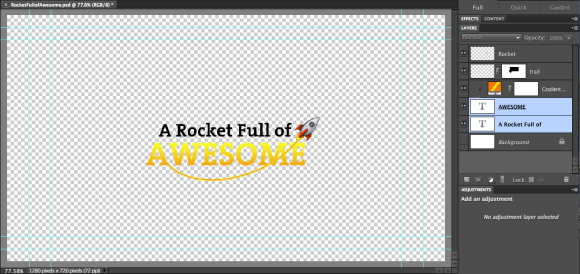
3 . Choose ( single file > Save As ) to save the filing cabinet . From the Format belt down - up bill of fare , choosePNG . If call for whether to apply interlacing , chooseNone .
Step 2: Add the image to iMovie
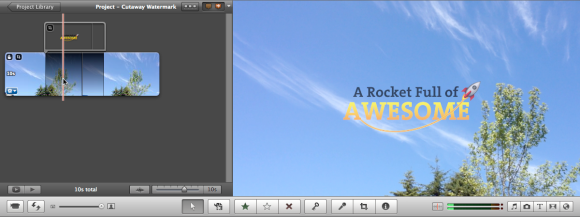
iMovie ’s Cutaway feature of speech is designed to insert footage without disrupt live picture , such as when you desire to jump to another time while someone speak over it . We can take advantage of the feature by inserting our vapourous PNG image or else of a clipping .
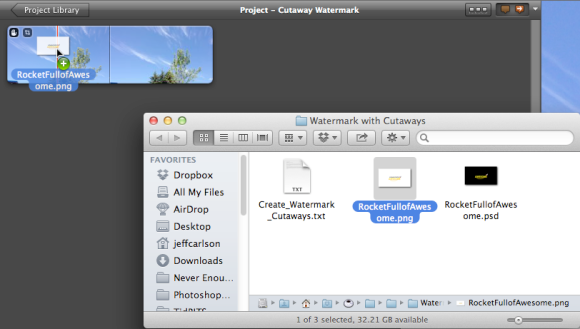
1 . Locate the picture in theFinder , and pose theFinderwindow so you’re able to also see your iMovie labor .
2 . draw the image filing cabinet onto the top of your project ’s filmstrip where you want it to appear .
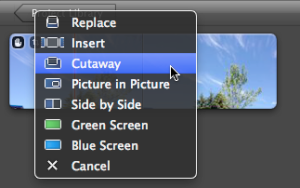
3 . From the bolt down - up computer menu that appears , chooseCutaway . The paradigm is lend as a cutaway drawing clip that sits above the filmstrip .
4 . Since you ’ve added a photograph to your labor , iMovie implement the Ken Burns Effect to it . Select the cutaway model magazine and click theCropbutton in iMovie ’s toolbar , or double - click theCropicon in the clip . In the Viewer , click theFitbutton to make the image use up the entire bod .
5 . If you need to , adjust the continuance and placement of the cutaway clip by dragging its edges in the Project web browser app .
6 . Since the image just appears spontaneously during playback , you may want to add a transition . Double - cluck the cutaway clip to bring up theClip Inspectorand aline theCutaway Fade Manualslider . you’re able to also exchange the simulacrum ’s opacity , a helpful instrument for making watermark that are unnoticeable .
When you work the video , the image appear as a snazzy raw championship or watermark . you may practice the image Indian file in any project you wish well using these gradation .